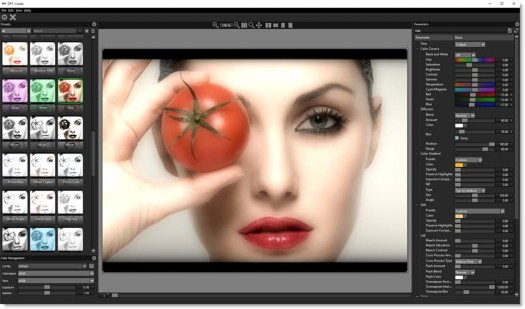
The Boris FX Editor is an all new user interface designed for easy, intuitive editing of effects and presets.
 \
\
The BCC FX Editor is comprised of 4 main components:
- Viewer: Where images are viewed, edited and manipulated.
- Presets: The Presets window allows you to select from existing filter presets.
- Parameters: The Parameters window displays the current filter’s parameters. Adjusting the parameters will update and change the image in the Viewer.
- Color Management: The FX Editor uses the OpenColorIO standard originally developed by Sony Pictures Imageworks for its color management.
The interface can be opened by selecting the FX Editor button in the host’s effects panel.
The Viewer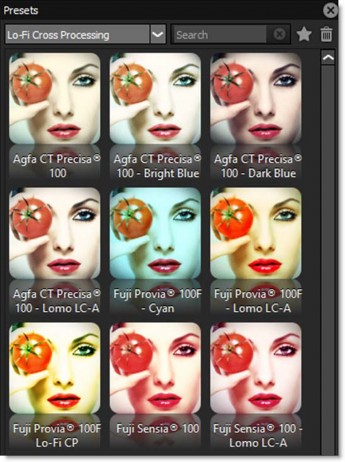
Presets
Parameters
The Viewer
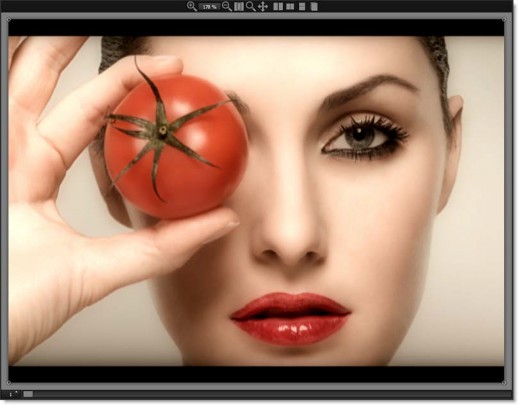
The Viewer is where images are viewed, edited and manipulated.


Zoom In: Zooms the image in.

Zoom Level: Displays the zoom level as a percentage.

Zoom Out: Zooms the image out.

Zoom to Fit: Fits the entire image inside the Viewer.

Zoom: Select the Zoom Region icon and drag select a square region in the Viewer to zoom in on that area.

Pan: Pans the image left, right, up and down.
Viewer Keyboard Shortcuts
| Shortcut | Action |
| Middle-mouse drag | Pans the image |
| Space Bar+drag | Pans the image |
| I Key | Zooms the image in |
| O Key | Zooms the image out |
| Zoom icon+Drag a square | Zooms into the defined area |
| Scroll wheel over image | Zooms the image in and out |
| Middle-mouse double click | Fits the image to the window |
| F | Fits the image to the window |
| H | Opens the Histogram window |
Compare
Compare modes compare images using Side-by-Side, Vertical Split, Horizontal Split or A/B comparison modes. By default, the current filter and original image are selected for comparison. Choose one of the comparison modes using the icons above the Viewer.


Side-by-Side Comparison: Compares images side by side in the Viewer.
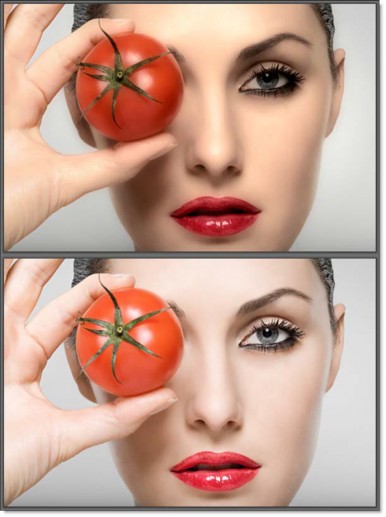

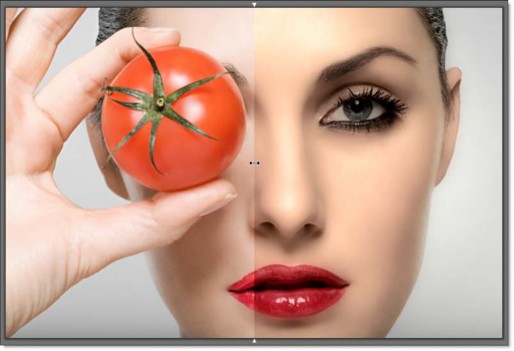
Vertical Split Comparison: Compares images using a vertical split. Move your cursor into the image area over the split line and when the cursor changes to a double-arrow, click and drag to move the split. Depending on the filter used, the split line may not be obvious, so triangular sashes on the outside of the image help you find it. If you drag the sash all the way around, it will swap directions.

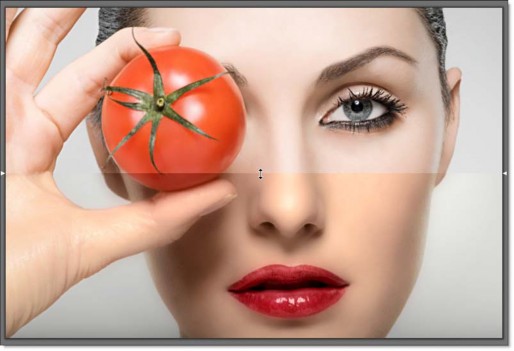
Horizontal Split Comparison: Compares images using a horizontal split. Move your cursor into the image area over the split line and when the cursor changes to a double-arrow, click and drag to move the split. Depending on the filter used, the split line may not be obvious, so triangular sashes on the outside of the image help you find it. If you drag the sash all the way around, it will swap directions.

A/B Comparison: When the A/B Comparison button is selected, a Show Other View icon appears. Clicking it cycles through the images.
 Show Other View
Histogram
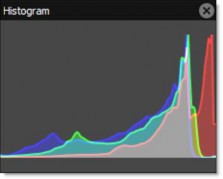
A histogram is a specialized graph that plots the number of pixels at each color intensity level. It is very useful in seeing how an image’s pixels are distributed.
Time Bar
A Time Bar is located below the Viewer which controls which image in the sequence is loaded into the Viewer.

Note:The Time Bar is only available in host applications that support this feature.
To change the Time Bar frame:
- Drag the slider.or
- Enter a new number.or
- Click the up and down arrows next to the frame number.
Presets and Parameters
Presets
The Presets window allows you to select from a set of pre-defined presets. Presets for most filters have been created so that you can easily click through the various choices.
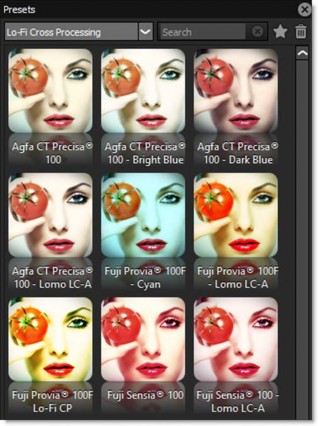
Most filters contain multiple preset groups which are selectable at the top of the window.
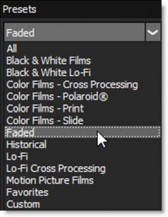
Clicking once on a preset modifies the image in the Viewer. As you click on different presets, the image in the Viewer will update. This allows you to quickly try out several different presets.
Preset Searching
Presets can be searched for by entering text in the search field located at the top of the Presets window. The pattern remains in effect when you switch filters, but it will clear automatically when you switch layers in the Effect window or apply a preset. Clear the search text to return the Presets window to it’s normal state.
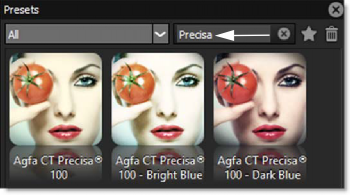
To search for a preset:
- Select a filter, for instance Grads and Tints > Gels.
- In the Presets window search field, type ***red.***All presets with red in the name are shown.
- In the search field, type ***sun|blue.***Any preset with sun or blue in the name is shown.
Favorites
Presets can be tagged as a Favorite allowing them to be sorted separately in the Presets window. You can tag a preset as a Favorite by selecting the preset and pressing the Toggle Favorite icon located at the top right of the Presets window.

Presets tagged as a favorite display a yellow star at the top right of the preset.
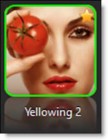
To sort the Presets window by Favorites, select Favorites in the Presets pop- up menu.
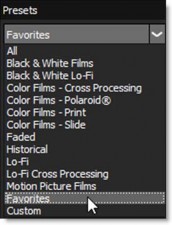
Presets Right-Click Menu
Right-click over a preset to open Preset options.
Rename: Right-click on a preset, select Rename and type in the new name.
Delete: Right-click on a preset and select Delete.
Make Default: Right-click on a preset and select Make Default. The default preset is the one that is applied to the image when a filter is selected and the one shown in the Filter window. Changing the default will take effect the next time you start the BCC FX Editor.
Restore:
Default Presets: Restores the Default preset for each filter. The restore happens the next time you select the filter.
Deleted Presets: Restores deleted presets.
Renamed Presets: Restores renamed presets. The restore happens the next time you select the filter.
To Factory Default: Restores all presets to the default factory settings.
Parameters
The Parameters window displays the current filter’s parameters. Adjusting the parameters will update and change the image in the Viewer.
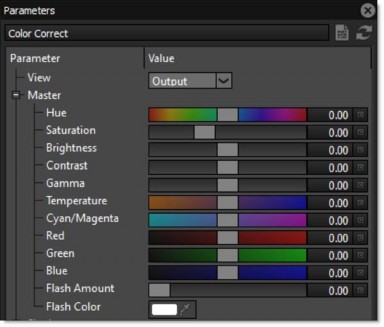
Slider controls can be adjusted in the following ways:
- Clicking and dragging the slider.
- You can adjust with finer precision by pressing Ctrl(Win)/Cmd(Mac) while dragging the slider.
- Clicking on the number to the right of the slider, typing in the desired value and hitting Enter.
- Hover the cursor over a slider and use the mouse scroll wheel to make the adjustment. Scrolling up raises the value while scrolling down lowers it.Pop-up menus can be adjusted in the following ways:
- Click on the pop-up menu and make a selection.
- Hover the cursor over a pop-up menu and use the mouse scroll wheel to change the selection.
Create Custom Preset: Creates a custom preset in the Presets window based on the current parameter settings. You must name the preset prior to creating it by using the name field to the left of the Add Preset icon.
Reset to Defaults: Resets all of the parameters for the currently selected preset to the built-in defaults.
Sashes
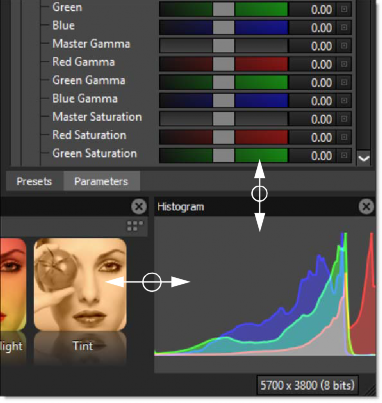
By clicking and dragging the sashes, dividing lines between areas of the screen, you can customize the DFT interface.
Tool Tips
Hovering the cursor over an icon will pop up a tool tip that displays its function.

Value Field Length
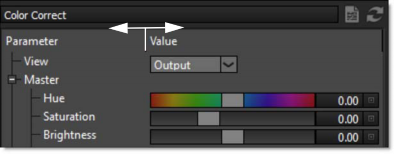
You can resize the Value field by clicking and dragging the dividing line between Parameter and Value at the top of the Parameters window. This is useful if the Parameter names are getting cut off.
Parameter Groups
Parameter groups in the Parameters window can be expanded and collapsed using the plus and minus icons located to the left of the group.


Slider Precision
You can adjust any slider with finer precision by pressing **Ctrl(Win)/Cmd(Mac)**while dragging the slider.

Variations
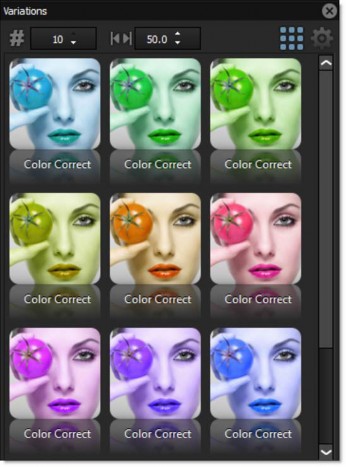
The Variations window allows you to create your own filter variations and becomes visible when a parameter name is selected in the Parameters window.
 Variations
To display the Variations window and create variations, pick a filter and click on a parameter name in the Parameters window.

Ranges, Toggles, and Color parameters are available for creating variations. When you select a parameter, the Variations window appears and you’ll see the variations being generated on that parameter. Click on a second parameter and it will generate variations between the two.

The first parameter you click on will be the dominant parameter – it’ll go across the top of the Variations tab. So, you can get different results depending on the order you select the parameters. Click on a selected parameter to toggle it back off again.
Note:You can only have one or two parameters selected at a time. If you click on a third parameter, the last parameter you clicked on will deselect itself. If you deselect both of the parameters or switch effects, the Variations window will disappear because the variations are no longer being generated.
Variations are generated based on the current effect parameters. So, you can pick some parameters for your variation, then go back to the Presets window and pick a different Preset, and the variations will regenerate.
Variation Controls

Maximum Number of Variations: Sets the number of variations.

Parameter Value Spread: Determines the difference from one variation to another.

Auto Generate: Variations are constantly being generated every time you select a parameter or click on a variation thumbnail.

Generate: When Auto Generate is off, you must click the Generate icon to update the variations after new parameters are selected.
The File Menu
Setups
A Setup takes a snapshot of the filter’s parameters. Setups can be saved and loaded and are independent of the image they were originally applied to. If you are loading a Setup containing multiple filters that was saved from the standalone or photo plug-in versions, only the filter that you are currently working with is modified by the settings contained in the Setup.
Open Setup: Opens a previously saved Setup.
Save Setup: Takes a snapshot of the filter’s parameters and saves it as a Setup file. This Setup file can later be loaded to the same or a different image.
Preferences
Preferences allow you to customize default settings.
Thumbnail Size: You can select whether the FX Editor interface uses either a small or large thumbnail size. Medium thumbnails are the default.
- Small: Small thumbnails are used in the FX Editor interface.
- Medium: Medium thumbnails are used in the FX Editor interface.
- Large: Large thumbnails are used in the FX Editor interface.
Preview Size
The BCC FX Editor works at a maximum resolution as defined by the Preview Size–the default being 2048 by 2048 pixels. Never fear, when your image is saved, the FX Editor always processes at the resolution of the original image.
- 1024: The FX Editor works at a maximum resolution of 1024 x 1024 pixels.
- 2048: The FX Editor works at a maximum resolution of 2048 x 2048 pixels.
- 4096: The FX Editor works at a maximum resolution of 4096 x 4096 pixels.
Downsampling
At large preview sizes, interaction may slow down when adjusting filter parameters. To maintain fast processing during adjustments, you can enable Downsampling.
Adaptive: Automatically downsamples the image if required.
2:1: Automatically downsamples the image by a factor of 2.
4:1: Automatically downsamples the image by a factor of 4.
8:1: Automatically downsamples the image by a factor of 8.
Preview Scaling
Point: Uses a lower quality scaling method when displaying the image in the Viewer. Point is more accurate when applying filters such as grain and sharpen, but when zooming in, the image will display “chunky” artifacts.
Bicubic: Uses a smooth scaling method when displaying the image in the Viewer. Bicubic can mask the effect of grain and sharpen filters because of its inherent smoothing, but doesn’t suffer from the Point methods chunkiness when zooming in.
GPU Rendering: Enables or disables GPU rendering.
The Edit Menu
Undo/Redo: Undo or redo operations.
Undo/Redo History: Undo/Redo has a history, so you can jump to any item in the history by picking it from the menu.
The View Menu
Window
The BCC FX Editor user interface is broken up into individual windows which can be opened or closed by selecting or deselecting them from the View menu. The following windows can be opened or closed:
Color Management: Opens or close the Color Management window.
Color Wheels: Open or closes the Color Correct Wheels window.
Console: Displays diagnostic information.
Copy to Clipboard: Copies the contents of the Console to the Clipboard.
Options: OpenGLDisplays the OpenGL version information.
Rendering Statistics: Displays rendering times.
Histogram: Opens or closes the Histogram window.
Parameters: Opens or closes the Parameters window.
Presets: Opens or closes the Presets window.
Variations: Opens or closes the Variations window.
Reset: Resets the window layout the next time the FX Editor is started. This is useful if you have tweaked your windows beyond recognition.
Zoom In: Zooms the image in.
Zoom Out: Zooms the image out.
Fit Image to Window: Fits the image to the window.
Layouts
There are 4 preset layouts that automatically arrange the interface windows into different configurations.
- Default Layout: The interface is configured with the default BCC FX Editor layout where all windows are shown.
- Edit Layout: The Edit Layout shows the Viewer, Presets and Parameters windows.
- View Layout: The View Layout shows only the Viewer.
- Dual Monitor Layout: The Dual Monitor Layout shows the Viewer on the left monitor and all other windows on the right monitor.
Layout Shortcuts
| Shortcut | Action |
| F2 | Selects the Default Layout |
| F3 | Selects the Edit Layout |
| F4 | Selects the View Layout |
| F5 | Selects the Dual Monitor Layout |
Color Management
The BCC FX Editor uses the OpenColorIO standard originally developed by Sony Pictures Imageworks for its color management. OCIO is compatible with the Academy Color Encoding Specification (ACES) and is LUT-format agnostic, supporting many popular formats. In DFT, you can load custom color configuration files, apply color space conversions, as well as use other controls for fine tuning.
For a more detailed explanation of OpenColorIO, including generating LUT’s and suggested workflows, please visit http://opencolorio.org/.
Note:The color management functionality provided is for display purposes only. The color profiles, LUTs, and colorspace conversions applied in the Viewer do not affect the rendered image.
Select View > Window > Color Management to open the Color Management window in the DFT user interface.
Config
The BCC FX Editor includes a default OCIO configuration. To load a custom OCIO configuration, click the load icon to the right of the Config field.

For instance, you can download and use an Aces OCIO config file here:https://github.com/imageworks/OpenColorIO-Configs
Colorspace: Sets the input colorspace of the scene. The following colorspaces are provided: Linear, sRGB, rec709, Cineon, Gamma 1.8, Gamma 2.2, Panalog, REDlog, ViperLog, AlexaV3LogC, PLogLin, SLog, Raw.
View: Select a colorspace transform to apply to the scene. You can select from sRGB, rec709 or None.
Exposure: Adjusts the brightness of the image in F-stops. Exposure is applied before the display transform.
Gamma: Adjusts the gamma of the image. Gamma is applied after the display transform.
The Help Menu
- User Guide: Opens the BCC FX Editor User Guide.
- What’s New: Provides information on updates, release notes and available downloads.
- About: Shows the BCC FX Editor version number. This is useful information to provide to support should you encounter any issues.
Working with the FX Editor
BCC FX Editor User Interface
- Apply a BCC+ filter that contains presets. For instance, Film Styles > BCC+ Looks.
- Click the BCC FX Editor Interface button.
The FX Editor user interface opens and consists of Presets, Parameters and Viewer windows. - Try out the various filter presets.
- Adjust the filter parameters to your liking.
- To preview a different frame in the Viewer, drag the Time Bar slider at the bottom of the Viewer.
Note:The Time Bar is only available in host applications that support this feature. - Click the apply button to return to the host application.
The values of the parameter adjustments in the DFT user interface are transferred to your host application.
Tagging and Sorting Favorite Presets
Presets can be tagged as a Favorite allowing them to be sorted separately in the Presets window.
- Apply a BCC+ filter with presets.
- Click the BCC FX Editor Interface button. The FX Editor user interface opens and consists of Presets, Parameters and Viewer windows.
- Tag a preset as a Favorite by selecting the preset and pressing the Toggle Favorite icon located at the top right of the Presets window.
Presets tagged as a favorite display a yellow star at the top right of the preset. - To sort the Presets window by Favorites, select Favorites in the Presets pop-up menu.
Comparing Images
The BCC FX Editor can compare images using Side-by-Side, Vertical Split, Horizontal Split or A/B comparison modes. By default, the current filter and original image are selected for comparison.
- Apply a BCC+ filter and make sure it is affecting the image in some way.
- Click the BCC FX Editor Interface button. The FX Editor user interface opens and consists of Presets, Parameters and Viewer windows.
- Click on the Side-by-Side Comparison icon. Horizontal images are stacked vertically and vertical images are placed side by side.
- Click the Vertical Split Comparison mode icon. You can now compare the images using a vertical split.
- Move your cursor into the image area over the split line and when the cursor changes to a double-arrow, click and drag to move the split. Depending on the filter used, the split line may not be obvious, so triangular sashes on the outside of the image help you find it. If you drag the sash all the way around, it will swap directions.
- Enable the A/B Comparison icon and then click the Show Other View icon that appears to cycle the current filter with the original image.
- When done, press the A/B Comparison icon to turn it off.
Creating Variations
Variations based on either one or two parameters can be created and are displayed as thumbnails in a window below the Presets window.
- Apply a BCC+ filter.
- Click the BCC FX Editor Interface button. The FX Editor user interface opens and consists of Presets, Parameters and Viewer windows.
- Click on a parameter name in the Parameters window.
Variable parameters are Ranges, Toggles, and Colors. When you select a parameter, the Variations appear and you’ll see the variations being generated on that parameter. - Click on a second parameter and it will generate variations between the two. The first parameter you click on will be the dominant parameter – it’ll go across the top of the Variations tab. So, you can get different results depending on the order you select the parameters.
- Click on a selected parameter to toggle it back off again.
Note:You can only have one or two parameters selected at a time. If you click on a third parameter, the last parameter you clicked on will deselect itself. If you deselect both of the parameters, the Variations window will disappear because the variations are no longer being generated.
Variations are generated based on the current effect parameters. So, you can pick some parameters for your variation, then go back to the Presets window and pick a different Preset, and the variations will regenerate.
Setups
A Setup takes a snapshot of the parameter settings applied to your image. Setups can be saved and loaded and are independent of the image they were originally applied to.
- Apply a BCC+ filter.
- Click the BCC FX Editor Interface button. The FX Editor user interface opens and consists of Presets, Parameters and Viewer windows.
- Choose a preset and make some parameter adjustments.
- Select File > Save Setup.
- When the file browser opens, enter a name and click Save.
You can now apply this setup to a different image using File > Open Setup.


