Replaced by BCC+ Multi-Star
We recommend use of BCC+ Multi-Star instead of BCC Glare. The newer BCC+ Multi-Star filter creates multi-point star patterns in the highlights of the image. The filter also contains GPU acceleration for faster smoother results, and FX Editor support.
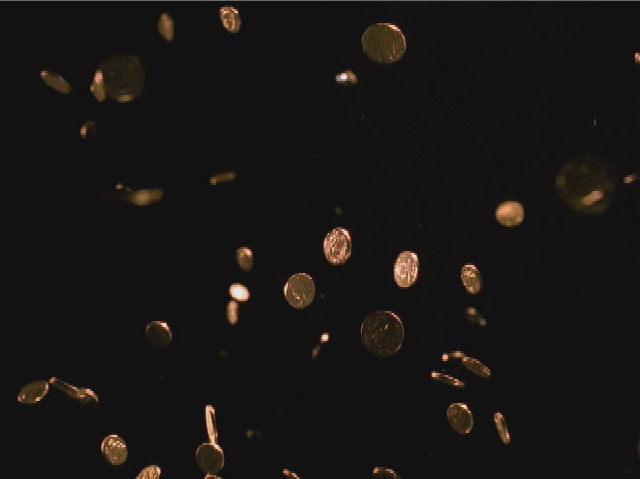 | 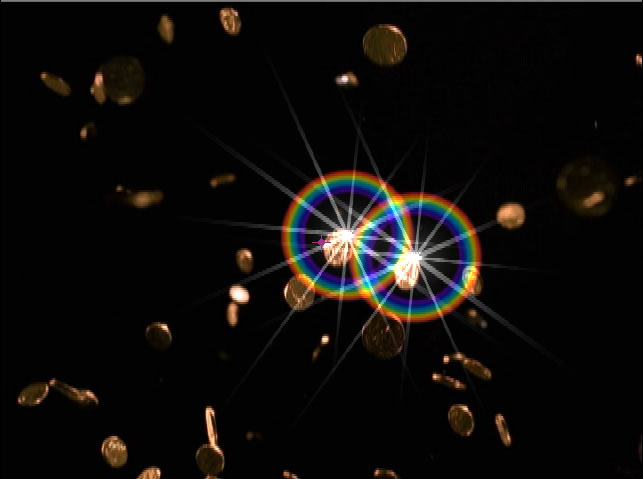 |
| Source image | Filtered image |
Overview
The Glare filter creates an effect producing a sharp reflection. A luminance map creates the glare based on bright areas in the image.
Function
Presets and Common Controls
BCC filters come with a library of factory installed presets plus the ability to create your own custom presets and preview them with the BCC FX Browser™.
BCC filters also include common controls that configure global effect preferences and other host-specific effect settings.
For more information about working with presets and other common controls, Click Here.
- Note: You must have a supported OpenGL card and driver to use the BCC Glare filter.
Glare Threshold uses a luminance map to create glare based on a bright area in the image. The effect is created on any area with a luminance value above the specified Threshold. If you decrease this value, more glare is created; if you increase it, less glare is created.
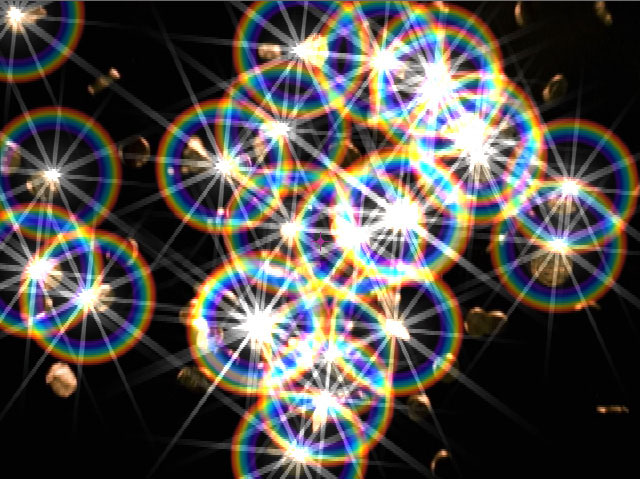 | 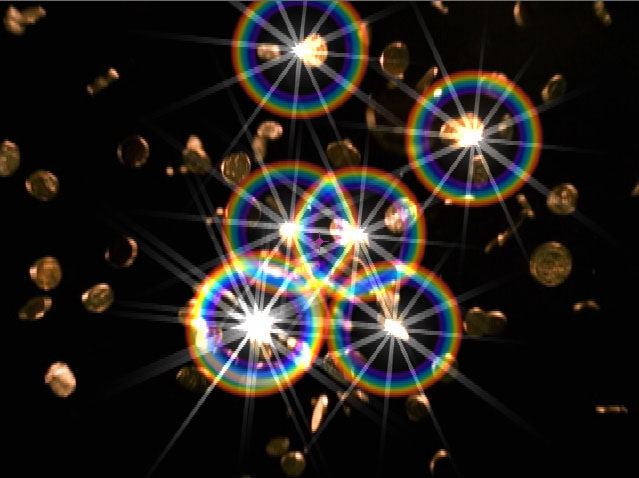 | 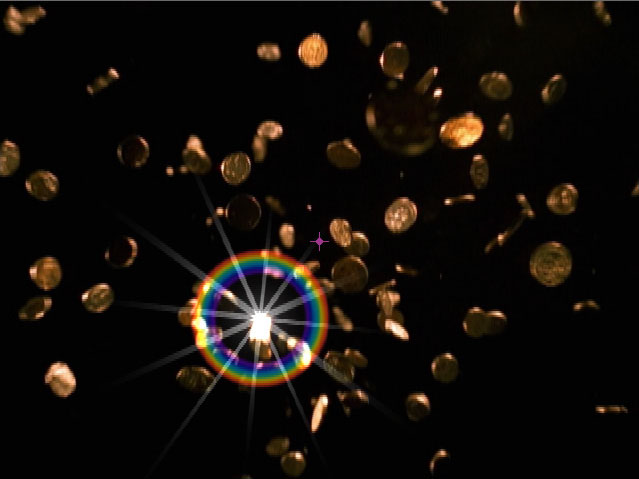 |
| Glare Threshold=16 | Glare Threshold=33 | Glare Threshold=61 |
Glare Brightness sets the brightness of the glare.
Glare Scale sets the scale of the glare.
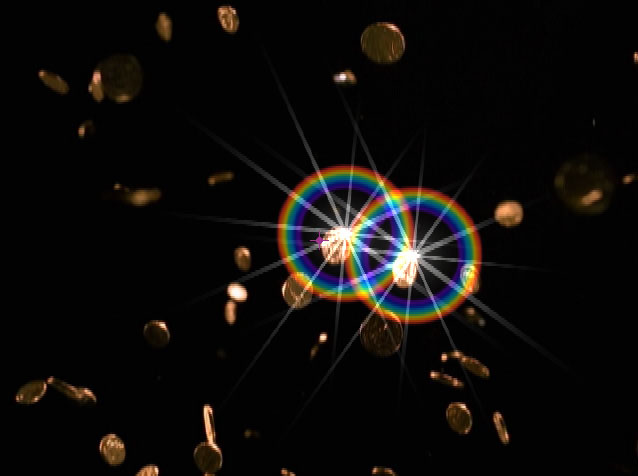 | 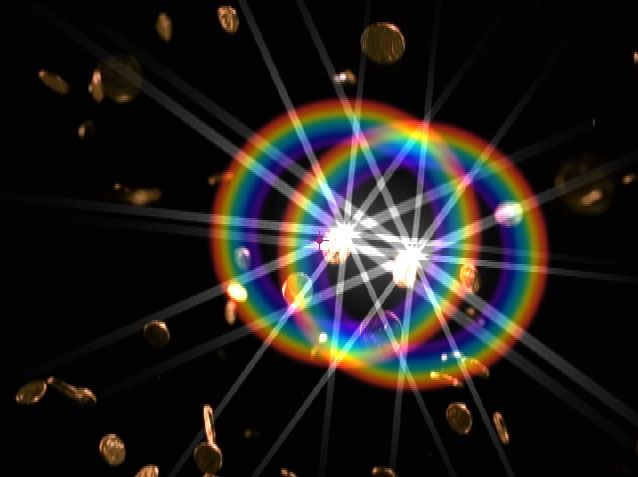 |
| Glare Scale=1 | Glare Scale=2 |
Glare Scale Aspect adjusts the shape of the glare. Positive values stretch the glare horizontally, and negative values stretch it vertically.
Glare Angle sets the angle of the glare.
Glare Ray Color sets the color of the glare.
The Glare Ray Shape menu sets the shape of the glare.The choices are Taper and Straight. When Taper is chosen, the rays spread outward in the shape of a fan.
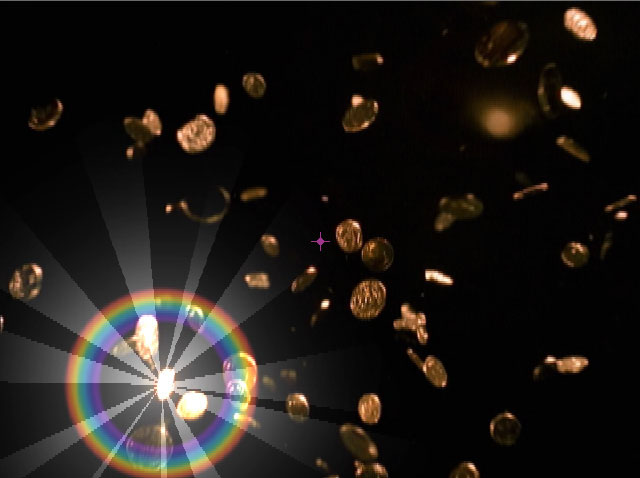 | 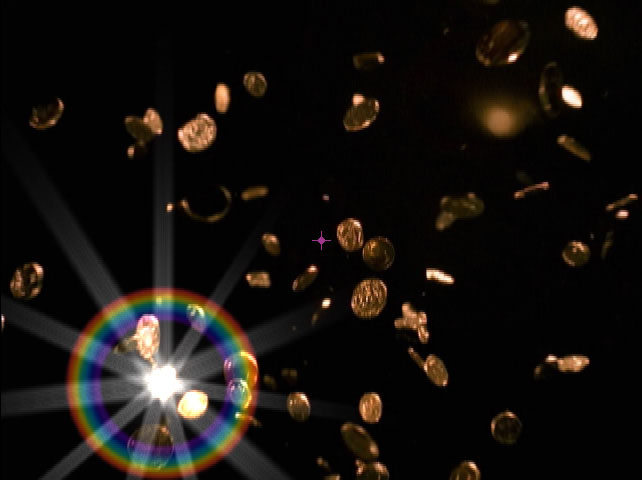 |
| Taper | Straight |
Glare Ray Width and Glare Ray Height set the size of the rays on the X-axis and Y-axis respectively.
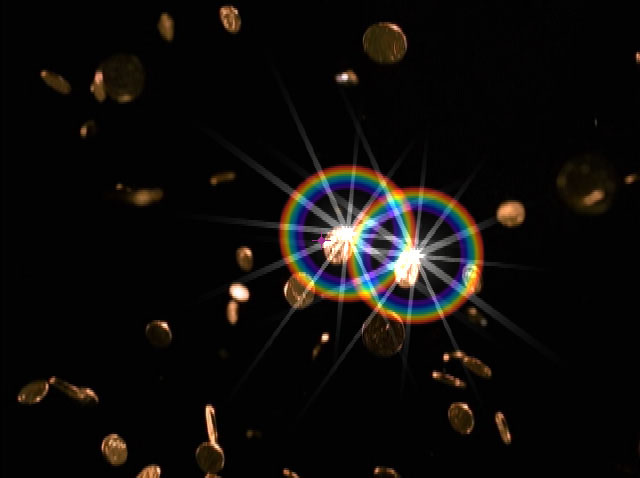 | 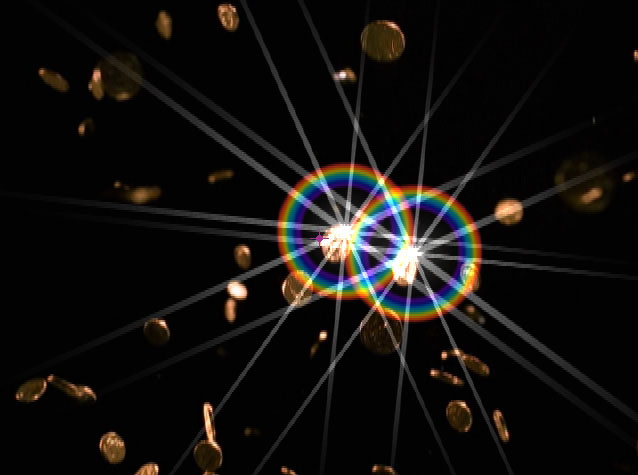 |
| Glare Ray Height=1 | Glare Ray Height=2 |
Glare Ray Counts determines the number of rays in the effect.
Glare Ray Scale Variance varies the size of the rays. Increasing Size Variance increases the variety of sizes in the effect. Leaving this parameter at the default setting of 0 ensures that each ray uses the assigned Scale value.
Glare Ray Scale Seed determines the value input to the random number used by the filter to change the size of the rays. Adjust this value when you like the overall appearance of the effect but want to change the random configuration of the sizes. If Glare Scale Variance is 0, this parameter has no affect.
Glare Ray Color Variance varies the color of the rays. Increasing Glare Color Variance increases the variety of colors in the effect. Leaving this parameter at the default setting of 0 ensures that each ray uses the assigned Color value.
Glare Ray Color Seed determines the value input to the random number used by the filter to change the color of the rays. Adjust this value when you like the overall appearance of the effect but want to change the random configuration of the colors. If Glare Color Variance is 0, this parameter has no affect.
Selecting the Glare Ring On checkbox creates a hollow doughnut-shaped ring of light around the glare. If this checkbox is not selected, the other Ring parameters have no affect.
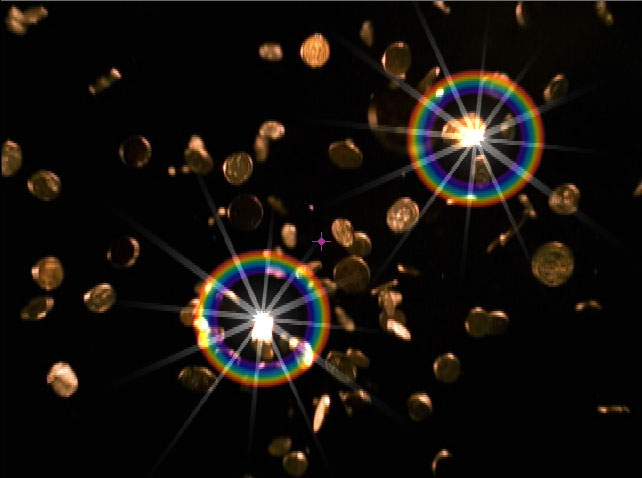 | 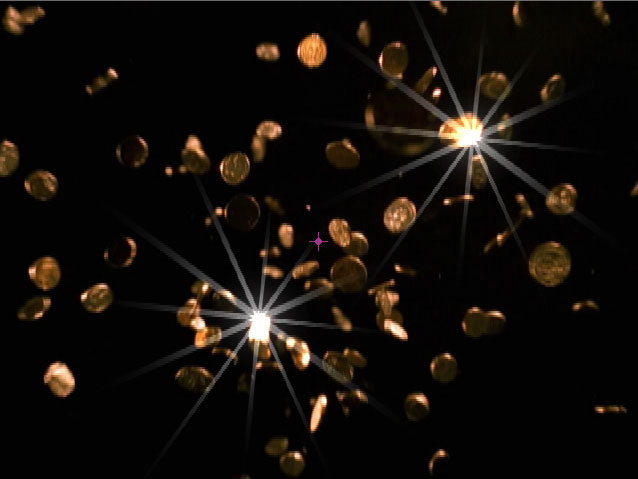 |
| Glare Ring On | Glare Ring Off |
Glare Ring Scale sets the scale of the ring.
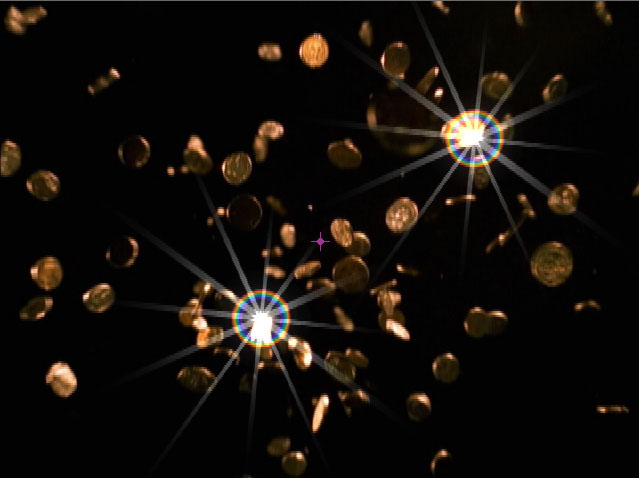 | 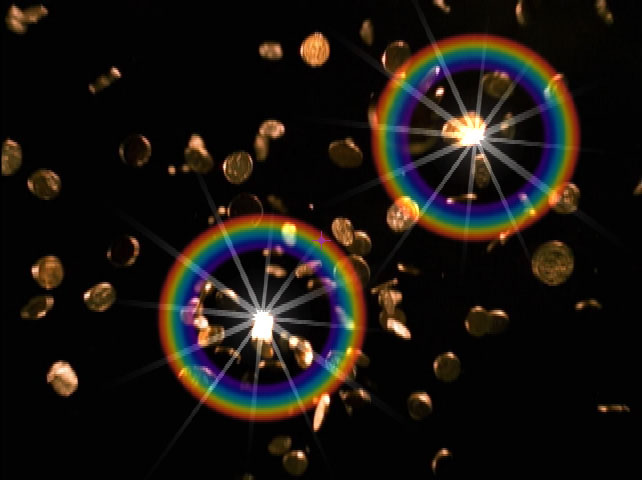 | 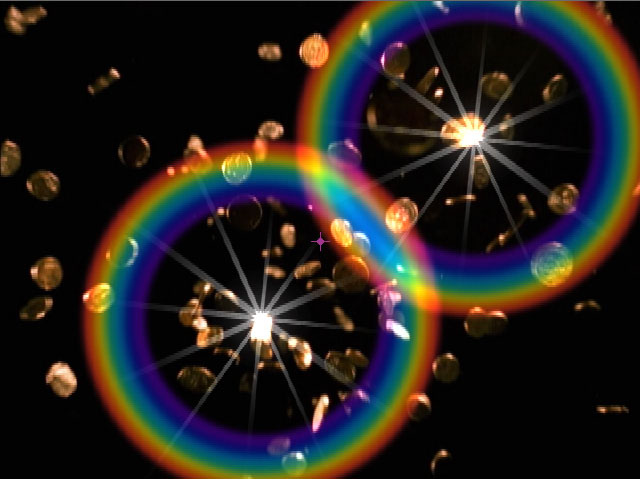 |
| Glare Ring Scale=.5 | Glare Ring Scale=1.5 | Glare Ring Scale=2.5 |
Glare Ring Saturation adjusts the intensity of each color’s hue in the glare. Negative values desaturate the ring, while positive values increase the saturation of the ring.
When the Glare Ring On checkbox is selected, the Glare Ring Red Amount, Glare Ring Green Amount, and Glare Ring Blue Amount adjust the weight of the corresponding color channel in creating the glare ring.
Glare Ring Intensity controls the intensity or brightness of the ring.
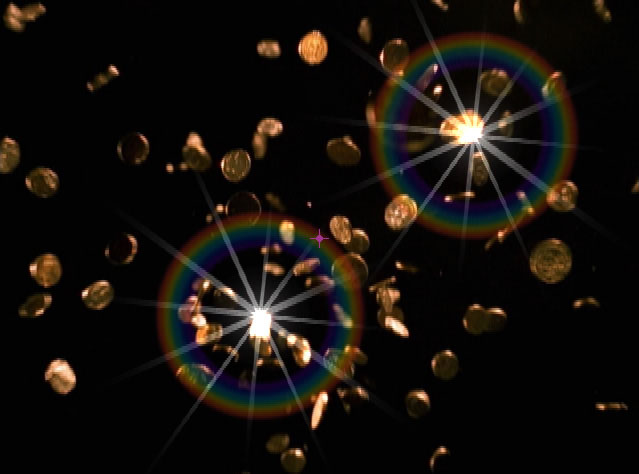 | 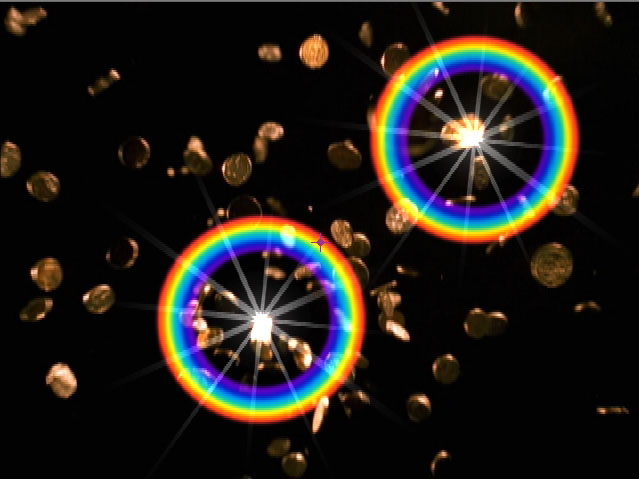 |
| Glare Ring Intensity=16 | Glare Ring Intensity=80 |
If you apply the filter to a source that uses alpha, you will not see the background image composed with the source image through the alpha channel. To see the composition, choose the background layer from the Glare Background Map Layer menu.
Glare Preserve Alpha controls the amount of glitter in the areas covered by the alpha channel. With Glare Preserve Alpha set to 0, Glare does not appear in areas governed by the alpha channel (in other words the effect has zero opacity in alpha areas); with Glare Preserve Alpha set to 100, the Glare is opaque over the alpha channel.
- Warning: If your source image includes an alpha channel (for example a logo over a background image), in order to see the the background image composited with the source image, you need to set a background layer in the Glare Background Map Layer menu.
Mix with Original blends the source and filtered images. Use this parameter to animate the effect from the unfiltered to the filtered image without adjusting other settings, or to reduce the effect of the filter by mixing it with the source image.
Motion Tracker
The BCC Motion Tracker allows you to track the motion of an object, then use the motion path to drive other geometric properties of the effect without the need for keyframing.
For more information on the Motion Tracker, Click Here.
PixelChooser
The BCC PixelChooser provides simple, built-in masking of the effect result. The PixelChooser is generally used to select a portion of the image and restrict an effect to just the selected area while maintaining the original image content in unselected regions. The selection can be based on geometric shapes or on the image’s luma/color properties.
For more information on the PixelChooser, Click Here.
Beat Reactor
The BCC Beat Reactor is an animation control suite which drives effect properties based on the contents of an audio track. This lets you seamlessly tie visual FX to an audio soundtrack without the need for ANY manual keyframing.
For more information on the Beat Reactor, Click Here.


