Overview
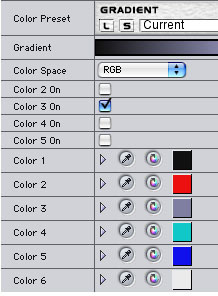
Just as you can load and save filter presets, the Color Preset banner allows you to load and save gradient presets. After you apply a BCC filter and adjust the gradient parameters, you can save the parameter settings and reload them later. Several premade presets are also included. Gradient presets are compatible with any filter that uses gradients.
Function
Presets and Common Controls
BCC filters come with a library of factory installed presets plus the ability to create your own custom presets and preview them with the BCC FX Browser™.
BCC filters also include common controls that configure global effect preferences and other host-specific effect settings.
For more information about working with presets and other common controls, Click Here.
The Gradient color ramp provides a preview of the gradient you are creating. The Gradient Preview will not update while you drag sliders.
The Color Space menu determines whether the gradient is created in RGB, HSL, or HSV color space. Choose HSL or HSV is you want to animate the colors in the gradient while maintaining the level of saturation.
The Color 1, Color 2, Color 3, Color 4, Color 5, and Color 6 controls choose six different colors to add to the gradient. The Color 1 and Color 6 colors are always used. Each of the remaining colors has a Color On checkbox. Select this option to add the corresponding color to the gradient. Deselect this option to remove the corresponding color from the gradient.
Loading and Saving Presets
The Load and Save controls are available in each filter that uses a gradient. This feature allows you to save favorite gradient settings and apply them to multiple projects.
Loading Effects:
To load a previously saved gradient setting, click the “L” or Load button. A dialog box allows you to choose a preset. The saved settings are recalled and applied to your effect.
Saving Effects:
After you adjust the gradient parameters, you can save the settings by clicking the “S” or Save button. A dialog box lets you name the file. Preset names are limited to alphanumeric characters. Special characters may result in the preset being dimmed in the Load preset list. Saving a BCC setting creates a static gradient that uses the values at the first frame.
Black Point adjusts the value in the Input Channel which is treated as the pure Color 1 level in the output. All pixels whose Input Channel value is lower than the Black Point value are mapped to the Color 1 color. Increasing positive Black Point values cause more pixels to be purely Color 1 in the output. Decreasing negative values cause fewer pixels to be purely Color 1. The following illustrations show the affect of adjusting the Black Point with a simple two-color gradient from black (Color 1) to white (Color 6).
 | 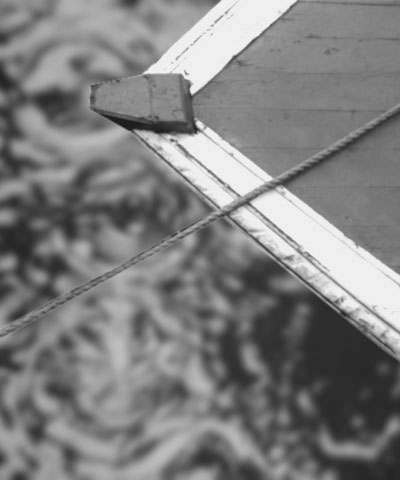 |  |
| Black Point= -75 | Black Point=0 | Black Point=75 |
White Point adjusts the value in the Input Channel which is mapped to the pure Color 6 in the output. Decreasing White Point causes more pixels to be purely Color 6 in the output. The illustrations below show the affect of adjusting the White Point in with a simple two- color gradient from black (Color 1) to white (Color 6).
 | 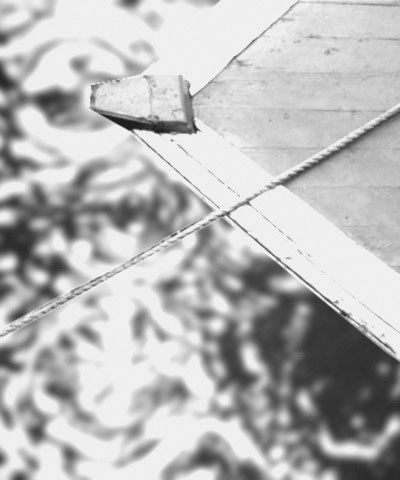 | 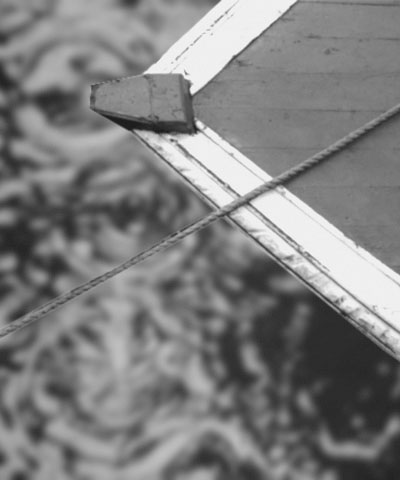 |
| White Point=100 | White Point=50 | White Point=25 |
Negative Squeeze values compress and shift the gradient towards the left (Color 1) side. Increasing positive values compress and shift the gradient towards the right (Color 6) side.
 |  |  |
| Squeeze= -75 | Squeeze=0 | Squeeze=75 |
Advanced Gradient Controls Parameter Group
The Loop Mode popup affects the output when either Loop Count or Gradient Offset are changed from their default values.
When Off is chosen, looping past the end of the gradient uses the end color. This is the default value.
When you choose Forward Loop the gradient loops back to Color 1 after it passes Color 6. You can increase Loop Count to set the number of loops or change Gradient Offset to move the mapping through this loop.
When you choose Back & Forth Loop, the color mapping goes from 1 to 6 to 6 to 1, etc.
Note: the advanced group is not present in all BCC filters.
Loop Count sets the number of times that the gradient loops. Values less than one use less of the gradient, and negative values loop backwards, which will only have a different appearance from a positive value if Gradient Offset is not set to 0. Set Crossfade End Colors to a value other than zero when you use Loop Count. This will prevent the rendered image from jumping.
Gradient Offset offsets the starting point of the gradient. This can be animated to create palette-shifting effects. A value of 100 offsets the gradient by one full cycle. Since the gradient loops back and forth, setting Gradient Offset to 100 or 300 simply reverses the direction of the gradient. Set Crossfade End Colors to a value other than zero when you use Gradient Offset. This will prevent the rendered image from jumping.
Color Ease adjusts the softness of the transitions between pure colors in the gradient. Increasing positive values cause the transitions to be more abrupt. Decreasing negative values soften the transitions.
 |  |
| Color Ease= -100 | Color Ease=100 |
Gradient HSL Parameter Group
Hue cycles the colors in the gradient around the color wheel in the HSL color space.
Saturation adjusts the intensity of each color’s hue in the gradient. Negative values desaturate the gradient, while positive values increase the saturation of the gradient.
Lightness controls the brightness of the colors in the gradient. Higher values lighten the colors, while lower values darken the colors.


