Overview
Jitter allows you to vary one or more attributes of a source layer over time, such as size, position, opacity, brightness, or contrast. Additional controls choose the type of variance used for the jittering and allow you to view color-coded graphs of the jittered parameter values.
Boris Continuum Complete includes both a BCC Jitter and BCC Jitter Basic. The two filters are very similar except that BCC Jitter Basic does not include all the parameters; BCC Jitter provides more options for controlling the effect; while BCC Jitter Basic is streamlined for when you want to create a simple Jitter effect.
Function
The Jitter filter has four basic groups of controls that are used to jitter attributes of the source layer. The following steps outline the recommended usage of this filter.
Apply the BCC Jitter or BCC Jitter Basic filter the clip you want to Jitter. Set the Source menu set to the Filtered Layer. The Default setting of None uses the layer the filter is applied to.
Use the Jitter 1, 2, and 3 parameters to create up to three different jitter curves (BCC Jitter Basic allows you to create one jitter curve). The curves represent the variation of a parameter value over time. View the Jitter Curves by setting the Curve View menu while you adjust the Jitter parameters to see the affects your adjustments have on the parameters.
Apply each Jitter curve to up to three parameters using the Destination 1, 2, and 3 controls. For example, you could use the same variance pattern to affect the source image’s scale, opacity, and contrast.
Adjust the impact of each Jitter curve on the destination parameter using the Amount 1, 2, and 3 controls. Amount affects the intensity, rather than the shape, of the applied Jitter curve.
- Note: The Jitter filter includes extensive parameters for you to customize. You may want to start by using a preset to help you become familiar with the parameters.
Presets and Common Controls
BCC filters come with a library of factory installed presets plus the ability to create your own custom presets and preview them with the BCC FX Browser™.
BCC filters also include common controls that configure global effect preferences and other host-specific effect settings.
For more information about working with presets and other common controls, Click Here.
The Source menu sets the layer in the timeline used to create the effect.
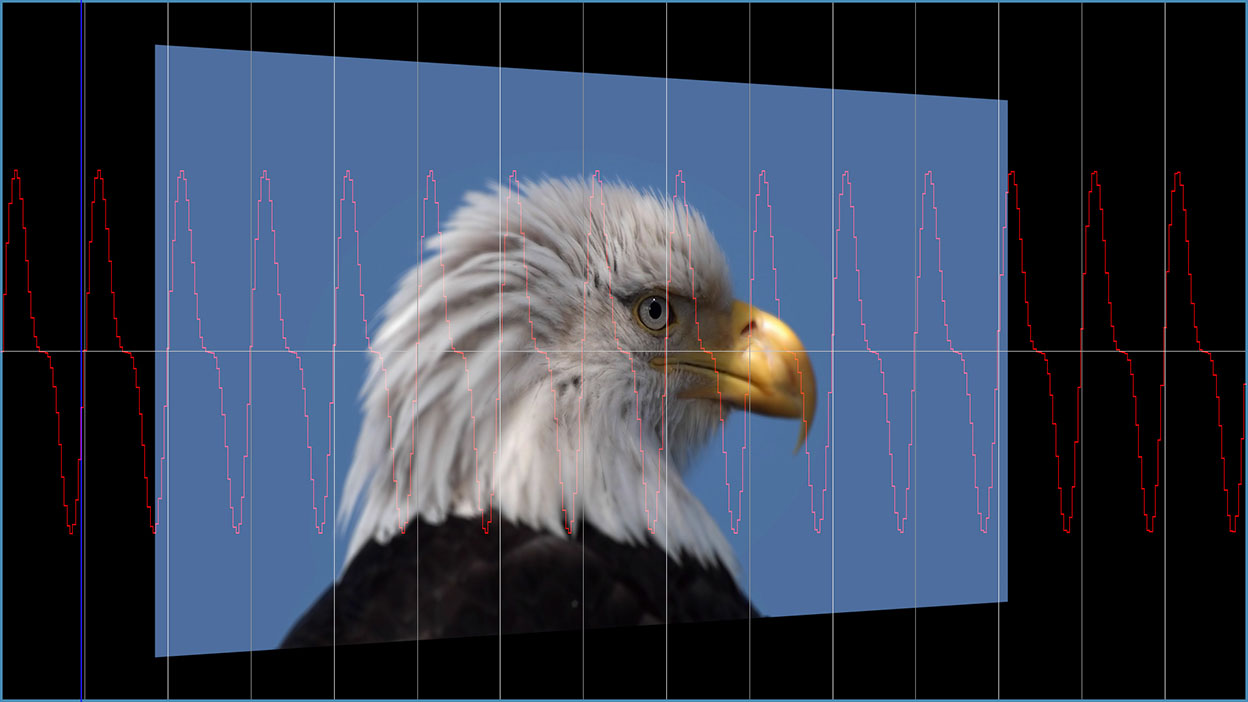
The Curve View menu displays a graph of the effect of the jitter over time. If one of the Jitter Shape controls is Off, that jitter is inactive and its curve does not appear on the graph. This menu setting determines how the jitter curves are represented on the graph. When you use the Draft Only options, the curves are not visible in the rendered effect. However, you must preview in Draft mode in your host for these options to display. When you use the Renderoptions, the curves appear in the rendered effect.
- Off does not display any jitter curves.
- Curves: Draft Only and Curves: Render display curves showing the amount of jitter at each frame or at selected frames of the effect.
- Curves Over Layer: Draft Only and Curves Over Layer: Render display the jitter curves over the rendered clip. This mode allows you to simultaneously preview the jitter curves and the rendered output, which can be useful for adjusting the effect.
- Curves Over Comp: Draft Only and Curves Over Comp: Render display the jitter curves over all other layers in the effect.
The vertical axis on the graph represents the current time in the effect. The horizontal axis represents the base parameter value (set by the Source or Insert parameter values) before it is jittered. The red curve represents Jitter 1, the green curve represents Jitter 2, and the blue curve represents Jitter 3.
Curves Parameter Group
The parameters in this section allow you to view the Jitter curves as you make adjustments to them. These curves plot the values of the jittered parameter over time.
The Time View menu controls the time range shown on the graph. Full Effect displays the jitter curves from the start to the end of the effect. 16, 8, 4, and 2 display the curves for the given number of seconds after the frame specified by Scroll Curves.
Scroll Curves selects the first frame in the effect that is displayed when Time View is set to 16, 8, 4, or 2. This parameter has no effect if Time View is set to Full Effect.
Lock Scale checkbox locks the Scale Y to the Scale X value, preserving the aspect ratio of the source image as scale adjustments are made. Deselect Lock to Scale X to adjust Scale X and Y independently.
Scale X sets the horizontal scale of the source layer. The Scale X value is expressed as a percentage of the source layer’s original width.
Scale Y sets the vertical scale of the source layer. The Scale Y value is expressed as a percentage of the source layer’s original height.
Position coordinates set the horizontal and vertical position of the source layer.
Tumble, Spin, and Rotate move the source layer around the X, Y, and Z axis respectively. Tumble, Spin, and Rotate can be animated over values greater than 360° in order to make the layer complete more than one full revolution.
Opacity scales the opacity of the source layer. When Opacity is 0, the layer is completely transparent. As the Opacity value increases, the layer becomes increasingly opaque, and at a value of 100, the layer is completely opaque.
Motion Blur Parameter Group
Select the Motion Blur On checkbox to turn on motion blur. If Motion Blur On is not selected, the other parameters have no affect.
- Warning: Motion Blur is an especially memory-intensive feature. It is particularly useful to work in Draft****Mode when creating an effect with motion blur.
The Motion Blur Smoothness menu determines how many times the effect samples between the time the shutter opens and the time it closes. Increasing the number of samples creates a smoother blur but increases render and preview time proportionately. Choose Rough, Medium, Smooth, or Smoothest. Rough uses the fewest samples, while Smoothest uses the most.
Shutter Angle refers to the workings of a conventional film camera. Normally the shutter is open to 180°, meaning that the shutter is open for half of each frame. Increasing the angle opens the shutter longer, creating a wider blur. Decreasing the angle produces a thinner blur.
Selecting the Adaptive Motion Blur checkbox causes the effect to take fewer samples when the source moves more slowly. Selecting this checkbox usually does not have a visible effect, but improves rendering speed.
The Jitter Shape 1 menu sets the shape of the Jitter curve. The best way to understand how these shapes affect the jittered parameters is to set an option in the Curve View menu to see the shape of the curve over time. The curves can be modified using the Timing Jitter 1 and/or Master Jitter 1 settings.
- Off turns Jitter 1 off. If shape Jitter 1 is set to Off, the other Jitter 1 parameters have no effect.
 |
- Noise Jumps causes the noise to jump to a new value in increments set by the Timing Jitter 1 setting.
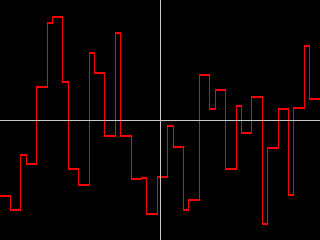 |
- Random**Walk causes the noise to start at 0, then add a new random number in increments set by the Timing Jitter 1 setting.
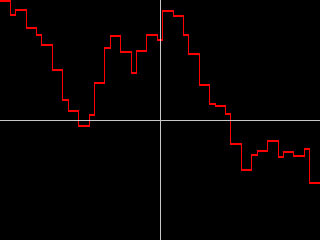 |
- Smooth**Noise creates a new noise value every frame, then smooths the curve that is created. Timing Jitter 1 adjusts the width of the curve smoothness.
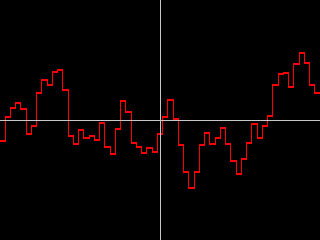 |
- Smooth**Walk creates a Random Walk curve, then smooths the result. Timing Jitter 1 adjusts the width of the curve smoothness.
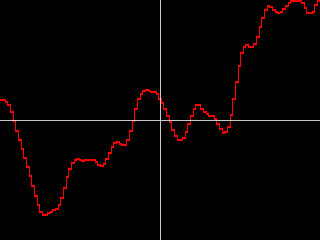 |
- Constant adds the Master Jitter 1 value to the base parameter value set by the Source and Insert settings, creating a static effect.
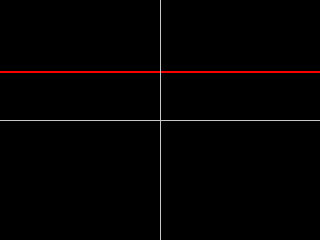 |
- The remaining choices all produce regular waves of varying shapes. Most of these choices have fairly descriptive names. The Spectrum choices are all variations on the sine wave (the curve at right is an example of a Spectrum wave). For each of these choices, Timing Jitter 1 adjusts the frequency of the wave, and Master Jitter 1 adjusts the amplitude (height) of the wave.
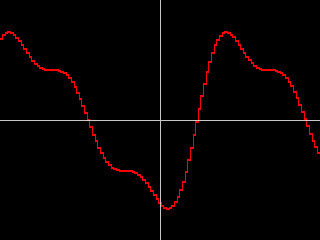 |
Jitter Parameter Group
The Jitter parameter group creates a jitter curve.
Master Jitter adjusts the intensity of the jitter by scaling all of the other jitter parameters. For this reason, each Shape Jitter curve responds slightly differently to Master Jitter. When Master Jitter 1 is 0, no jitter is created.
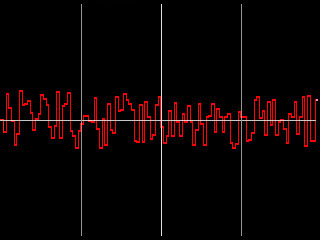 | 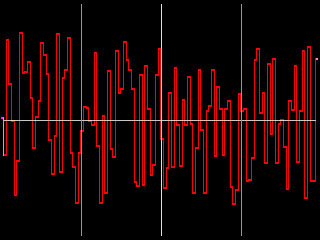 |
| Master Jitter=25 | Master Jitter=75 |
The effect of Timing Jitter depends on which shape is selected in the Shape Jitter menu. See the Shape menu for details.
Random Seed Jitter sets the value that is input to the random number generator used to generate noise. Adjust this value when you like the overall effect but want to adjust the random configuration of the jitter curve.
Frame Offset Jitter offsets the position of the jitter curve by the specified number of frames. Adjusting this value controls which point on the curve corresponds to a given frame.
The Destination Jitter menu selects which parameter is affected by the jitter. Destination 2and Destination 3 allow you to choose two more parameters to jitter.
- When Destination is set to Off, no parameters are affected.
- Scale jitters both the X and Y Scale.
- Motion jitters the motion of the layer in the X, Y, and Z directions simultaneously. If Motion is selected, the Jitter Amount is proportionate to the layer’s speed, so when the layer is still, no jitter is applied.
- XY Wobble jitters the layer in the direction perpendicular to the layer’s direction of motion in the X and Y planes. For example, if the layer is moving horizontally, XY Wobble jitters the layer vertically. If XY Wobble is selected, the Jitter Amount is proportionate to the layer’s speed, so when the layer is still, no jitter is applied.
- Angular Motion jitters Tumble, Spin, and Rotate in amounts proportionate to each parameters rate of change. When Tumble, Spin, or Rotate is constant, the parameter is not affected by the jitter.
Beat Reactor
The BCC Beat Reactor is an animation control suite which drives effect properties based on the contents of an audio track. This lets you seamlessly tie visual FX to an audio soundtrack without the need for ANY manual keyframing.
For more information on the Beat Reactor, Click Here.


