Replaced by BCC+ Motion Blur ML
We recommend use of BCC+ Motion Blur ML instead of BCC Motion Blur. The newer BCC+ filter uses our newly developed hardware accelerated optical flow algorithm coupled with Boris FX machine learning (ML) to detect pixel motion in a shot and includes several options for controlling and fine tuning the level of motion blur added to the resulting image. As with all BCC+ filters, BCC+ Motion Blur ML is GPU accellerated for fast, speedy results, and includes access to the FX Editor.
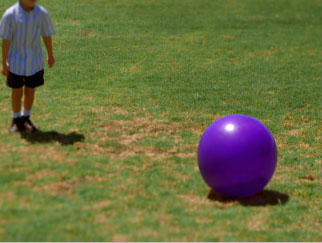 | 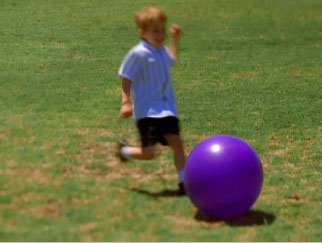 | 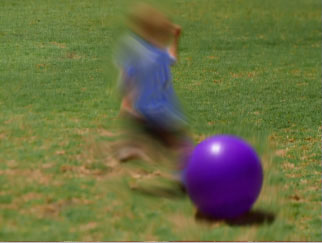 |
|---|---|---|
| Source Image | Source Image | Filtered Image |
Overview
The BCC Motion Blur filter creates a realistic blur on the motion in an image, simulating the effect of shooting a moving object on film. The blur is based on the motion of the pixels in the image. For example, you could apply the Motion Blur filter to a clip of a speeding car and the car’s motion would blur while the background would not. The blur is most pronounced when the object moves quickly and more subtle when it moves slowly. Motion blur is not visible if the image is static.
Based upon optical flow technology, this filter examines past and future frames to determine the motion of the pixels in the image. Depending upon the selected settings, a blur or a smear is applied to the pixels that move from one frame to the next. You can use an image in the timeline as a source for motion and then apply the motion from the chosen image to the filtered track.
BCC10 introduces a new Advanced optical flow option – accessed via the Optical Flow Method menu. This Advanced mode uses OpenCL hardware assisted rendering to implement a more sophisticated (and more computationally intensive) motion vector analysis. The performance of the Advance mode varies widely from one graphics card to another and if you see reduced performance or unexpected results when using the Advanced option it is recommended that you switch to the Simple mode on that card.
Parameter Contols
Presets and Common Controls
BCC filters come with a library of factory installed presets plus the ability to create your own custom presets and preview them with the BCC FX Browser™.
BCC filters also include common controls that configure global effect preferences and other host-specific effect settings.
For more information about working with presets and other common controls, Click Here.
Compare Mode
The BCC Compare Mode provides a convenient mechanism to compare the effect result with the original source layer. It provides several variations on basic split-screen views with the filtered clip placed next to the unedited original.
For more information on the Compare Mode,Click Here.
The Source Layer menu sets the media to blur with the source layer (the clip or track to which the filter is applied). You must assign the media that you want to use to the Source Layer menu. When this menu is set to None, the other parameters have no affect.
The Blur Type menu sets the type of motion blur that is created. The choices are Blur or Smear. Smear blurs the pixels in one direction. Blur blurs the pixels symmetrically.
 | 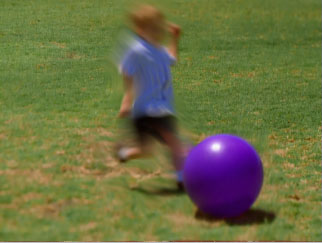 |  |
| Original Image | Smear | Blur |
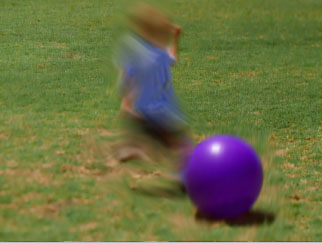
Motion Blur Amt sets the amount of blur or smear that is applied to moving pixels. Positive values apply the blur or smear; negative values sharpen these pixels. The following example shows Blur as the Blur Type.
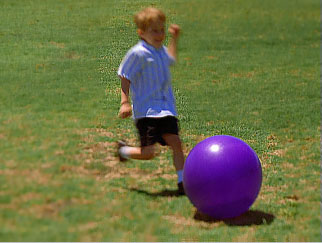 | 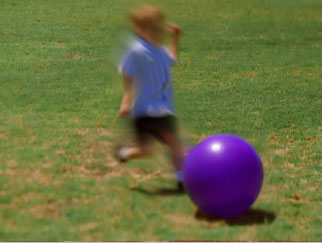 | 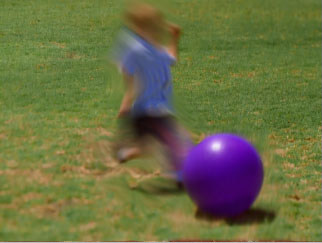 |
| Motion Blur Amount= -9 | Motion Blur Amount=5 | Motion Blur Amount=10 |
Smear Falloff determines the falloff when the Blur Type menu is set to Smear. Falloff is the transition between the smeared and unsmeared areas. At a value of 0, the Smear is fully applied; at a value of 100, the smear has no affect. This is ideal for animating the smear.
Velocity Limit determines the range of moving pixels that are filtered. At a value of 0, the filter will not find any moving pixels in the image; at a value of 1000 (maximum), the filter uses the full range of motion in the image.
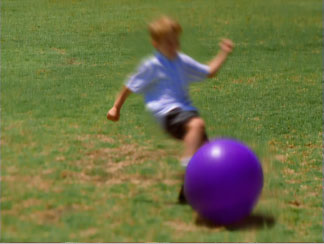 | 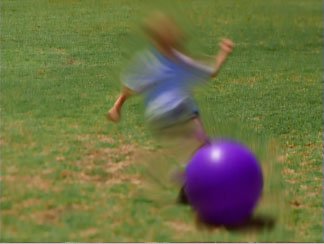 |
| Velocity Limit=10 | Velocity Limit=150 |
The Optical Flow Method menu chooses between the original Simple optical flow method and a newer Advanced mode. The Advanced mode uses OpenCL hardware assisted rendering to implement a more sophisticated (and more computationally intensive) motion vector analysis. The performance of the Advance mode varies widely from one graphics card to another and if you see reduced performance or unexpected results when using the Advanced option it is recommended that you switch to the Simple mode on that card.
Advanced Group
The controls in the Advanced group are only relevant when the Optical Flow Method is set to Advanced. The controls in this group are used to fine tune the motion analysis performed by the Advanced mode. Motion vector analysis tends to be highly dependent on the details of each individual clip, and these controls are used to optimize the quality and performance results on a per-clip basis.
The Better Downsampling checkbox turns on a higher quality downsampling mode which can increase the accuracy of the motion vector analysis when the Optical Flow Resolution is set to a value below Best. Enabling the Better Downsampling mode does slightly increase render times however.
The Optical Flow Resolution menu controls the downsampling used during the motion vector analysis. Choosing Best will generate the highest quality motion vectors but will also increase render times, whereas High and Medium will do motion analysis at reduced resolution but with progressively faster performance.
The Motion Complexity slider is used to fine tune the motion vector analysis based on the type of motion in the clip. For clips with very complex motion – elements moving in many different directions – you can more accurately capture those motion intricacies by increasing the Motion Complexity slider. However as the Motion Complexity slider increases the motion vector field tends to be less uniform which can cause unwanted discontinuities in the motion blur result for images which don’t contain a lot of complex motion. This slider should be tweaked to find the right balance between blur uniformity and motion detail for your particular image.
The Image Detail slider is used to fine tune the motion vector analysis based on how much fine detail the clip contains. Increasing the Image Detail slider causes the motion to be analyzed at finer and finer levels of detail which can increase accuracy in images with lots of detail but which can also reduce performance.
The Accuracy Tuning menu is used to provide another level of trade of between accuracy and performance. Higher values will generate more detailed and accurate vector maps but at the cost of increasing render intensiveness.
The Motion Post-Smoothing menu controls whether or not the motion vector field is smoothed after being created which can yield more uniform looking results in cases where the vectors have excessive variation. When set to None there is no post-smoothing of the motion vectors, whereas choosing Small or Large will apply increasing amounts of smoothing to the vector field.
The FG Mask Layer menu sets the media to use as a foreground mask to constrain the pixel movement. When this menu is set to None, the media that is assigned to the FG Mask Layer has no affect.
The FG Mask Channel menu determines which channel is used to create the foreground mask. The choices are Red, Green, Blue, Luma or Alpha. This setting has no affect if you have assigned the FG Mask Layer menu set to None.
The FG Blur Type menu sets the type of motion blur that is created on the foreground mask. The choices are Blur or Smear. Smear blurs the pixels in one direction; Blur blurs the pixels symmetrically. This option is applied to the foreground calculation; the background image is controlled by the Blur Type menu. This setting has no affect if the FG Mask Layer menu is set to None.
FG Motion Blur Amount sets the amount of blur or smear applied to moving pixels in the foreground image. Positive values apply the blur or smear; negative values sharpen pixels.
FG Smear Falloff determines the falloff when the FG Blur Type menu is set to Smear. Falloff is the transition between the smeared and unsmeared areas.At a value of 0, the Smear is fully applied; at a value of 100, the smear has no affect on the image. This is ideal for animating the smear.
FG Velocity Limit determines the range of moving pixels in the foreground image that are filtered. At a value of 0, the filter will not find any moving pixels in the image; at a value of 2000 (maximum), the filter uses the full range of motion in the image.
Blur Threshold reduces the amount of color changes to each pixel by the threshold amount. Increasing Blur Threshold causes the parts of the image with abrupt changes in color to blur, while areas with subtle details remain unchanged.
The Maximum Deviation parameter sets the maximum deviation (based on 8-bit color) allowed for any channel. Reducing this value limits the amount any color can change. This control becomes more noticeable at values below 30. Very small amounts of Max. Deviation can be useful (especially combines with the PixelChooser) to reduce noise in video and digital stills that contain noise in their dark areas.
The Apply Mode menu controls how the filtered image is composited with the source image. For descriptions of all the possible Apply Modes, Click Here.
Apply Mix controls the mix of the specified Apply Mode with the Normal apply mode. If the Apply Mode is Normal, Apply Mix has no affect and the parameter does not appear. If Apply Mix is 0, Apply Mode has no affect. Increase Apply Mix to blend the Apply Mode setting with the Normal apply mode.
Mix with Original blends the source and filtered images. Use this parameter to animate the effect from the unfiltered to the filtered image without adjusting other settings, or to reduce the affect of the filter by mixing it with the source image.
Motion Tracker
The BCC Motion Tracker allows you to track the motion of an object, then use the motion path to drive other geometric properties of the effect without the need for keyframing.
For more information on the Motion Tracker, Click Here.
PixelChooser
The BCC PixelChooser provides simple, built-in masking of the effect result. The PixelChooser is generally used to select a portion of the image and restrict an effect to just the selected area while maintaining the original image content in unselected regions. The selection can be based on geometric shapes or on the image’s luma/color properties.
For more information on the PixelChooser, Click Here.


