Replaced by BCC Particle Illusion
We recommend use of BCC Particle Illusion instead of BCC Sparks. BCC Particle Illusion contains thousands of curated particle effects, mocha motion tracking, 3D particles with integrated camera, Fluid Dynamics, 3D model emission, 3D deflectors, particle trails, and more.
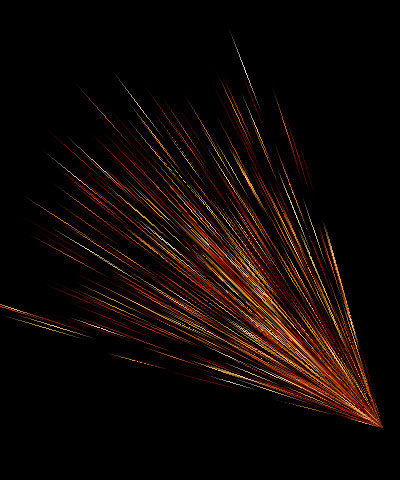 | 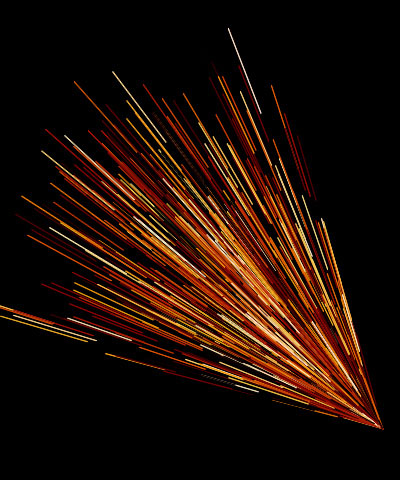 | |
| Streaks | Trails | Lines |
Overview
Sparks generates auto-animated sparks that shoot from a point and disperse. The sparks’ sizes, shapes, and colors can be adjusted. You can also adjust the speed of the sparks, apply a gravitational force, and add an interaction layer.
Function
Presets and Common Controls
BCC filters come with a library of factory installed presets plus the ability to create your own custom presets and preview them with the BCC FX Browser™.
BCC filters also include common controls that configure global effect preferences and other host-specific effect settings.
For more information about working with presets and other common controls, Click Here.
The Spark Shape menu chooses the shape of the sparks. Choose Streaks, Trails, or Lines.
Spark Velocity determines the speed with which the sparks emanate from the producer point. Increasing this value moves the sparks faster, while decreasing this value moves the sparks slower.
Amount controls the number of individual sparks in the effect. Increase this value to add more sparks to the effect; decrease this value to reduce the number of sparks in the effect.
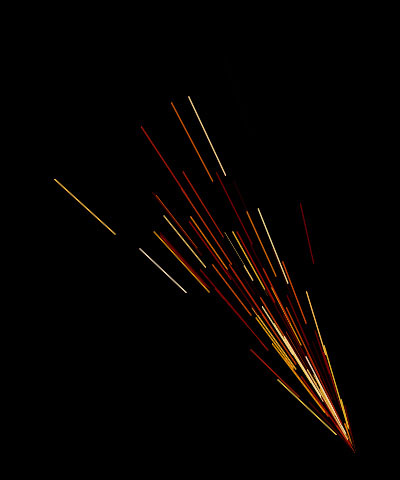 | 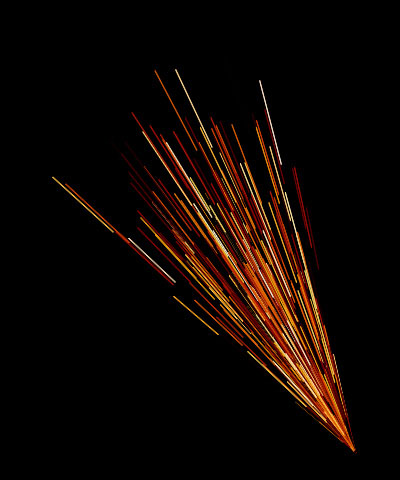 | 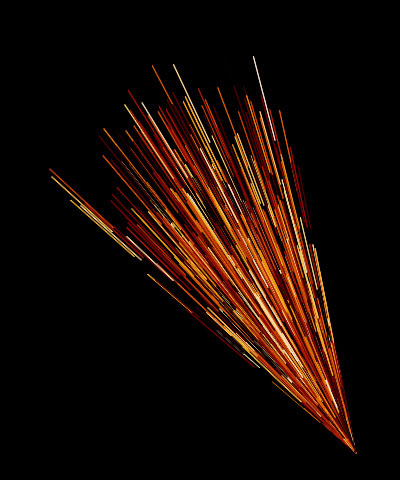 |
| Amount=20 | Amount=100 | Amount=300 |
Producer Acceleration lets you ease in or out of keyframes for the Producer X and Y parameters.At a value of 0, Linear interpolation is applied; a value of 100 provides a significant curve for easing in and out of keyframe values. If Producer X and Y are not animated, this parameter has no affect.
The Producer XY position controls set the location of the producer point on the X and Y axis.
Producer Z set the location of the producer point on the Z axis.
Select the Composite on Alpha checkbox to composite the sparks over a transparent background. Deselect this option to use the filtered layer as the background for the effect.
Spread affects the overall tightness of the spark pattern as the sparks leave the source. Decreasing this value brings the sparks closer to the source. Increasing this value spreads the sparks and causes them to flow farther from the source.
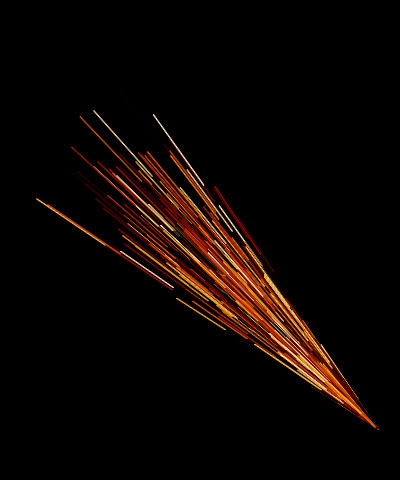 | 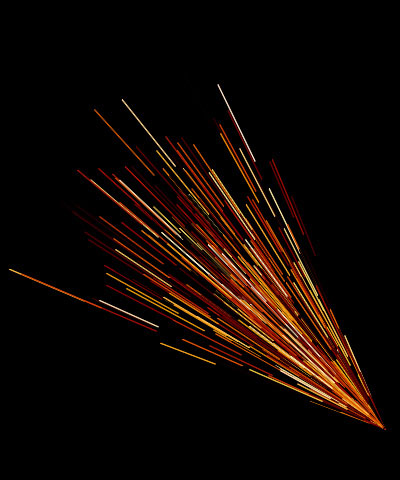 | 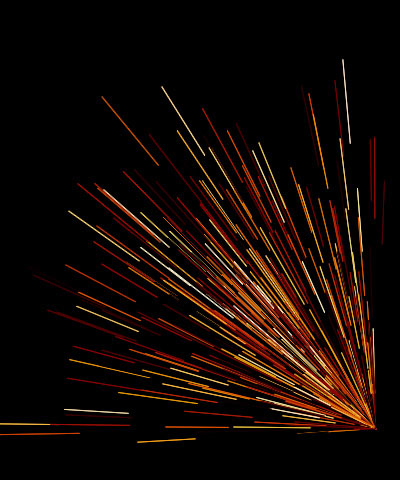 |
| Spread=25 | Spread=50 | Spread=100 |
The Spread Mode menu controls the overall shape of the spark effect.
- The default selection, 3D, generates sparks which flow out through a cone-shaped region in all directions.
- Fountain is similar to 3D, but adds more sparks flowing straight upward in the manner of water droplets flowing from a fountain.
- Flat Fan sprays sparks in a two-dimensional fan shape on two opposite sides of the source.
- Sine Cannon shoots sparks from a generator swinging in a circle around the source point.
- Circular sprays sparks out from the edges of a circle.
- Spiral creates sparks that spiral around a central source, much like hurricane winds spiralling around the eye of the storm.
Spread Character can be used to finetune the shape of the spark system created by the selected Spread Mode. The affect of this parameter depends on the chosen Spread Mode.
- In the 3D and Fountain Spread Modes, Spread Character alters the shape of the cone through which the sparks flow.
- In Flat Fan mode, Spread Character decreases the randomness of the sparks and making them spray out from the source point in a more ordered manner.
- In Circular mode, Spread Character causes more sparks to spread toward the center of the circle rather than only spraying out from the edges.
- In Sine Cannon mode, Spread Character affects the speed of the swinging generator.
- In Spiral mode, Spread Character makes the spiral pattern tighter or wider.
Spark Size Adjustment adjusts the size of the sparks. Negative values produce shorter sparks, while positive values produce longer sparks.
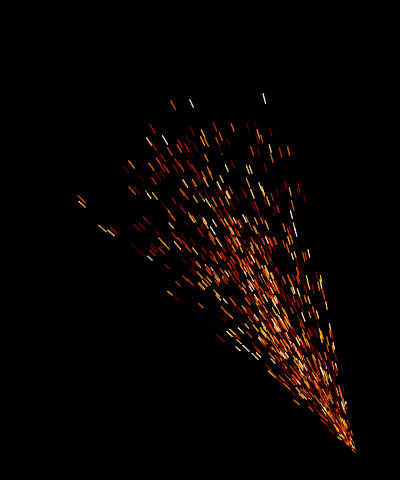 | 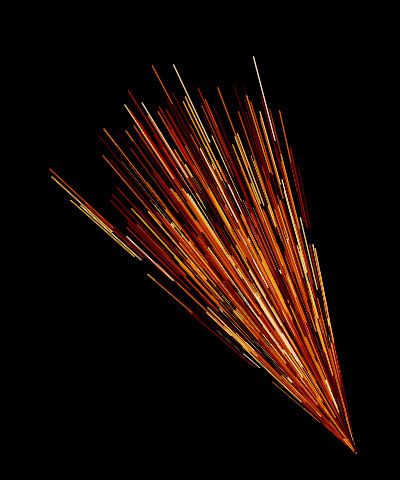 | 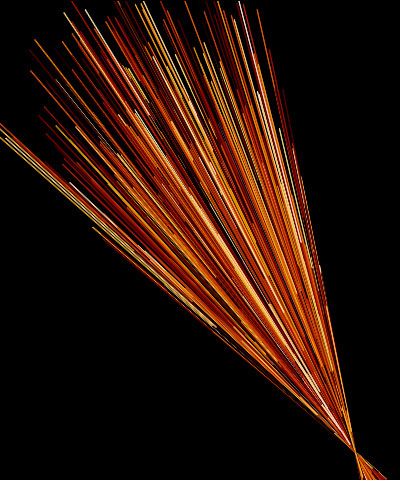 |
| Spark Size Adjustment= -90 | Spark Size Adjustment=0 | Spark Size Adjustment=25 |
The Spark Lifespan parameter determines how long each spark lasts before it decays.
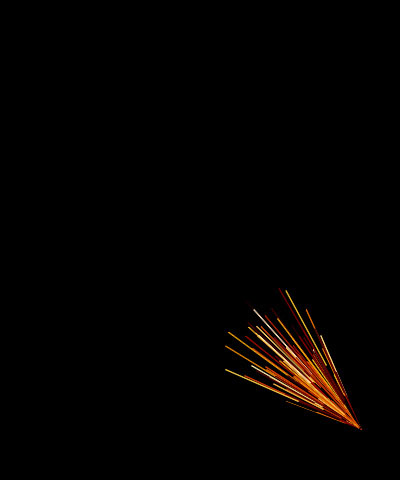 | 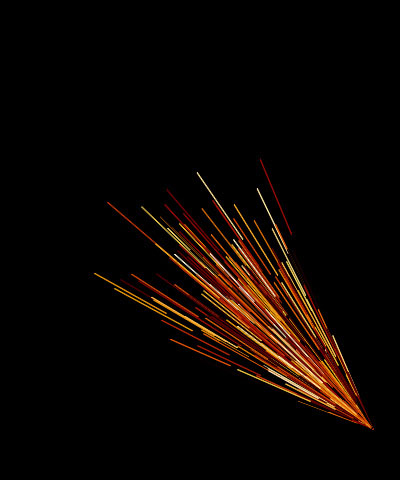 | 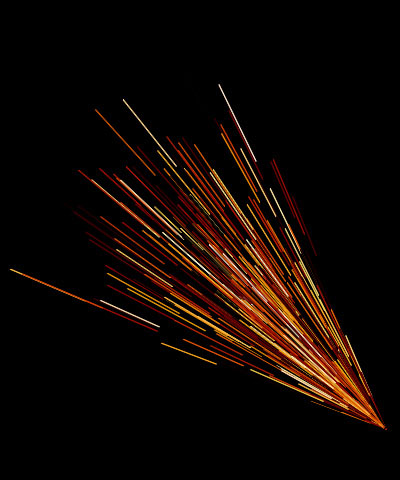 |
| Spark Lifespan=2 | Spark Lifespan=4 | Spark Lifespan=5 |
Orientation Parameter Group
Tumble, Spin and Rotate rotate the producer point around the X, Y, and Z axis, respectively.
Production Area Parameter Group
Width and Height stretch the spark source along the horizontal and vertical axis. Increasing one of these parameters stretches the source in one dimension and creates a spark source that is a straight line. Increasing both stretches the source in two dimensions and creates a spark source that is a plane. When the spark source is a plane, the sparks appear to generate randomly within the space, rather than flowing from a specific point or line.
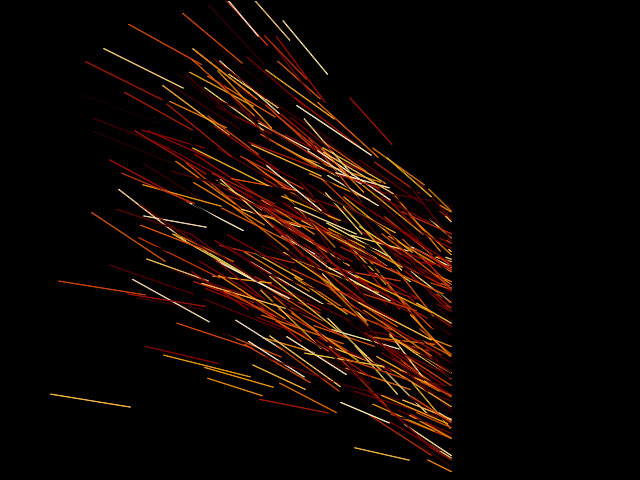 | 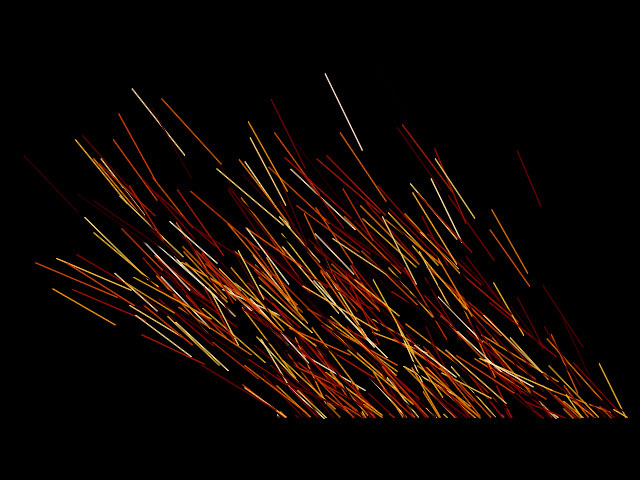 |
| Height=20 | Width=20 |
Depth controls the movement of the sparks in Z-space. Decreasing Depth from the default value of 0 makes the sparks appear to approach the viewer as they flow from the source. As a result, sparks appear to grow in size as they approach the viewer. Increasing Depth makes the sparks appear to move away from the viewer as they flow from the source. In this case, sparks appear to shrink as they move away from the source.
The Generate From Alpha menu allows you to set a boundary for the spark production area using the alpha channel from any clip or layer in your composition. Sparks are only generated within the region that corresponds to the opaque portion of the Generate from Alpha image’s alpha channel. If the chosen image has no alpha, this setting has no affect.
Color Parameter Group
The controls in this section select the color and opacity of the generated sparks. The Start settings affect the sparks as they are produced at the source, and the End settings affect the sparks as they reach their final destination or decay point. The Midpoint controls control the how quickly the sparks move from the Start to the End settings. Each of the two groups contains the following parameters.
The Color Mode menus offer several means by which the sparks’ colors are derived.
- Source Point causes each spark to use the color of the source layer at the point where the spark originates. If the effect’s source coordinates correspond to a red region in the source layer, the spark is red.
- Source Update causes each spark to use the color of each point on the source image that the spark passes through. If the spark passes from a blue region in the source to a red region, the spark’s color will change from blue to red.
- Source within System is similar to Source Point, except that Source within System picks colors from the source based on the sparks’ positions relative to the spark system instead of relative to the source layer.
- Random Source causes the sparks to use the color of a randomly chosen point in the source image.
- Random Source 2 uses another randomly chosen color from the source image as the spark color.
- Custom Color sets the spark color to the Custom Color parameter setting.
- Source as Gradient: Left to Right creates a gradient for the spark color from the Color Source Layer menu image and blends from left to right. Only the Start Color Mode has this choice.
- Source as Gradient: Top to Bottom creates a gradient for the spark color from the Color Source Layer menu image and blends from top to bottom. Only the Start Color Mode has this choice.
The Start Color controls allow you to select colors for the Start, Midpoint, and End ranges of the effect. Note that you must set the Color menu (described above) to Custom Color to use this parameter.
The Color Reference Layer menu chooses any layer in your composition to use as a source for spark colors.
Start/End Brightness Variance controls the range of brightness values among the sparks. Increasing Brightness Variance creates a system in which some sparks are bright and others are dim, and increases the disparity between the brightest and dimmest sparks. The default setting of 0 ensures that all sparks have the same brightness value.
Start/End Opacity sets the opacity level of the sparks. A value of 100 makes all sparks in the range completely opaque, and a value of 0 makes all sparks completely transparent. You can set different Opacity values in the Start and End ranges to create effects in which sparks stream outward from the source and disappear.
Midpoint Location moves the Midpoint along the gradient between the Start and End values. A value of 0 places the Midpoint close to the generation point, and sparks begin changing to their End Color and Opacity values soon after birth. A value of 100 places the Midpoint nearer the End point, and sparks remain at the Start Color, Size, and Opacity values until close to the end of their life span.
Midpoint Variance increases the range of Midpoint Location values among the sparks. As you increase the Midpoint Variance value, the Midpoint Location varies more from spark to spark.
Overall Opacity affects the opacity levels of the entire spark system, after individual Start, Midpoint and End opacity values are taken into account. This parameter provides a means of adjusting and animating the opacity of the effect as a whole without changing individual parameters for each range.
Reflection Parameter Group
The Reflect off Layer menu chooses a layer in the composition to use as a reflection layer. When sparks hit an edge in the reflection layer, they bounce off.
The Layer Use Channel menu chooses the channel in the reflection layer that determines how the sparks bounce. For example, if Alpha is used, the sparks bounce off boundaries in the reflection layer’s alpha channel.
The Layer Edges menu sets how the outer edges of the reflection layer interact with the sparks.
- None treats the edges of the reflection layer like transparent areas.
- Solid treats the edges of the reflection layer like opaque areas.
Bounce Friction sets the amount of friction applied to the sparks as they bounce off the reflection layer. Reducing Bounce Friction allows the sparks to bounce higher. Increasing Bounce Friction slows the sparks down, causing them to bounce lower.
Forces Parameter Group
Gravity allows you to apply a second force to the movement of the comet. Increasing this value pulls the sparks increasingly strongly in the direction of the Gravity Angle as they leave the source point.
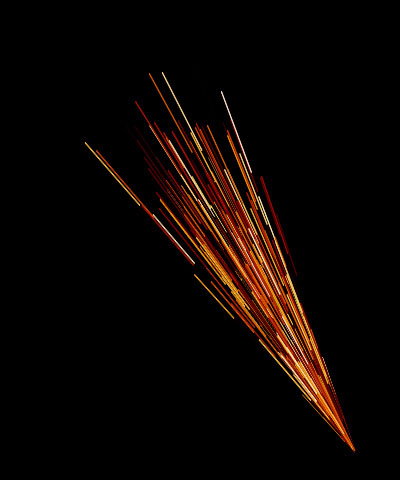 | 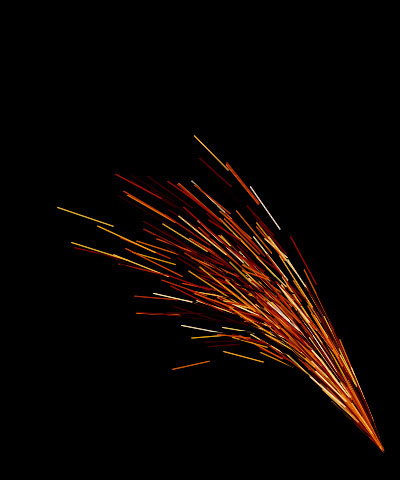 | 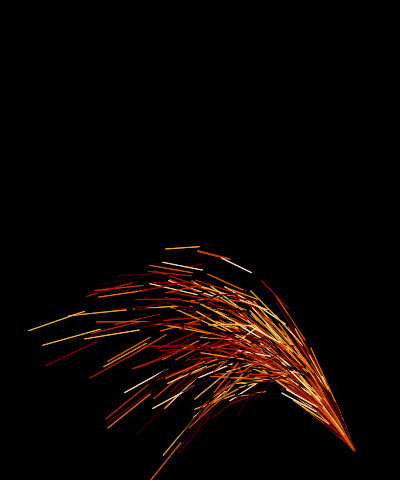 |
| Gravity=0 | Gravity=400 | Gravity=700 |
Air Resistance adds resistance to the effect, decreasing the sparks’ velocities. Increase Air Resistance to slow down the sparks, or decrease Air Resistance to increase the sparks’ speed.
Velocity Variance varies the speeds of individual sparks. Increasing this value creates a wider range of possible spark velocities. The default setting of 0 ensures that all sparks travel at exactly the same speed.
Options Parameter Group
The Start on Frame parameter has two functions, depending on whether the Manual Animation checkbox is selected or deselected.
- With the Manual Animation checkbox deselected, Start on Frame lets you start the beginning of the auto-animated effect a number of frames past the start of the layer to which it is applied. Setting Start on Frame to 20 starts the animation twenty frames past the beginning of the clip.
- With the Manual Animation checkbox selected, Start on Frame lets you manually animate the effect. In this case, a value of 0 represents zero frames into the effect, 15 represents 15 frames into the effect, and so on. Selecting the Manual Animation option locks the effect to the selected Start on Frame value. You may then animate the Start on Frame value to pause, slow down, or speed the effect, or to animate the effect forward and backward in time.
Time Scale allows you to adjust the timing of the effect by stretching or speeding time. Decreasing Time Scale below the default value of 100 stretches time. Thus, the effect appears to take place in slow motion, with sparks taking more time to reach their destination or die. Time scale values greater than 100 speed time, causing the comet to move more quickly.
Increasing Delay from the default value of 0 causes sparks to remain invisible until they reach a certain distance from the source point. This can be used to create effects with no visible production center, since sparks do not appear until they disperse to some extent.
Increasing Precision increases the accuracy of spark movement, which can be helpful when creating complex effects. Higher values increase rendering times proportionately.
The Optimize Algorithm checkbox helps speed rendering times without affecting the apparent quality of the image. Deselect this option if there are “jumps” in the render.
Random Seed determines which value is input to the random number generator used by the filter. Adjust this value when you like the overall effect but want to adjust the random configuration of the sparks.
Motion Tracker
The BCC Motion Tracker allows you to track the motion of an object, then use the motion path to drive other geometric properties of the effect without the need for keyframing.
For more information on the Motion Tracker, Click Here.


