Overview
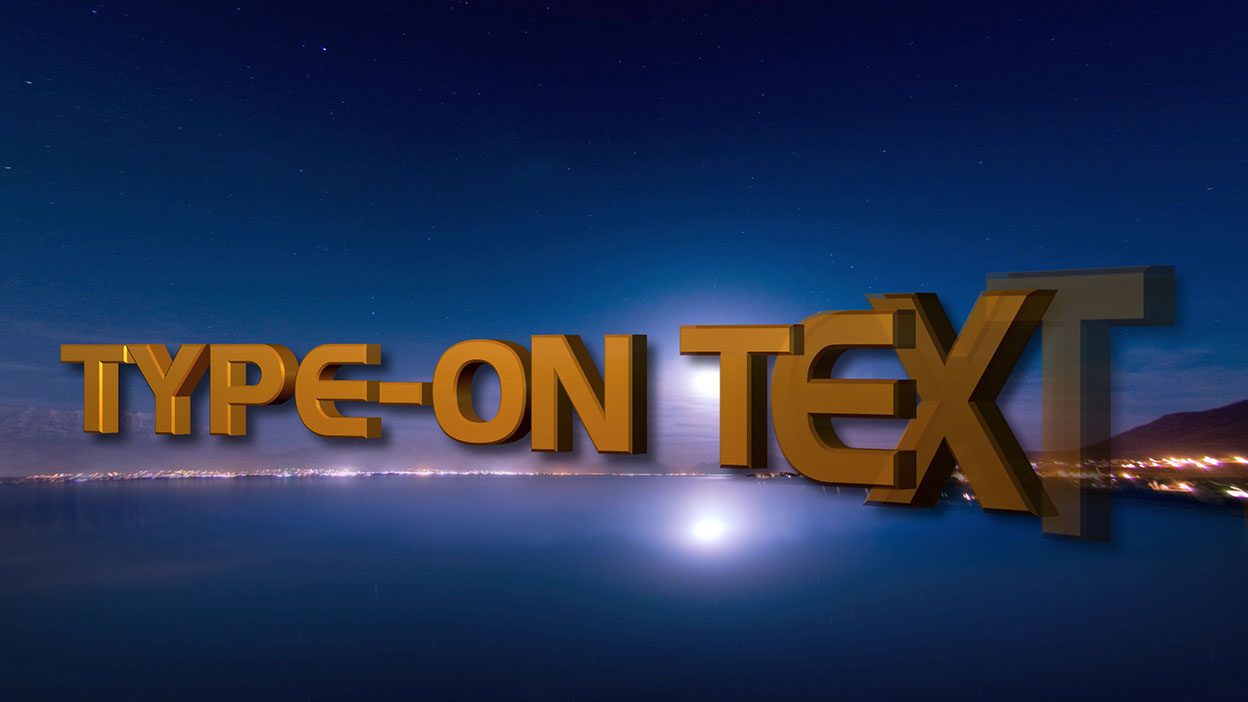
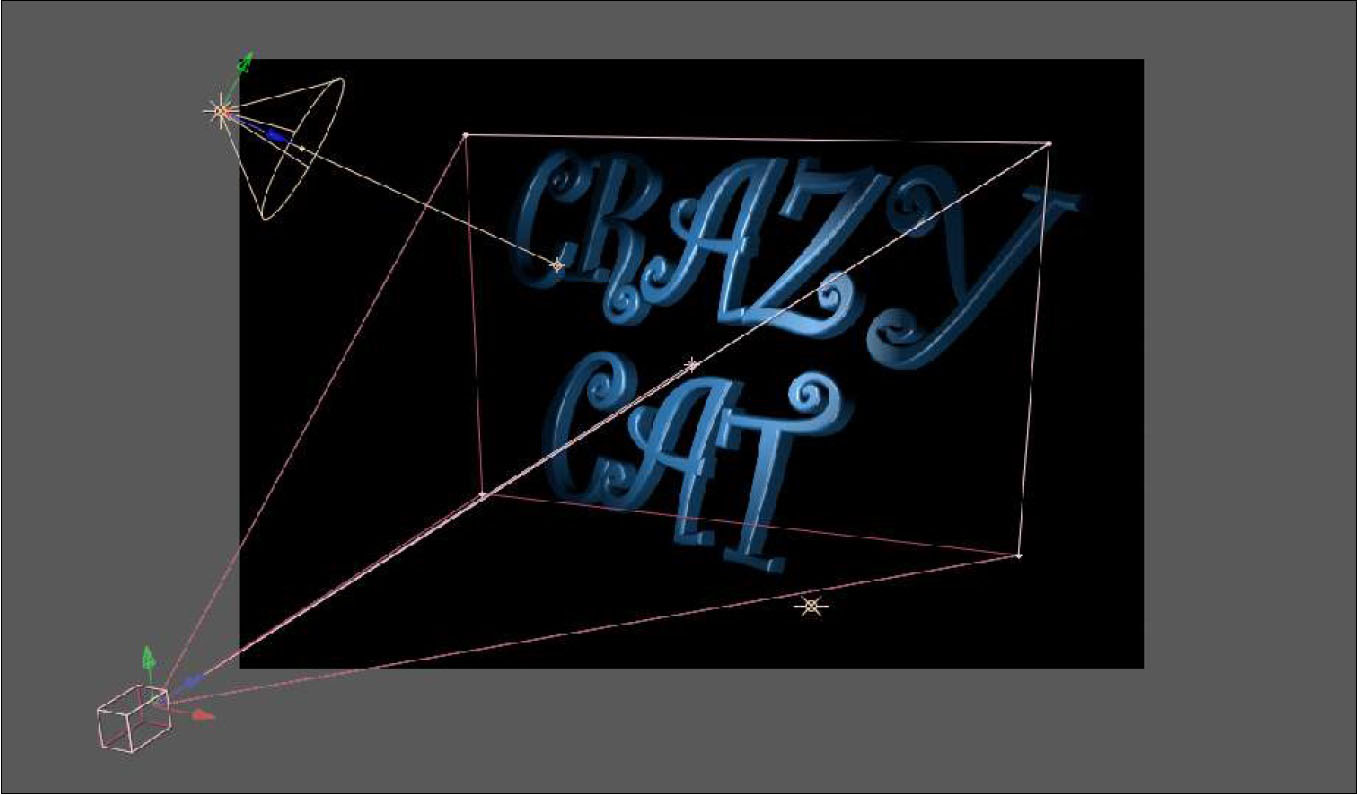
The BCC Type-On Text filter enables you to generate true 3D type-on text animations, with full automation for the type-on / type-off effect and manual override controls for the animation timing. Users of After Effects, HitFilm, and Nuke can take advantage of tight integration with the native host 3D camera and lighting systems in addition to the filter’s own built-in 3D camera and lighting options that are available across all hosts. Additionally, AE users can use AE native mask tools to create custom bevel shapes, and for non-AE users, a variety of built-in bevel shapes have been included. Also included with this filter are 3D deformers, such as ripple, pulse, bend-taper-twist, curl and a shatter explosion effect. The Jitter option offers additional automated control over the 3D text animation.
As with all filters in the 3D Objects group, this OpenGL based filter is hardware assisted for enhanced render performance.
Presets and Common Controls
BCC filters come with a library of factory installed presets plus the ability to create your own custom presets and preview them with the BCC FX Browser™.
BCC filters also include common controls that configure global effect preferences and other host-specific effect settings.
For more information about working with presets and other common controls, Click Here.
Applying the BCC Type On Text Filter
3D Objects filters are general best applied to solid color/slug layers which match the dimensions of the overall project. It is recommended that you apply the filter to a project/comp sized layer when possible to ensure that features such as host native Camera and Light integration will work as expected.
Although the Type On Text filter operates in a true 3D space, for best integration of the 3D extrusion into an host 3D scene it is generally recommended to leave the solid layer the filter is applied to a 2D layer (rather than switching it to a 3D layer).
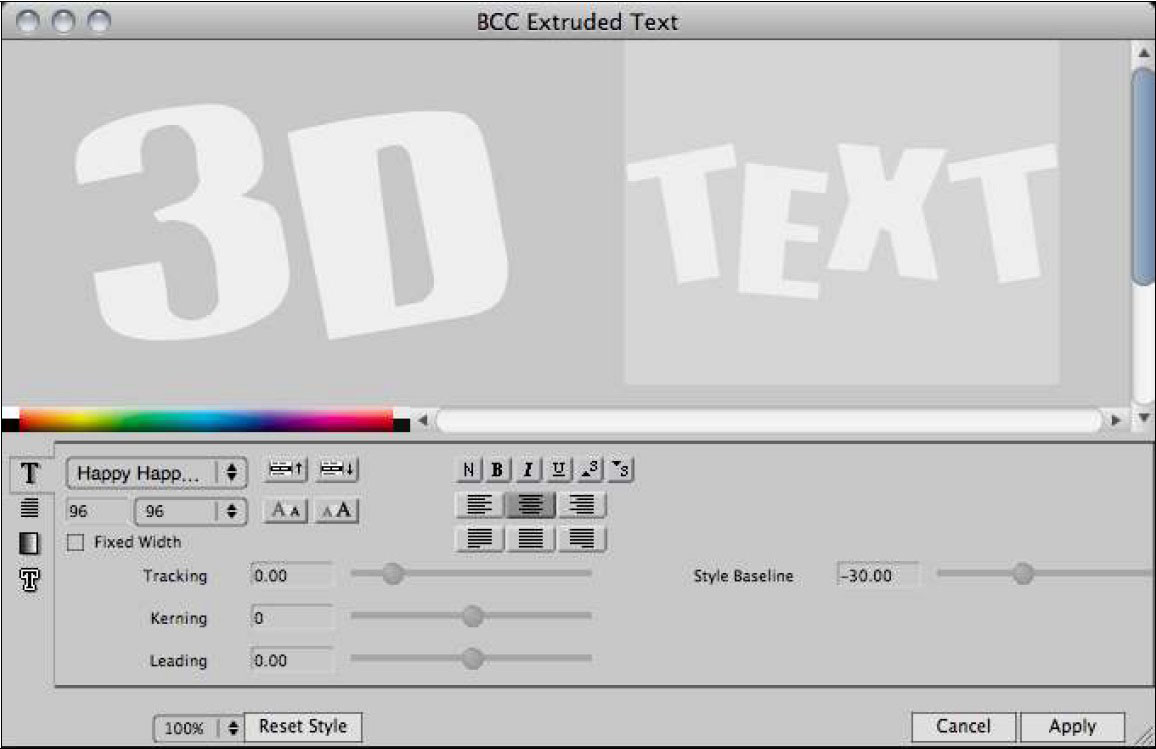
The BCC Type On Text filter provides a custom Text Window to enter and format the text. In some hosts the Text Window may automatically launch when the effect is first applied, whereas in other hosts you may need to select the Text button to bring up the window.
Text Window
BCC Type On Text uses the standard Boris Text Window (like the Boris Title Toolkit, RED, Blue, and Graffiti products).
The Text Window is where text is entered and formatted, where Font and Point Size are selected, etc.
Smaller point sizes generally do not work well when extruding text – it’s best to start with a larger point size (perhaps a point size of 100 or larger depending on the Font) – and then to reduce the size by scaling it down using the Scale controls in the filter’s Transformations group if smaller text is desired.
Changes made to most of the attributes in the Text Window (font and point size for example) are applied to the currently selected text – which means it is possible to use multiple fonts and point sizes within the same text object.
When the Text Window is open and text entry, editing, or formatting is finished, the Text Window can be closed by using the Apply or Cancel buttons in the bottom right area of the window or by choosing Close from under the File menu (or keyboard shortcut for Close).
Note, on Mac OS some of the parameters such as Top Down Text, Right to Left Reading, Negative Line Leading, Superscript and Subscript are not accounted for in the custom text entry window. However previews and renders back in the host will always correctly account for these parameters. This limitation does not affect Windows users. We recommend using the new Title Studio effect for more comprehensive typography preview and control.
Note that the Line Leading in the text entry preview window does not match up with the leading in the rendered result, and the leading may need to be adjusted to generate the desired final render after previewing the leading back in the host. We recommend using the new Title Studio effect for more comprehensive typography preview and control.
Global Preferences [BCC9 only]
[This preference applies only to BCC9 and is not relevant in newer versions of BCC.] The 3D Objects family of effects relies on the BCC Preferences panel to optimize your configuration based on your workflow needs and the capabilities of your graphics hardware. In particular if you wish to work with footage resolutions higher than 1920×1080 (up to 4k) or to optimize antialiasing settings for your hardware, please consult the documentation on Managing BCC Preferences.
Built in Filter Presets
There are several levels of built-in preset controls in the Type On Text filter ;
There is a master preset control for saving and loading values for all the parameters in the filter. This is the 1st preset control, near the top of the Effect Controls panel.
There is an Extrusion Style preset control for saving and loading a style that includes all the Extrusion and Material attributes.
There are 2 preset controls (Bevel and Side) for saving and loading custom curves created out of AE masks (for use in defining extrusion shapes).
There are Material preset controls for saving and applying materials used on the extrusion surfaces.
Type On Reveal & Type Off Remove
The Type On Text filter allows for creating animation that is applied to individual text characters while maintaining the text as a single editable text block. When Do Reveal Effect/Type On is enabled, the parameters in the Type On Reveal group allow for specifying offsets for attributes of the text characters and the type on animation will animate these parameters from the offset back to the default value over the specified time frame. And when Do Remove Effect/Type Off is enabled, the parameters in the Type Off Remove group allow for specifying offsets for attributes of the text characters and the type off animation will animate these parameters from the default to the offset value over the specified time frame. This allows for convenient creation of title effects where the extruded text characters animate on and off the screen.
The Reveal Time parameter in the Type On group and the corresponding Remove Time parameter in the Type Off group can be used to adjust the duration of the type on and type off animation. The type on animation begins at the first frame of the layer the filter is applied to and the type off animation ends at the last frame of the layer the filter is applied to. The Reveal Time and Remove Time represent what percentage of the duration of the layer the animation occurs over. In other words, a Reveal Time of 50 means the type on animation will finish half way (50%) through the layer duration, and using a Reveal Time of 25 it will finish 1/4 of the way through, and so on. A Remove Time of 50 means the text characters start animating off at the halfway point, while a remove Time of 75 means the type off begins 3/4 of the way through the layer, and so on. Be aware that the Reveal and Remove Time are based on the original duration of the layer and trimming the layer at either end will not cause the animation to scale to the new duration but rather will actually trim the effect as if it were source footage.
The Overlap parameter can be used to determine how many of the text characters are animating at once during the type on or type of animation. At the default Overlap value of 100 there is no overlap and characters animate one at a time with the next character beginning upon the previous character finishing its animation. Using an Overlap value of less than 100 creates a pause between each character’s animation and the next one. And increasing the Overlap above 100 results in overlapping animation of multiple characters. When using overlapping character animation it’s important to adjust the Overlap value in relation to how many text characters are in the effect ; for example if there are only 5 text characters in the effect, using an Overlap value of less than 500 will give desirable results, while using an Overlap value beyond 500 can give unexpected results.
The Animation popup menu offers 3 interpolation choices for the type on / type off animation ; Linear, Decelerate, Accelerate.
Fade, Scale, and Rotation parameters allow for specifying offsets from the default that will be used in the type on / type off.
When enabled, the Always Visible checkbox (within the Type On group)makes it so the auto-animation goes from the default to the offset and back again. This can be used to create the appearance of a sort of wave going through the string of text characters.
The Reveal Order and Remove Order popup menus allow for specifying whether the character animation goes from first to last (Forward), last to first (Reverse), or Random (with Random Seed available for varying the random order).
Position X, Y, and Z allow for specifying offsets in 3D space to make the text characters move during type on / type off animation.
Render
The Render parameter group includes controls that can affect the smoothness and edge quality as well as some other options that affect the visual quality of the Extruded Text effect.
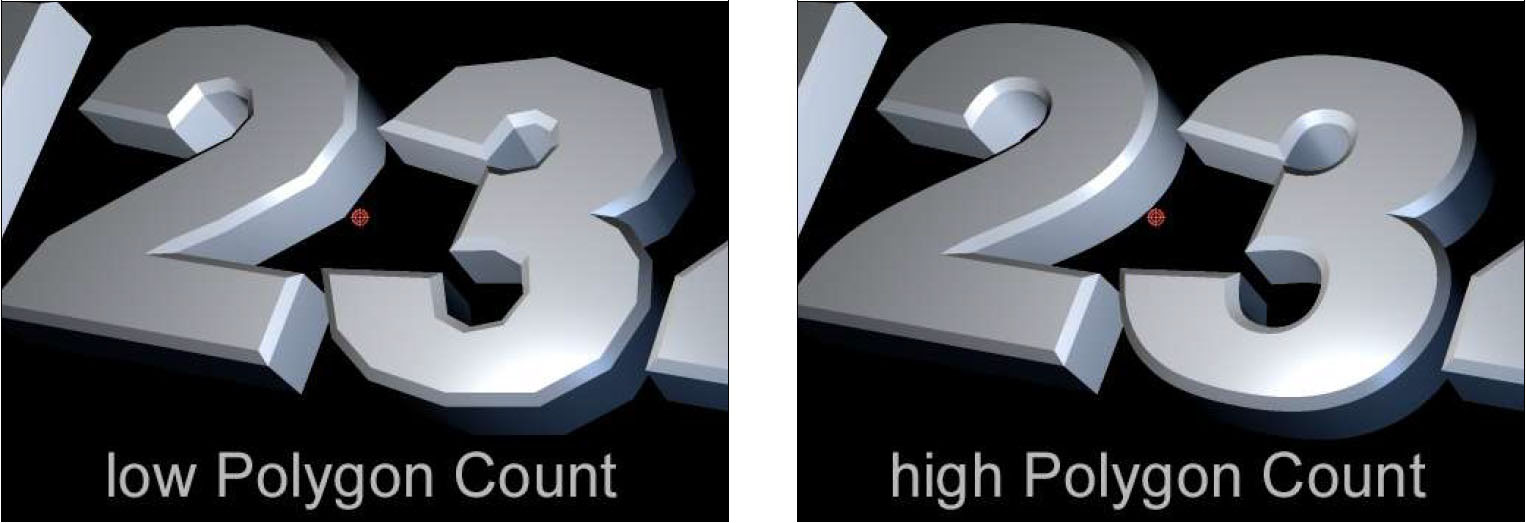
The Polygon Count parameter can be used to increase or decrease the number of polygons defining the extruded object. If curved edges or surfaces of the extrusion look blocky, increasing the Polygon Count will result in the curves looking smoother. The performance of the filter is affected by the Polygon Count and it is possible to speed up the performance (during preview or exporting the final effect) by reducing the Polygon Count.
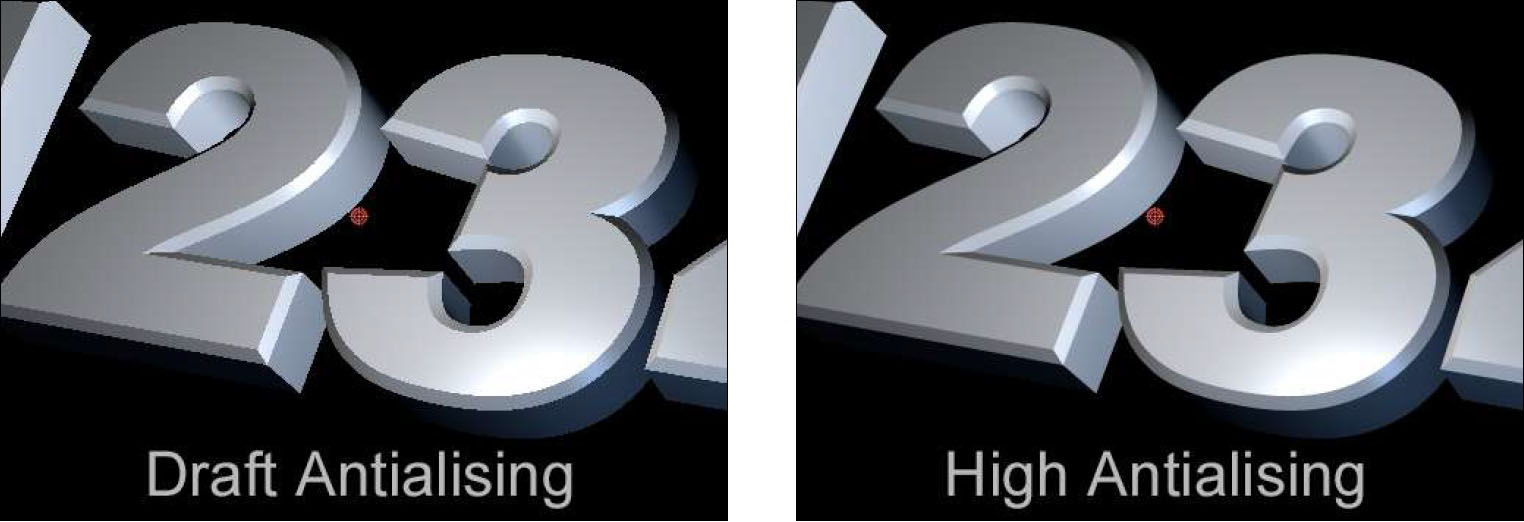
The Antialiasing popup menu controls the level of antialiasing applied to the edges of the Extruded Text. If the edges of the Extruded Text look jagged, increasing the Antialiasing level can help smooth the appearance of the edges. The performance of the filter is affected by how much antialiasing is being applied and it is possible to speed up the performance (during preview or exporting the final effect) by reducing the Antialiasing level. Be aware that when the AE layer the filter is applied to is set to Draft in the AE timeline the Antialiasing popup menu has no effect and the Extruded Text uses Draft antialiasing regardless of how the popup menu is set. Likewise in Avid hosts if the Follow Avid Draft Setting checkbox is enabled, the filter will render in draft mode when Avid is at less than full resolution (i.e. either yellow/yellow or yellow/green) and you will only see the antialiasing results when Avid is set to full green/green resolution. Note that important additional hardware based antialiasing options are also available in the BCC Preferences panel.
The Transparent Object checkbox can allow for a more realistic appearance when using partially transparent (as opposed to fully transparent or fully opaque) materials on extruded surfaces.
The Motion Blur parameters offer control for simulating a camera blur for motion resulting from animation of the Extruded Text. Enabling Motion Blur will noticeably slow down the preview and render time for the effect, so it is recommended to enable it as a last step when designing the effect. Also, notice that the Enable Motion Blur checkbox parameter is keyframable so it is possible to only enable it for the frames within the effect including significant motion – thereby speeding up preview of some areas and speeding up the overall final render of the effect.
Using Host 3D Camera and Lights
Some hosts support direct integration with the host’s native 3D Camera (AE, Nuke, HitFilm) and 3D lights (AE and HitFilm).
By default the 3D object is lit by a single built-in point light centered and positioned in front of the extrusion and by any host lights enabled in the comp if Use Comp Lights is enabled and it is a supported host.
If both the Use Comp Lights and the Use Built-in Light checkboxes are enabled it can be lit by both the BCC built-in light and the host native comp lights.
When using AE lights, the 3D object will properly support all host light types (Point, Spot, Ambient, or Parallel)
There is information specific to using the Built-In Light controls later in this document.
If an active host camera is present in the comp, the 3D object can be viewed from the perspective of the hosts 3D camera by enabling the Use Comp Camera checkbox in supported hosts.
If there is more than one camera track spanning the current frame, and the host comp window set to “Active Camera” the 3D object will use the perspective of the camera whose track is nearest the top of the timeline. If there are multiple cameras and the hostcomp window is set to use a specific camera (other than the topmost camera) the 3D object will use the camera specified by the comp window. In this sense the filter simply follows the behavior of 3D layers (e.g. in AE).
There is information specific to using the Built-In Camera controls later in this document.
Extrusion
The Extrusion parameter group includes controls for adjusting the shape (geometry) of the extruded text object.
The Extrusion Depth parameter defines the depth of the side face that extends between the front and back of the extruded text.
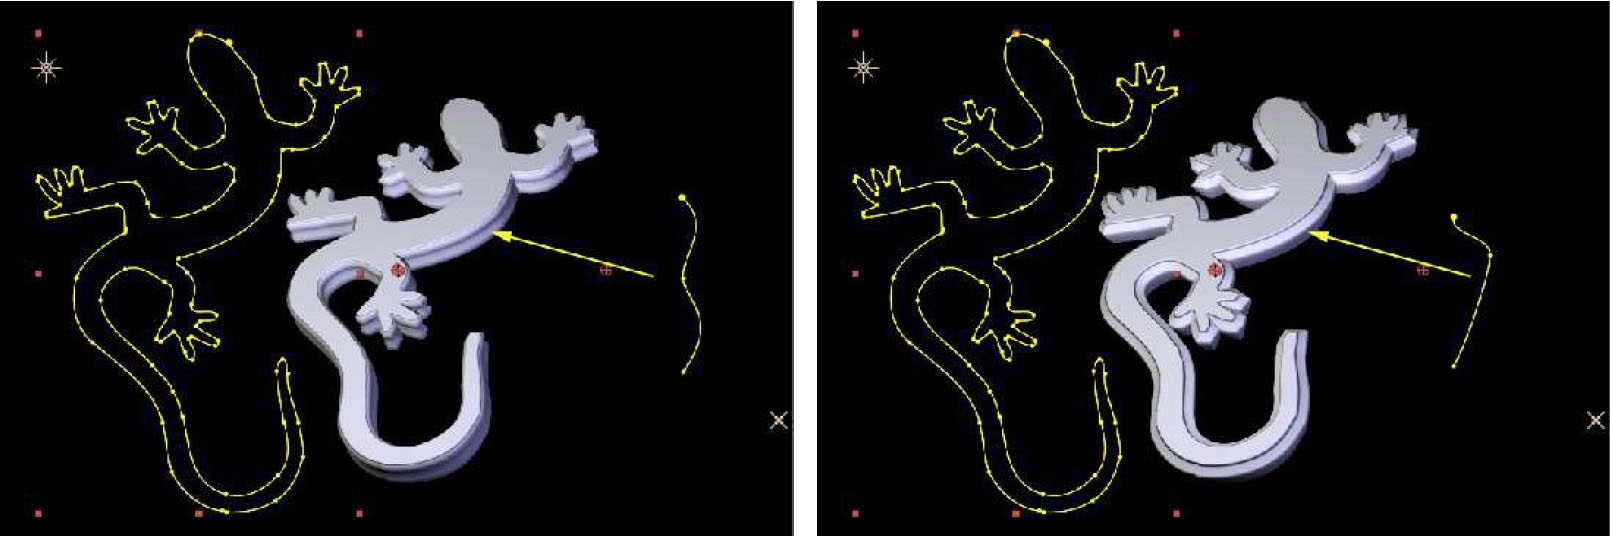
The Bevel Style popup menu offers choices for Straight, Convex, Concave, Saved Preset, or Host Path. The Host Path choice allows for creating a custom bevel based on an AE mask, and the Saved Preset choice allows for using a preset created by saving a bevel style based on an AE mask.
The Bevel Amount parameter determines the depth of the edge bevels for the extruded text.
The Back Bevels checkbox enables edge bevels between the side and back face of the extruded text.
The Side Style popup menu offers choices of Straight, Saved Preset, or Host Path. The Host Path choice allows for creating a custom side face based on an AE mask, and the Saved Preset choice allows for using a preset created by saving a side style based on an AE mask.
The Bevel Host Path and Side Host Path popup menus are where it is possible to select an AE mask as a custom extrusion curve (if Bevel Style or Side Style is set to Host Path, other wise these controls are disabled).
The Bevel Saved Preset and the Side Saved Preset controls are where you can access bevel or side preset styles that have been saved based on AE Masks. To save such a bevel or side style preset the Bevel Style or Side Style popup menu must be set to Host Path and an AE mask must be selected as the Host Path. Once the preset is saved, it will work even in effects that do not include
that particular AE Mask.
- Note: That for an AE Mask to be accessible to the filter it must be applied to the same AE layer the filter is applied to, and for the mask to have the expected effect as a custom bevel or side curve it must be an open path. The images below show various AE mask curves applied to the side face of an Extruded Spline.
Material
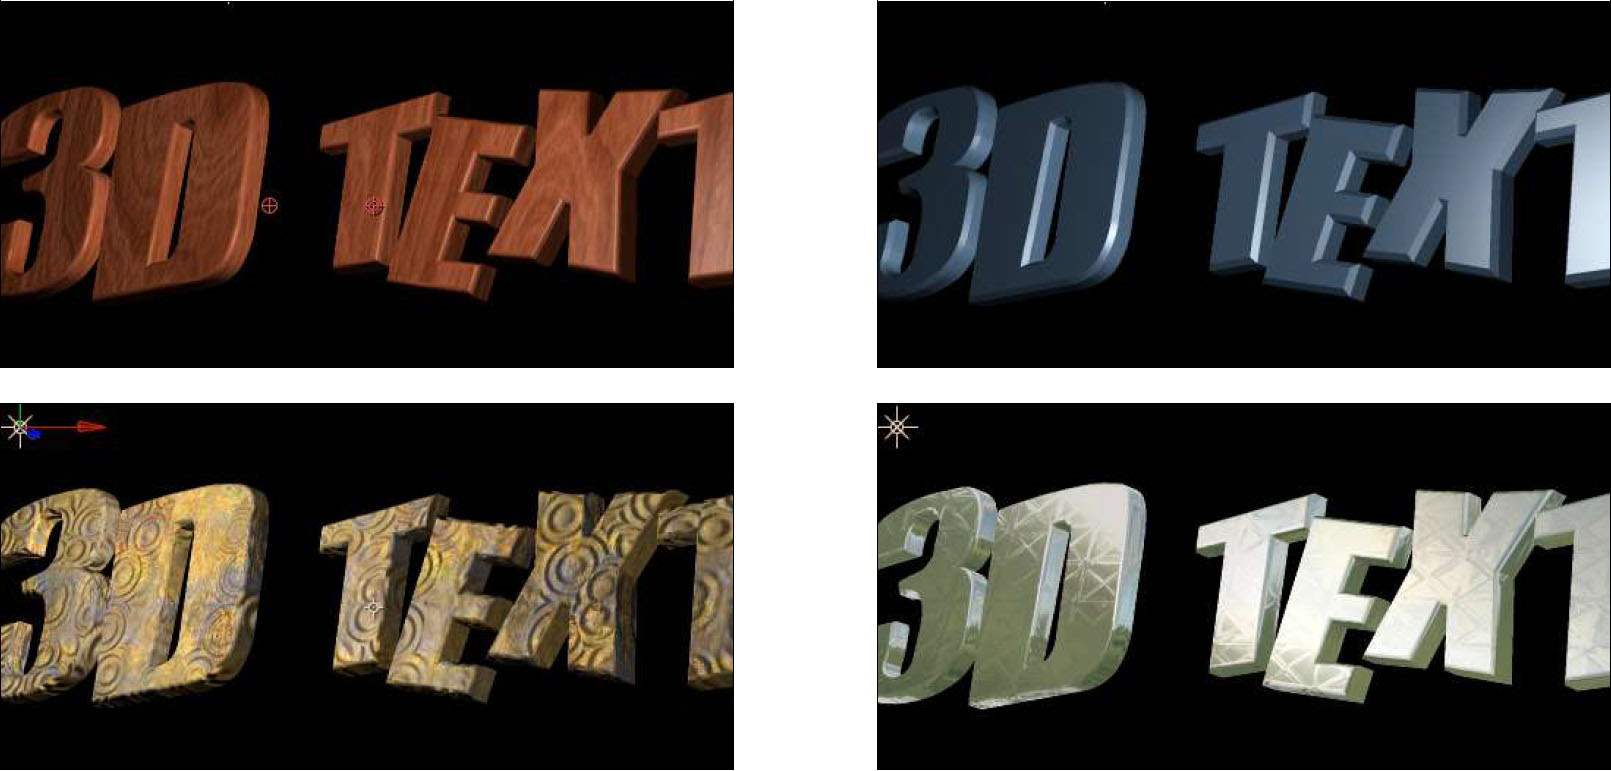
Material parameters are used to determine the appearance of the surface(s) of the Extruded Text.
The Ambient Intensity parameter controls the ambient light amount on all materials for an extruded object, unless there is an active AE Ambient Light track in the comp, in which case the ambient light is controlled there and Ambient Intensity will have no effect.
The Material Count popup menu determines which faces of the extrusion share materials and which of the 4 Material parameter groups are used (and have their controls enabled) is determined by this popup menu.
The Material Preset control is where it is possible to save or apply preset materials. Material Presets include all parameters of a material except Texture Layer or Bump Layer (because these parameters refer to other layers in the AE comp and so are not available in all contexts the style may be used). To save a material preset style including texture or bumps, use a texture or bump map from the Texture File or Bump File popup menu since these files are accessed directly from disk as a resource of the plugin so that they will be available in whatever context the style is applied.
The Front Texture File popup menu allows for selecting a texture to map to the surface of the 3D object. Texture maps accessed through this menu can be saved as part of preset styles (Material presets, Extrusion presets, Filter master presets). The texture maps pre-installed in this menu are graphics designed to simulate materials like stone, tiles, metal, and wood – and they are designed to seamlessly tile so that when they are used the surface should look continuous at any scale, rotation, or position offset. The pre- installed texture files are from the Genetica Texture Packs created by Spiral Graphics [http://www.spiralgraphics.biz/] It’s possible to add more textures to this menu by placing them in the correct directory on your hard drive. The directories for the Texture Files menu graphics are as follows ; On Mac OS [Macintosh HD\LibraryApplication Support\BorisFX\BCC 6.0\Styles**Custom Textures**] and on Windows [C:Program Files\Boris FX, Inc\BCC Presets 6**Custom Textures**]. The Texture File feature supports several still graphic formats such as ; psd, bmp, png, tif, tga, pct, jpg, gif.
The Texture Layer popup menu is where it is possible to select an alternate layer within the AE comp to use as a texture mapped to the surface of the 3D object. This allows for using any AE supported media files (including moving video) as a texture map.
The Texture Alpha popup menu allows for specifying how to interpret (or even disable) the alpha channel on a texture map.
The Texture Strength parameter allows for fading a texture map which reveals some of the diffuse color underneath. At a value of 1 the texture map is fully opaque and it fades as the value is lowered.
The Ambient, Diffuse, and Highlight color parameters determine the colors for the material.
The Opacity parameter controls the opacity of the material. When using partially transparent materials, enabling the Transparent Object checkbox in the Render group may create a more realistic looking effect.
The Highlight Amount parameter controls how much of a highlight will be reflected on the surface of the object. There is more of a highlight at lower values and less at higher values. A visible highlight is also dependent on the Highlight color chip being adjusted to a color with some obvious luminance.
The Specular Strength parameter controls how intense (shiny) the highlight is.
The Front Bump File popup menu allows for selecting a bump map for the surface of the 3D object. Bump maps accessed through this menu can be saved as part of preset styles (Material presets, Extrusion presets, Filter master presets). The menu accesses graphics from the same directory as the Texture File popup menu.
The Front Bump Layer popup menu is where it is possible to select an alternate layer within the AE comp to use as a bump map on the surface of the 3D object. This allows for using any AE supported media files (including moving video) as a bump map.
The Bump Strength parameter controls the intensity of the bumps generated by the bump map.
The Shift X and Y, Scale X and Y, and Rotate parameters allow for offsetting the position, scaling, and rotating the texture and bump maps.
The Reflection popup allows for selecting a reflection map for simulating a reflection on the surface of the 3D object.
The Reflectivity parameter controls how much of the reflection map is mixed in to the look of the material.
The Reflection Scale parameter scales the appearance of the reflection map.
The Two-sided Lighting checkbox causes a material to display the effects of lights on both sides when the checkbox is enabled. This can be useful for achieving specific types of effects.
Transformations
The Transformations parameter group includes controls for Rotating, Positioning, and Scaling the 3D object
The Orientation X, Orientation Y, and Orientation Z parameters offer an initial set of rotation controls for orienting the 3D object. Used in conjunction with the Rotate X, Y, and Z controls it is possible to create animations that would not be possible with a single set of rotation controls.
The Rotate X, Rotate Y, and Rotate Z parameters offer rotation controls for the 3 3D axes, and the order in which they are applied to the object matches the X, Y, and Z Rotation of AE 3D layers making it easy to match the rotations from such AE layers and even to link the rotation parameters of the 3D object to other layers using AE expressions
The Position X, Y, and Z parameters offer world based position controls for the Extrusion
The PreRotate Position X, Y, and Z parameters offer object based position controls for the Extrusion
The Master Scale parameter increases or decreases the X, Y, and Z scale of the Extrusion
The individual Scale X, Y, and Z parameters offer individual control of Scale along each axis. It’s possible to offset the individual scale values to change the scale ratio and then to globally scale the result while maintaining that ratio by using the Master Scale parameter. Be aware that the Scale Z parameter is not the commonly desired way to increase the depth of the extrusion – there is another parameter offered in the Extrusion group which scales only the extrusion face (not bevels etc.) which is more commonly used for this purpose.
The Opacity control in the Transformations group controls the opacity of all materials for the 3D object. When using partially transparent materials, enabling the Transparent Object checkbox in the Render group may create a more realistic looking effect. Keep in mind that this is a different effect from fading the opacity for the AE layer the filter is applied to which is the recommended way of uniformly fading the filter effect.
Pivot X, Y, and Z allow for offsetting the pivot point around which the 3D object rotates, unless Lock Pivot to Position is enabled in which case these controls are disabled and the Pivot point follows the position point.
Built-in Light (1-3)
The Built-in Light parameter groups include controls for light sourcea that can be controlled from within the filter. Additional lights can be added by creating host light tracks in hosts that support full integration with their native 3D lighting systems such as AE and HitFilm. The Built-in Light offers 3 Light Types to choose from: Point, Spot, and Spot + Shadows
Point: A Point light shines from the source in all directions and includes controls for X/Y and Z Position, Color, Intensity, and Attenuation. Attenuation lessens the intensity of the light rays as they extend from the source, allowing for the creation of a less directional distant diffuse light, similar to sunlight.
Spot: A Spot light shines from the source toward a target (specified by Spot X/Y and Z parameters) and is limited to a cone defined by the Angle parameter and with edges softened by the Fall Off parameter.
Spot + Shadows: A Spot + Shadows light is identical to a Spot Light, except that it is also capable of casting shadows. The shadows it casts are limited to self-shadowing between 3D objects generated by the filter. The Width parameter can appear to soften the cast shadow edges. The cast shadows do not support partial transparency – meaning the shadows will appear as if the object being shadowed is fully opaque or fully transparent – and the Alpha Shadow Tolerance parameter defines the threshold for what the shadow considers opaque or transparent.
Built-in Camera
The Built-in Camera parameter group includes parameters that affect the viewing perspective of the 3D object whenever the Use Comp Camera checkbox is not enabled. When using the Built-in Camera, there are 3 options for what kind of Camera Model is used: Position, Orbit, or Pan.
Zoom: all 3 Camera Models include a Zoom control for zooming the viewing perspective. By using a low Zoom value, and moving closer to the 3D object with the Position Z parameter (or Orbit Radius or Pan Distance depending on the Camera Model), it’s possible to simulate a more wide angle lens perspective.
Position Camera: offers Position X, Y, and Z control for positioning the camera in 3D space, and offers 2 Camera Orientation
options: Free or Target.
- When using Free Camera Orientation, the direction the camera is pointing is determined by the Tumble, Spin, and
Rotate parameters.
- When using Target Camera Orientation, the camera will always point in the direction of the target as determined by the
Target X, Y, and Z parameters.
Orbit Camera: provides a convenient camera perspective for always facing the center (default Position of the 3D object) while allowing for simple orbit moves around the center using the Orbit Tumble, Orbit Spin, and Orbit Rotate parameters. Distance from the Center is determined by the Orbit Radius parameter.
Pan Camera: offers simple controls for panning horizontally using the Pan Advance parameter, and moving the camera in or out with the Pan Distance parameter.


