Primatte
Description
Using a unique algorithm based on three multi-faceted polyhedrons floating in RGB colorspace to isolate color regions, Primatte keys out and replaces blue or green screens with transparency to facilitate background replacement. 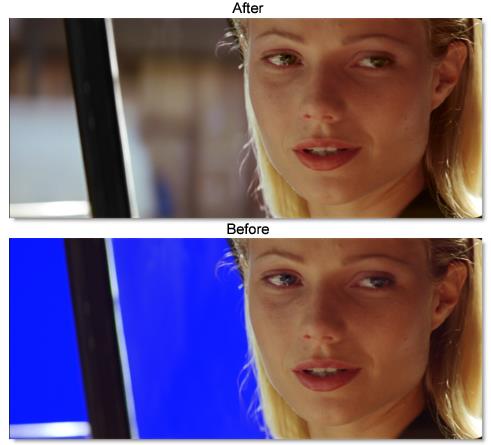
Node Group
Key.
Go to the Primatte tutorial to see how it works.
Understanding Primatte
Primatte constructs a space described by three concentric partial spheres. The space is created by finding color values in a 3D axis, with each axis being a primary color of red, green, or blue. These three shells separate four zones.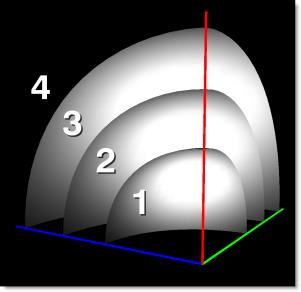
Zone 1
Inside the small polyhedron are all the background pixels. They are 100% transparent and have no background spill suppression. Pixels in the small polyhedron will appear black if you view the matte output.
Zone 2
Between the small and medium polyhedrons are the edge transition pixels which would appear gray when viewing the matte output. These are a blend of foreground and background pixels transparently blended with spill suppression applied.
Zone 3
Between the medium and the large polyhedron are the pixels in the center of your foreground objects. These have to stay 100% foreground, but do need spill suppression applied.
Zone 4
Zone 4 is outside the large polyhedron. These are foreground pixels that are 100% foreground and do not need spill suppression.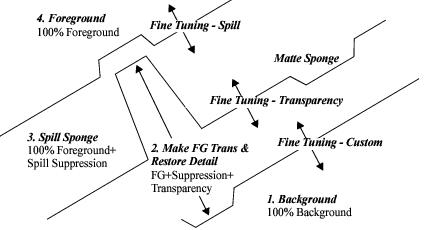
As you scrub on an image, Primatte pushes and pulls on the shells based on which function you use, creating dents and bumps on the shells. The position of the dents is determined by the pixel values as located on the RGB axis.
Visualizing a Primatte key in 3D color space would look something like this: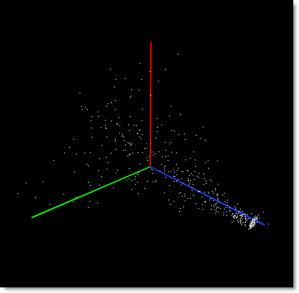
Pixels are distributed according to their color values and are manipulated based on their positioning within that 3D space.
Workflow
• Step 1 - Auto Analyze
• Step 2 - Clean Background
• Step 3 - Clean Foreground
• Step 4 - Hybrid Matte
• Step 5 - Spill Suppression
• Step 6 - Matte Refinement
• Step 7 - Compositing the result
Step 1 - Auto Analyze
Click the Auto Analyze button so that Primatte can automatically compute the best starting point for the key. Once the initial target for the key is set, you are free to modify and refine the result. Auto Analyze uses advanced image analysis tools to identify blue/green background colors, estimate foreground color properties, and then generate an initial key which is ready for fine tuning as necessary. Think of it as a short cut to jump start the sampling process that would otherwise need to be done from scratch.
In the event that Auto Analyze does not provide a good starting point, such as when keying colors other than blue or green, use Sample Background and then click and drag over the background. Sampling the background is a process that only needs to be done once, because multiple samples will not produce an additive result. Each time you Auto Analyze or use the Sample Background mode, it resets the sample.
Step 2 - Clean Background
Select Clean Background and click and drag over any gray pixels in the background to make them fully transparent. For manual control or difficult to key backgrounds, connect a Roto node to the Garbage Matte input where an animated shape can remove unwanted background elements.
Step 3 - Clean Foreground
Select Clean Foreground and click and drag over any gray pixels in the foreground to make them fully opaque. For manual control or difficult to key foregrounds, connect a Roto node to the Holdout Matte input where an animated shape can fill in the foreground.
Step 4 - Hybrid Matte
Images that contain blue or green hues that are very close to the key color can result in matte holes or less than desirable edges. The solution is to enable a second, Hybrid Matte to fill in any gray areas of the Primary Matte while still retaining gray values in the edge. You can do this by turning on the Hybrid > Enable option in the Advanced parameter group and then adjusting the blending of the two mattes with Hybrid Blur and Hybrid Erode.
Step 5 - Spill Suppression
Using the Spill Sponge, click and drag in the foreground image where you clearly see that the background key color is spilling over onto the foreground. Usually a few clicks is all that is necessary to remove the spill. To make spill adjustments in fine increments, Shift sample to increase spill colors and Alt sample to decrease spill.
Once the spill regions are isolated, the Spill parameter group offers additional controls. Depending on the individual shot, changing the Spill Replace mode to either Solid Color or Softened Background may produce a better result.
Step 6 - Matte Refinement
Using the Matte Sponge, click and drag in the foreground area to increase the matte opacity. To make matte adjustments in fine increments, Shift sample to increase the matte opacity and Alt sample to decrease opacity. Several controls are also available in the Matte Refinement group.
Step 7 - Compositing the Result
With the work to generate a key complete, the final step is to composite the keyed foreground over a replacement background. Oftentimes, the foreground and background elements have differences in color and lighting that need to be addressed. Primatte’s color correction can adjust the keyed foreground to match the background and light wrapping tools wrap the background image over the edges of the foreground to achieve a photorealistic composite.
Toolbar
When the Primatte node is selected, a number of different tools are selectable from the Toolbar at the top of the Parameters window.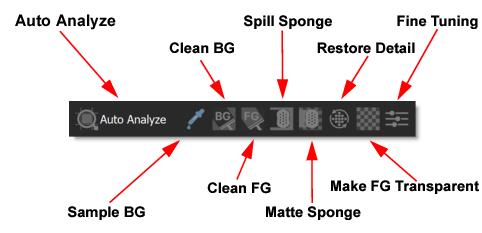
Controls
Create Matte
Auto Analyze
The first step in using Primatte, Auto Analyze automatically determines if a blue or green screen is used, removes it, and cleans the background and foreground noise. If the clip has even lighting and a correctly lit background color, the result will only need some spill removal to be complete.
Note: Each time you Auto-Analyze or use Sample Background, it resets the sample.
Sampling Method
A number of operations rely on a sample which is accomplished using either a line or rectangular sample.
Line (Drag)
As the cursor is dragged over the image, a line is generated. The pixels under this line are sampled when making adjustments.
Rectangle (Ctrl-drag)
As you Ctrl-drag over the image, a rectangle appears. The pixels within the shape are sampled when making adjustments.
Sample Background
Use Sample Background in the event that Auto Analyze does not provide a good starting point, such as when keying colors other than blue or green. Based on the sampled color, Primatte automatically determines the foreground areas and cleans the foreground noise.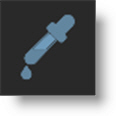
Clean Background
Removes noise from the background. The sampled pixels will become completely black.
Clean Foreground
Removes noise from the foreground. The sampled pixels will become completely white.
Spill Sponge
Removes the spill color from the foreground by suppressing it from the sampled area. To make adjustments in fine increments, Shift sample to increase spill colors and Alt sample to decrease spill.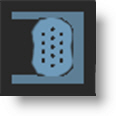
Matte Sponge
The sampled area becomes 100% foreground and only affects the matte. To make adjustments in fine increments, Shift sample to increase the matte opacity and Alt sample to decrease opacity.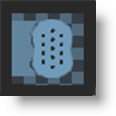
Restore Detail
Restores detail in semi-transparent background areas and is useful for restoring lost details like hair, smoke or cloth. This will be necessary if background sampling was over-aggressive. To make adjustments in fine increments, Shift sample to restore matte detail and Alt sample to remove detail.
Make FG Transparent
This makes foreground areas have more transparency and is useful for adjusting elements like clouds or smoke.
Fine Tuning
Precisely modifies the sampled area using the Fine Tuning > Spill, Transparency and Detail parameters.
Fine Tuning
Precisely modifies the sampled area. These controls are only available when the Fine Tuning icon is selected and an area is sampled.
Spill
Increases or decreases the amount of spill in the current sample.
Transparency
Increases or decreases the amount of transparency in the current sample.
Detail
Increases or decreases the amount of detail in the current sample.
Adjust Light
Compensates for unevenly lit blue and green screens by evening out the colors.
Enable
Enables/disables Adjust Light.
Strength
Controls the strength of the Adjust Light effect. View > Adjusted Light while changing the Strength.
Spill
Control the type and strength of the spill correction.
Mode
Complement
Each color identified as spill is nudged toward its natural complement.
Solid Color
Each color identified as spill is nudged toward a uniform solid color.
Softened Background
Each color identified as spill is nudged toward a color taken from a softened version of the background image at the same location.
Replace Color
Defines the solid color towards which spill regions are pushed when the Spill Replace Mode is Solid Color.
Replace Amount
The amount of spill replacement.
Secondary Spill
Enable
Enable/disable secondary spill removal.
Screen Type
Sets the spill color.
Auto
The spill color is automatically detected based on the screen color.
Green
Green is used as the spill color.
Blue
Blue is used as the spill color.
Red
Red is used as the spill color.
Bias
Adjusts the replacement color tones.
Bias Fixed Channel
Enables/disable the Bias Fixed Channel.
Amount
The amount of spill removal.
Matte Refinement
Various controls to manipulate the matte.
Enable
Enables/disables the Matte Refinement parameters.
Black Clip
Blacks in the matte are made blacker by increasing this value. As the value increases, more values are clipped to black. This is helpful for getting rid of unwanted gray areas in what should be the black part of the matte.
White Clip
Whites in the matte are made whiter by increasing this value. As the value increases, more values are clipped to white. This is helpful for getting rid of unwanted gray areas in what should be the white part of the matte.
Shrink+Grow
Shrinks or grows the matte. Negative values shrink and positive values grow the matte.
Blur
The matte is blurred.
Wrap
Helps blend the foreground into the background by making the background wrap into the foreground edges without completely losing the edge. The edge of the foreground starts to become transparent.
Invert
Inverts the matte.
Edge Cleaner
Provides spatial and temporal control over matte edges.
Enable
Enables/disables the Edge Cleaner parameters.
Radius
Sets the area to be adjusted.
Temporal Smoothing
Smooths the result over time.
Alpha Contrast
Adjusts the contrast of the matte.
Strength
The amount of edge cleaning.
Edge Sensitivity
The sensitivity of the edge pixel selection.
Holdout Matte
A Holdout Matte defines foreground areas that should not be keyed out. The input can come from an existing source channel or a node like Roto, and the result is combined with the output matte.
Channel
Determines which channel to use as the Holdout Matte source.
Red
Uses the red channel.
Green
Uses the green channel.
Blue
Uses the blue channel.
Alpha
Uses the alpha channel.
Luminance
Uses the average luminance of the RGB channels.
Blend
Sets the blend mode for combining the Holdout Matte with the Primary Matte.
Add
The Secondary Matte is added to the Primary Matte.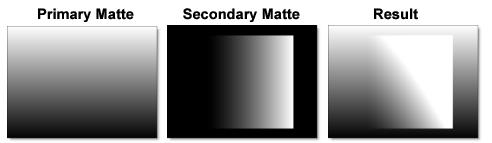
Subtract
The Secondary Matte is subtracted from the Primary Matte.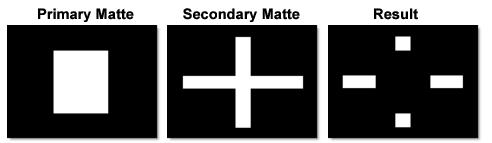
Multiply
Produces a result where there is a union of the Primary and Secondary Mattes.
Screen
This looks kind of like the Add blend mode, but highlights are retained as opposed to being burnt out.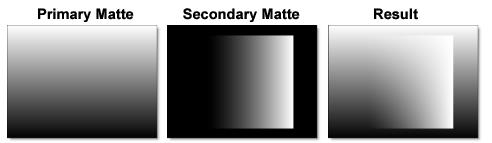
Difference
Produces a result where a value exists in the Primary and Secondary Mattes, but not in both.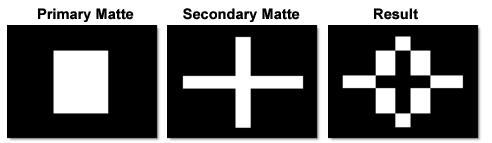
Darken
Compares the two mattes and takes pixels with the lower value.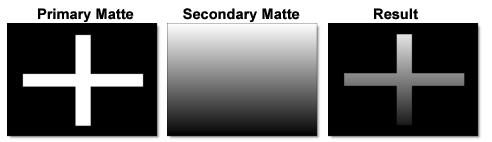
Lighten
Compares the two mattes and takes pixels with the higher value.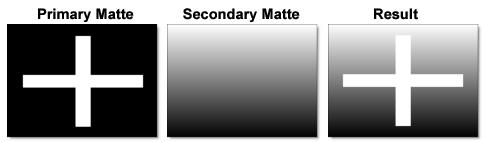
Amount
Sets the opacity of the Holdout Matte.
Garbage Matte
A Garbage Matte defines background areas that should be keyed out. The input can come from an existing source channel or a node like Roto, and the result is combined with the output matte.
Channel
Determines which channel to use as the Garbage Matte source.
Red
Uses the red channel.
Green
Uses the green channel.
Blue
Uses the blue channel.
Alpha
Uses the alpha channel.
Luminance
Uses the average luminance of the RGB channels.
Blend
Sets the blend mode for combining the Garbage Matte with the Primary Matte. See the Blend options for more information.
Amount
Sets the opacity of the Garbage Matte.
Color Correct
Enable
Enables/disables the Color Correct parameters.
Hue
Rotates the hue.
Saturation
Adjusts the saturation. Positive values saturate, negative values desaturate.
Brightness
Adjusts the luminance. Positive values brighten, negative values darken.
Contrast
Adjusts the contrast. Positive values increase contrast, negative values decrease contrast.
Gamma
Adjusts the gamma. The gamma adjustment leaves the white and black points the same and only modifies the values in-between. Positive values darken the image, negative values lighten the image.
Red
Adds or subtracts red.
Green
Adds or subtracts green.
Blue
Adds or subtracts blue.
Light Wrap
Helps blend the foreground into the background by making the color of the background wrap into the foreground edges without completely losing the edge.
Enable
Enables/disables the Light Wrap parameters.
Source
Selects the Light Wrap source.
Background Input
Uses the background input.
Solid Color
Uses a solid color.
Softness
Softens the edges of the border image used for light wrapping. Available when Source is set to Background Input.
Color
Sets the color of the light wrap. Available when Input is set to Solid Color.
Lightness
The brightness of the light wrap.
Width
The width of the light wrap.
Blend
Sets the blend mode for compositing the light wrap. See the Blend options for more information.
Mix with Original
Blends the original and affected result.
Light Wrap Spill
Composites the light wrap only within spill areas.
Enable
Enables/disables the Light Wrap Spill parameters.
Source
Selects the Light Wrap Spill source.
Background Input
Uses the background input.
Solid Color
Uses a solid color.
Softness
Softens the edges of the border image used for light wrapping. Available when Source is set to Background Input.
Color
Sets the color of the light wrap. Available when Input is set to Solid Color.
Lightness
The brightness of the light wrap.
Blend
Sets the blend mode for compositing the light wrap. See the Blend options for more information.
Mix with Original
Blends the original and affected result.
Edge Color Correct
The Edge Color Correct parameters allow you to color correct only the edge of the foreground. It is a good idea to take a look at your Edge Matte in the View Menu so that you can see what your edge actually looks like.
Enable
Enables/disables the Edge Color Correct parameters.
Width
Determines the width of the edge matte.
Hue
Rotates the hue.
Saturation
Adjusts the saturation. Positive values saturate, negative values desaturate.
Brightness
Adjusts the luminance. Positive values brighten, negative values darken.
Contrast
Adjusts the contrast. Positive values increase contrast, negative values decrease contrast.
Gamma
Adjusts the gamma. The gamma adjustment leaves the white and black points the same and only modifies the values in-between. Positive values darken the image, negative values lighten the image.
Red
Adds or subtracts red.
Green
Adds or subtracts green.
Blue
Adds or subtracts blue.
Advanced
Hybrid
Some images contain blue or green hues that are very close to the key color which can result in matte holes or less than desirable edges. The solution is to enable a second, Hybrid Matte to fill in any gray areas of the Primary Matte while still retaining gray values in the edge. The blending of the two mattes is achieved with the Hybrid > Blur and Erode parameters.
Enable
Enables/disable hybrid keying mode.
Blur
Blurs the hybrid matte.
Erode
Shrinks the hybrid matte.
BG Color – KF Only
In cases where key color or lighting changes significantly over time, this parameter can be keyframed. The overall shape of the 3D key sampling is preserved, but the shape is repositioned in color space to account for the color change.
Primatte Preview
The Primatte Preview window helps visualize the operation of the Primatte polyhedral slicing algorithm.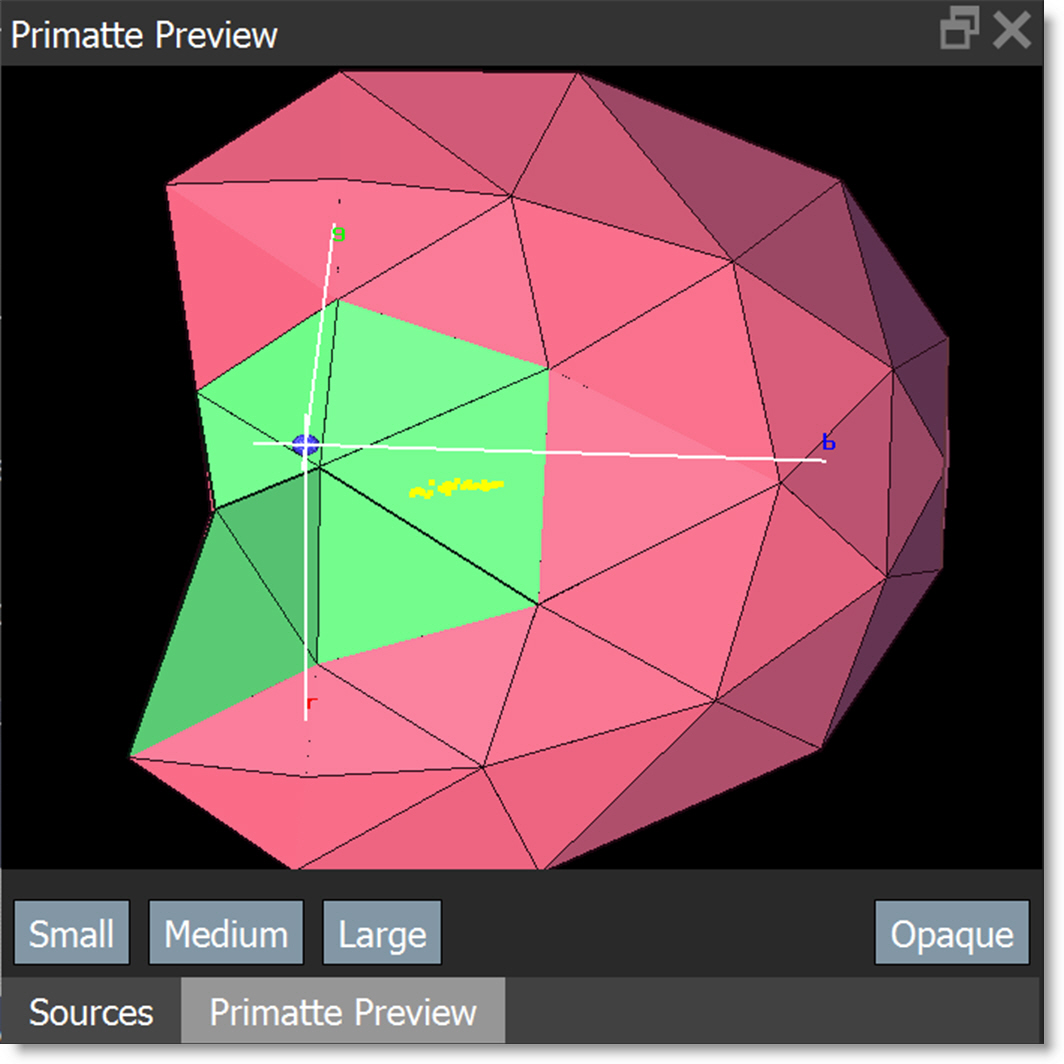
Small
Enables/disables the small polyhedron.
Medium
Enables/disables the medium polyhedron.
Large
Enables/disables the large polyhedron.
Opaque
Changes the polyhedrons from translucent to opaque so it is easier to see the clusters of color dots against the polyhedron surface.
Primatte Preview Keyboard Shortcuts
Shortcut | Action |
|---|---|
Click-drag | Rotates the polyhedron |
Shift-drag-up/down or Scroll Wheel | Zooms the polyhedron in/out |
Middle mouse-drag or Ctrl-drag | Pans the polyhedron |