 |
 |
Overview
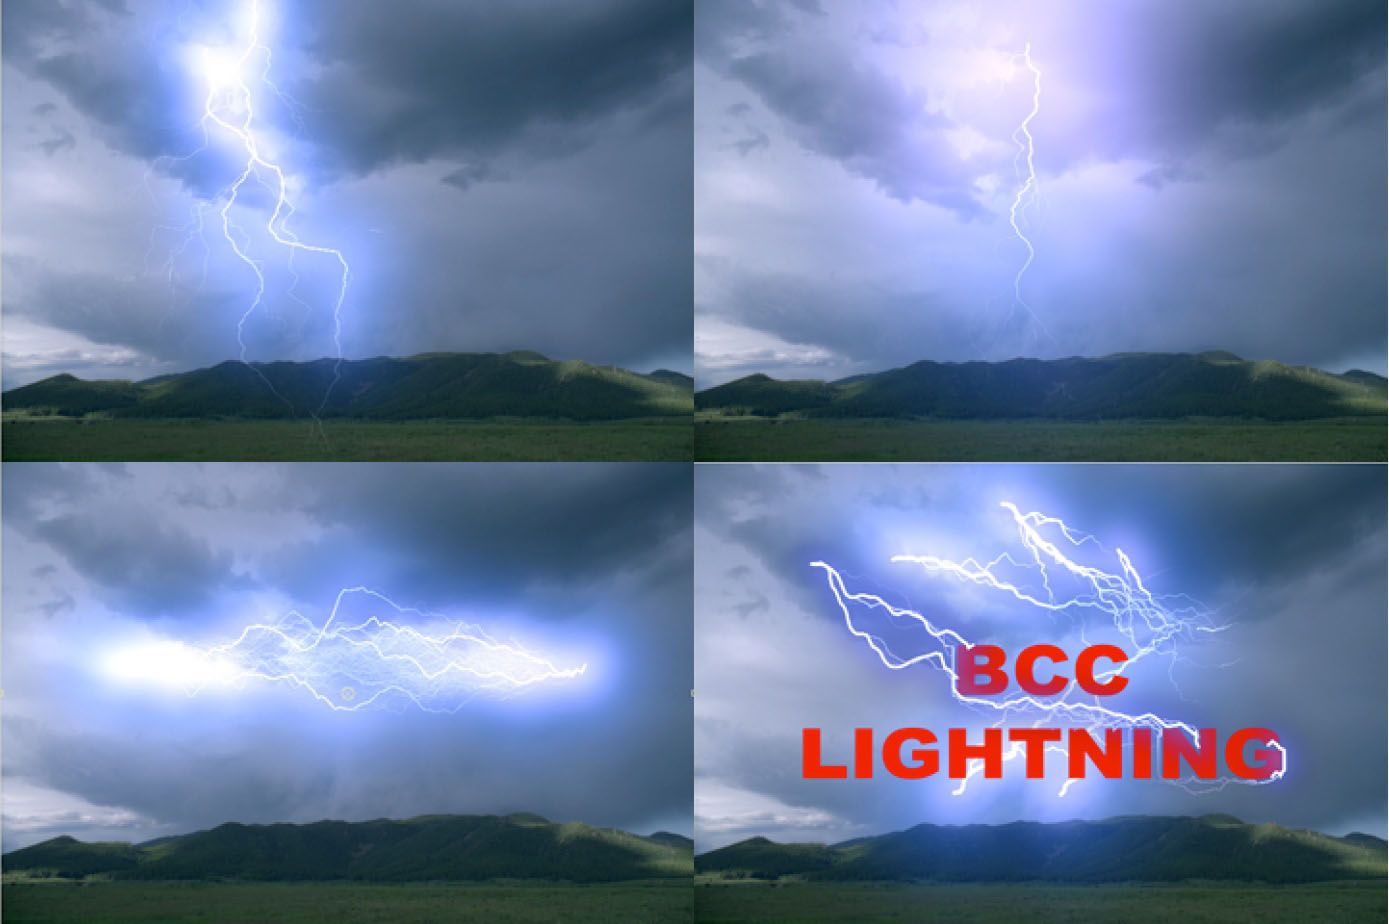
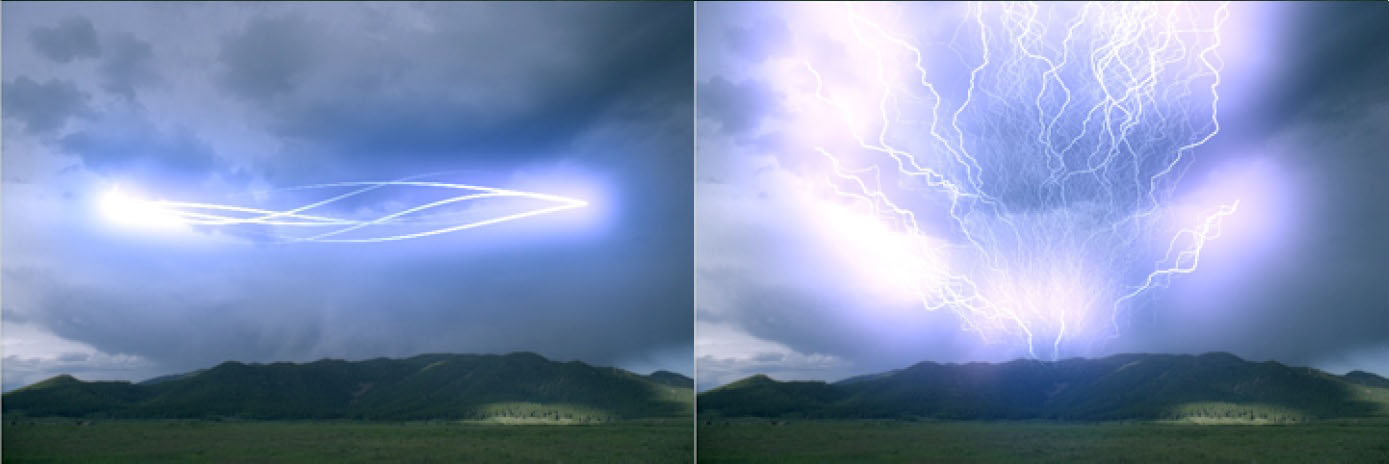
The BCC Lightning filter is designed to generate photo-realistic lightning bolts and plasma streams that will automatically flash or move over the image to which the filter was applied. This filter is based on OpenGL hardware assisted rendering technology and will deliver a high level of performance when paired with a supported graphics card. The filter included parameters to control and shape the overall appearance of the bolt as well as the bolt type and how it will flash or move on the viewer screen. The filter includes many presets that make fast work of setting up the filter; each of the factory installed settings can be modified by the user and then saved as a custom preset, which can be used on any project and from within any supported host.
The flashing animation of the bolt is handled with both the Flash Speed and Flash Amount parameters (these two parameters are used in conjunction with each other to control the on-off flashing of the lightning.) The Motion Control Group is used to handle the general movement of the lightning bolt(s) and includes controls for the lightning bolt Oscillation, which can be described as the arc through which the bolts can swing) the Speed (the actual speed of the oscillation / swing) and Duration (the amount of time a lightning strike takes to complete.)
There is also a group called Obstacle Control, which enables the lightning bolt(s) to collide and interact with the alpha or luma channel from any clip that is present in the timeline.
Function
Presets and Common Controls
BCC filters come with a library of factory installed presets plus the ability to create your own custom presets and preview them with the BCC FX Browser™.
BCC filters also include common controls that configure global effect preferences and other host-specific effect settings.
For more information about working with presets and other common controls, Click Here.
Type: This pop-up is used to select the type of lightning and includes the following 6 options.
- source to dest – lightning bolt flows from the source point to the destination point. the lightning bolt is always displayed in full. branches are omni-directional
- direction – lightning bolt similar to the source-to-dest type but branches flow in a more singular direction
- strike – bolt appears and then disappears over time dictated by the value set in the duration parameter
- two way strike – two bolt origin points that generate lightning that meets in the middle
- vertical – generates lightning that is always vertical by ignoring the destination point
- bouncing – generates omni-directional lightning, similar to a real-world sheet lightning effect
Lightning Number: Amount of bolts.
Seed: Sets the random number generator that controls the starting point of the look of the lightning source xy – sets the source point of the lightning strike.
Source Radius: Sets the radius of the starting point of the lightning strike – larger values will cause the starting point to move randomly and will also spread multiple bolts along a wider starting arc.
Dest XY: Sets the destination point of the lightning strike.
Dest Radius: Sets the radius of the destination point of the lightning strike – larger values will cause the destination point to move randomly and will also spread multiple bolts along a wider destination arc.
Bouncing Length: Sets the maximum length along which the lightning bolt can travel.
Bouncing Count: Sets the amount of bolts that are in the bounce / sheet lightning strike.
Width: Sets the width of the lightning bolt core.
Color: Sets the color of the lightning bolt and forks.
Flash Speed: Sets the speed or frame rate of the lightning pulsing on and off the screen.
Flash Amount: Sets the amount of flashing that occurs during the strike. a value of 100 causes the lightning to completely appear and disappear from the image as it flashes, while a value of 0 renders a bolt that is always visible.
Core Wiggliness: Sets the amount of turbulence in the bolt core. high values cause the bolt to appear more kinked than lower values.
Core Wiggly Amount: used in conjunction with the core wiggliness parameter to control the turbulence in the lightning bolt. higher values cause the bolt to appear more kinked than lower values.
Detail: Sets the level of complexity of the lightning bolt.
Taper Percent: Sets the position point along the bolt and forks where the tapering begins.
Taper Amount: Sets the amount of the visible taper that is applied to the bolt core and forks starting at the value determined by the taper percent parameter value.
Motion Control Group
Used to control the motion of the lightning strike.
Oscillation: Sets the maximum width of the arc that the middle of the bolt can swing through.
Speed: This sets the velocity of the bolt as it swings through an invisible arc. higher values cause the bolt to move faster than lower values.
Strike on: With this parameter enabled, the lightning bolt will move from the start point to the end point over the course of the timeline based on the value set in the duration parameter.
Duration: Sets the amount of frames that the strike takes to complete. this is total time of the effect, which includes the strike on and fade off.
Fork Control Group
Used to control the lightning forking.
Max Level: Sets the maximum amount of secondary branches that are generated along the bolt core.
Max length: Sets the maximum length of any secondary branch off the bolts main core.
Max Width: Sets the maximum width of any secondary branch off the bolts main core.
Max Density: Sets the amount of tertiary branches that are generated off of the secondary branches.
Max Angle: Sets the maximum angle that any branch can take.
Wiggliness: Sets the amount of turbulence in the branches. High values cause the bolt to appear more kinked than lower values.
Wiggly Amount: Used in conjunction with the core wiggliness parameter to control the turbulence in the branches of the lightning bolt. Higher values cause the branches to appear more kinked than lower values.
Glow Control Group
Used to control the glow of the lightning bolt.
Inner Width: Sets the width of the inner glow.
Inner Color: Sets the color of the inner glow.
Inner Opacity: Sets the opacity of the inner glow.
Outer Width: Sets the width of the outer glow.
Outer Color: Sets the color of the outer glow.
Outer Opacity: Sets the opacity of the outer glow.
Obstacle Control Group
Used to control how the lightning interacts with the target layers alpha or luma information obstacle type pop-up with 3 options:
- none – the layer to which the filter is applied has no effect on the lightning that is being generated
- alpha – feeds the alpha channel information to the lightning filter
- luma – feeds the luma channel information to the lightning filter
Obstacle Amount: Sets the amount of pixel information from the selected channel (alpha or luma) that is used by the lightning.
Luma Threshold: Sets the 50/50 point of the channel that is being used as an obstacle map for the lightning bolt to run around.
Obstacle Layer: Pop-up that determines what layer is used as an obstacle for the lightning bolt.
Mix with Original: Blends the effect with the clip to which it was applied.
Apply Group
Used to control how the lightning effect is applied or composited over the original clip
Source Alpha Check box: Enable to composite using the original clip’s source alpha. disable to ignore the image alpha channel.
Apply Mode Pop-up: Sets the apply mode of the filter as it is composited over the original clip.
Apply Mix: Blends the apply mode selection back with the normal apply mode. a value of 100 does not blend and just uses the chosen apply mode, while a value of 0 blends the selected apply mode back to 100 percent normal.


