Overview
The Rays Dissolve filter creates a stylized volumetric lighting effect that automatically animates as your transition progresses to obscure the underlying dissolve between clips.
Function
Presets and Common Controls
BCC filters come with a library of factory installed presets plus the ability to create your own custom presets and preview them with the BCC FX Browser™.
BCC filters also include common controls that configure global effect preferences and other host-specific effect settings.
For more information about working with presets and other common controls, Click Here.
Layer to Reveal: This layer selection popup is not relevant when you have applied the filter as a true NLE-style transition and it will be hidden or disabled in that context. When applied as a normal “effect” as opposed to a transition, however, this menu is used to select the Incoming or Reveal layer for the transition. Setting separate Light Source Start and End locations allows for easily animating the center point of the rays during the transition without the need to set any keyframes.
Animation: Menu controlling what drives the animation of the transition.
- Auto – automatically generates a transition based on the transition length (when used as a transition) or the clip length (when used as a filter.)
- Percent Done – requires the user to set keyframes to control the transition progression. Can be useful in customizing the exact timing of the transition or when applying the filter as a stylized effect as opposed to a direct NLE-style transition.
Percent Done: Disabled/Hidden by default. When the Animation menu is changed to Percent Done then this slider can be manually keyframed to control the transition progression.
Light Source Start: Sets the location of the simulated light source on the X and Y axis. By default this location is static and defines the light source position for the full transition, but when using in combination with the Light Source End and Source Point Animation controls this allows for easy animation of the light source without the need to set any keyframes.
Light Source End: When the Source Point Animation controls are used this sets the second location of the simulated light source on the X and Y axis so that the position can animate over the course of the transition without the need to any keyframes.
Source Point Animation: Control the auto-animation (if any) of the light source point during the transition.
- Start -> End: Animate the light source from the Start position to the End position over the course of the transition.
- End -> Start: Animate the light source from the End position to the Start position over the course of the transition.
- Start: No auto-animation of the light source. Just use the Light Source Start location (which can still be manually keyframed for maximum control if desired).
- End: No auto-animation of the light source. Just use the Light Source End location (which can still be manually keyframed for maximum control if desired).
Intensity: Adjusts the peak intensity of the light source which occurs at the transition midpoint.
Ray Length: controls the peak length of the rays of light that emanate from the source at the transition midpoint.
Color: Determines what drives the color of the light rays.
- Colorize: Base the light ray colors on a color gradient specified with the standard BCC Gradient controls.
- Image: Derive the light ray colors from the source image pixel coloration.
Color Source Layer: When Color is set to Image, this layer selector allows control over which image is used to define the ray colors.
- Rays Source: Use the source image for the rays calculation which by default is the pre-dissolved mix of the source and reveal layers.
- Source Layer: Use the transition source or “outgoing” layer.
- Reveal Layer: Use the incoming layer.
**Gradient:**The BCC Gradient group enables complex, multi-color gradients for use in a variety of effect settings such as colorizing light sources.
For more information on the BCC Gradient tool, Click Here.
Apply Mode: Controls the blend mode used for compositing the generated light rays back onto the image. For information on the available apply modes, Click Here.
Light From: Determines which source color channel is used to create the extract the light rays and to calculate the intensities of the source pixels. Pixels with higher values in the selected channel are considered to have higher intensities.
- Luma, Red, Green, and Blue use the corresponding color channel and multiply it by the source alpha channel.
- Luma Inverse uses the inverted luma channel to make the light.
- Unmultiplied Luma and Alpha use the unmodified corresponding source channels.
- Luma Cartoon Edges and Alpha Cartoon Edges find edges in the corresponding source channel, apply outlines to the edges, and use the resulting image. When Luma Cartoon Edges or Alpha Cartoon Edges is chosen, Thickness/Intensity adjusts the width of the outlined edges, and Cartoon Threshold sets the value in the threshold above which pixels are considered fully on.
- Luma Edges and Alpha Edges find edges in the corresponding source channel and use the resulting image. When Luma Edges or Alpha Edges is chosen, Thickness/Intensity adjusts the intensity of the edges, and Edge Floor adjusts the sensitivity of the filter when searching for edges in the source. Lower values increase sensitivity.
Edges Group
The Edges Parameter group provides additional control if either Alpha Edges, Luma Edges, Alpha Cartoon Edge or Luma Cartoon Edges is chosen in the Light From menu. If any of the other settings are chosen, the parameters in this section have no affect and are disabled.
Thickness/Intensity: Controls the intensity of the edges when the Light From menu is set to Alpha Edge or Luma Edges. When theLight From menu is set to Alpha Cartoon Edge or Luma Cartoon Edges, Thickness/Intensity adjusts the thickness of the outside edges.
Smooth Details: Blurs the source image before the filter searches for edges. This blur does not appear in the output; it is used only in edge detection. This parameter only works if the Light From menu is set to Luma Edges, Alpha Edges, Luma Cartoon Edges or Alpha Cartoon Edges.
Edge Bloom: Blurs the edges before they are used to create the applied light. This parameter only works if the Light From menu is set toLuma Edges, Alpha Edges, Luma Cartoon Edges or Alpha Cartoon Edges. The following example shows Light from Luma Edges.
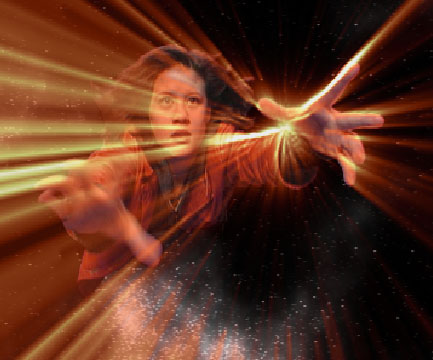 | 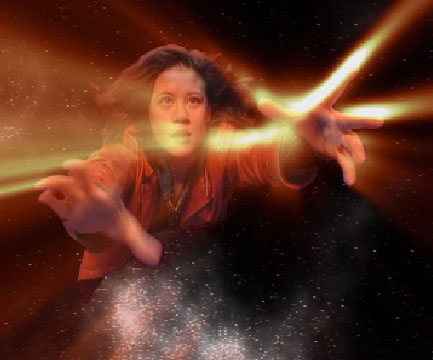 | 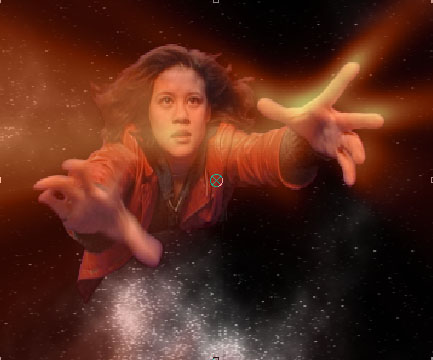 |
| Edge Bloom=0 | Edge Bloom=4 | Edge Bloom=7 |
Cartoon Threshold: Sets the value in the threshold above which pixels are considered fully on. This parameter is only available if the Light From menu is set to Luma Cartoon Edges or Alpha Cartoon Edges.
Texture Group
These parameters allow you to set and fine tune a light texture.
Texture: Allows you to select any combination of Shimmer and Strings. The options are Strings, Contracted Strings, Shimmer, Shimmer and Strings, Shimmer and Contracted Strings and Off. When Off is chosen, no texture is applied. The Shimmer controls create a texture that depends on the angle of the line from each point of the image to the light source. The Strings controls cause noise to affect the amount of attenuation the light rays experience as the emanate from the source and interact with the pixels they cross.
Two kinds of texture can be implemented, Strings and Shimmer.
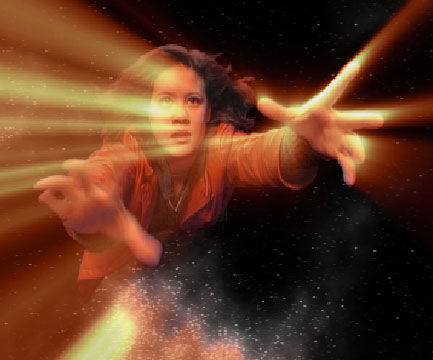 | 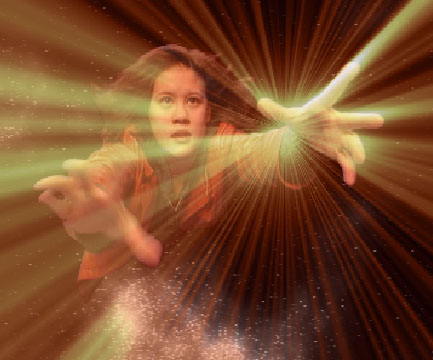 | 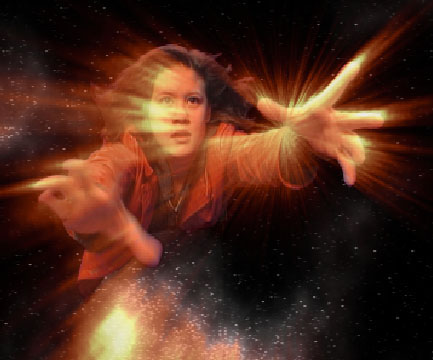 |
| No Texture | Shimmer | Strings |
Texture Intensity: Scales the selected textures. You can create a basic textured look by selecting one of the texture settings and adjusting its intensity. You can then fine tune its look by adjusting the parameters in the Texture Controls Group.
Stringiness: Controls the intensity of the texture when the Texture menu is set to one of the Strings options.
String Softness: Controls the softness applied to the string texture.
String Seed: Determines the value input to the random number used by the filter to adjust the strings. Adjust this value when you like the overall appearance of the effect but want to change the random configuration of the strings.
String Morph Rate: Controls the rate at which the strings evolve over time. This parameter can be animated, so you can animate from evolving strings to static strings.
Shimmer Intensity: Controls the intensity of the texture when the Texture menu is set to one of the shimmer options.
Shimmer Detail: Adjusts the amount of detail in the shimmer.
Shimmer Rotate: Rotates the shimmer pattern.
Shimmer Type: Determine the type of noise pattern used to generate the shimmer – Noise, Noisier, or Fractal.
Shimmer Seed: Determines the value input to the random number used by the filter to adjust the shimmer. Adjust this value when you like the overall appearance of the effect but want to change the random configuration of the shimmer.
Shimmer Morph Rate: Controls the rate at which the Shimmer pattern evolves over time..
Region Animation Group
Control an “envelope” around the rays which restricts the rays to a sub-portion of the image that automatically animates over the course of the transition to offer many variations on the overall feel of the transition.
Animation Type: Control whether any region envelope is applied and if so what style of auto-animation is used.
- None: Disables the Region Animation completely.
- Out: Region grows outward from the center.
- In: Region grows inward from the edges towards the center.
- Out & In: Region grows outward from the center during the first half of the transition and then shrinks back towards the center point during the second half of the transition.
- In & Out: Regions grows inward from the edges towards the center during the first half of the transition and then shrinks back towards the edges during the second half of the transition.
Region Type: Controls the geometric properties of the region.
- Circle: Region forms a circle around the image center point.
- Line: Region is defined by distance from a line, the orientation of which is set with the Direction parameter.
Softness: Controls how gradual the fade is along edge edges of the region. Higher values produce more gradual blends between areas inside versus outside the region.
Ease: Controls the smoothness of the blend between areas inside and outside the region. Lower values produce more linear change overs, while higher values have larger easing at the edges.
Color Group
Controls for color enhancements that auto-animate along with the transition – for example boosting (or reducing) the Brightness or Contrast during the peak of the transition to maintain greater contrast, boost intensity, or create stylized variations of the basic dissolve.
Brightness Peak: Defines the maximum change to the Brightness at the midpoint of the transition. Auto-animates so that it has no effect at the beginning or end of the transition and peaks in intensity at the middle.
Contrast Peak: Defines the maximum change to the Contrast at the midpoint of the transition. Auto-animates so that it has no effect at the beginning or end of the transition and peaks in intensity at the middle.
Extras Group
Contains additional advanced controls for further fine tuning the details of the effect.
**Create Rays From:**Determines how the rays are applied to the source and reveal layers.
- Dissolve – dissolve the two layers first and apply the rays to the output of the dissolve
- Source Layer – apply the rays prior to the dissolve, but only to the source layer
- Reveal Layer– apply the rays prior to the dissolve, but only to the reveal layer**
- Source and Reveal– apply the rays to both the source and reveal layers separately prior to dissolving between them**
- Off – disable the rays completely and just show the result of the basic dissolve
**A Intensity:**Scale the master intensity applied to the Source Layer.
**B Intensity:**Scale the master intensity applied to the Reveal Layer.
Animation Tuning Group
These parameters control the overall timing of the transition. On hosts which permit on-screen heads up display widgets (such as AE, Premiere, and Avid) you should never need to modify these sliders directly since they can be configured in a more convenient and intuitive manner by manipulating the widgets directly in your comp/preview pane. On hosts without heads up display widgets you can use these sliders directly to fine tune your animation timing, taking advantage of the View Ease Curve option to help visualize the animation rates.
**Ease In:**Control how quickly or slowly the rays effect increases at the beginning of the transition.
**Ease Mid:**Control the rate of change of the rays effect (how quickly it reaches its peak amount and how long it holds there) during the middle of the transition.
Ease Out: Control how quickly or slowly the rays effect amount decreases at the end of the transition.
Dissolve Duration: Control the timing of the underlying dissolve relative to the timing of the rest of the transition.
View Ease Curve: (Only visible/enabled in hosts that don’t support heads up display widgets for manipulating these controls directly on screen.) Enable this control to display a preview graph of the the animation curves rendered into in the composite window*.*


