Overview
Star Matte uses a ray burst effect to create or modify the source’s alpha channel.
Parameter Controls
Presets and Common Controls
BCC filters come with a library of factory installed presets plus the ability to create your own custom presets and preview them with the BCC FX Browser™.
BCC filters also include common controls that configure global effect preferences and other host-specific effect settings.
For more information about working with presets and other common controls, Click Here.
The Center crosshairs set the center point of the rays on the X and Y axis, respectively.
Intensity scales the alpha channel produced by this filter. This scales the intensity of the rays.
Ray Focus determines how much the rays are focused or narrowed. Higher values produce narrower rays.
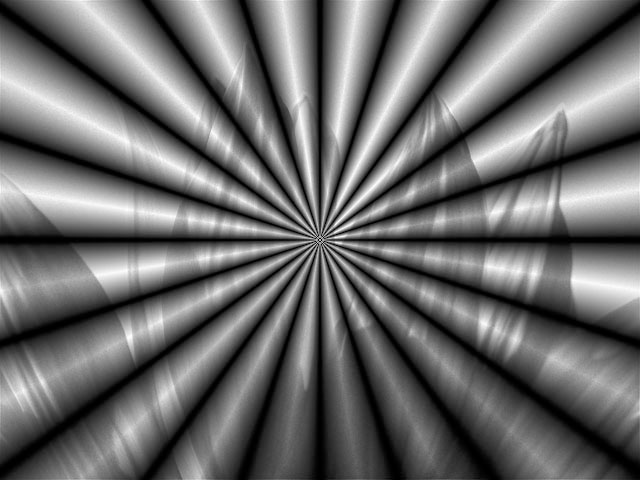 | 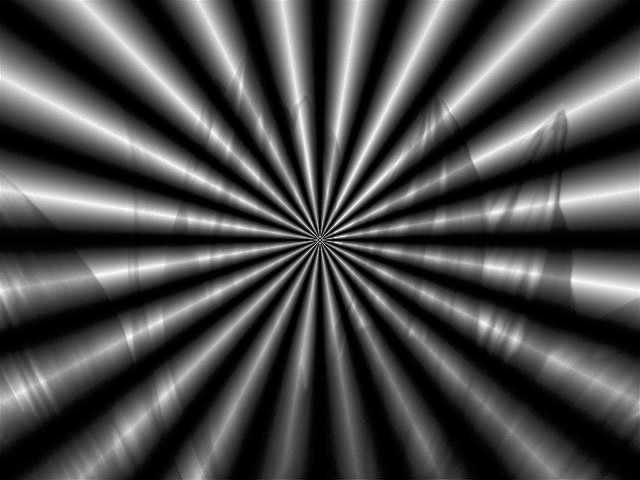 |
| Ray Focus=50 | Ray Focus=75 |
If the Uniform Angular Focus checkbox is selected, the rays focus uniformly from the center to the edges of the ray burst. If this option is not selected, you can create regions at the center of the ray burst and at the edges in which the rays are less focused.
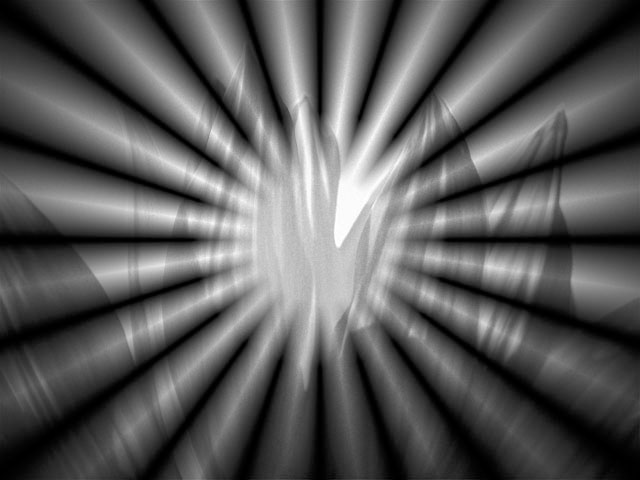 | 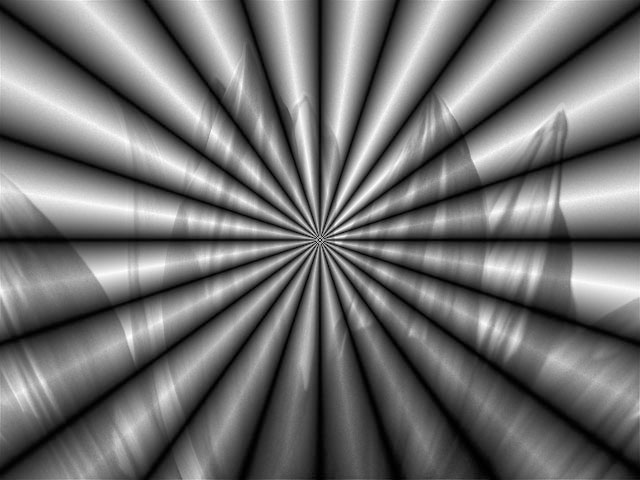 |
| Uniform Angular Focus=off | Uniform Angular Focus=on |
Focus Inside Falloff softens the transition between the unfocused area at the center of the ray burst and the focused rays. Higher values produce a more gradual transition. This parameter has no affect if Uniform Angular Focus is selected.
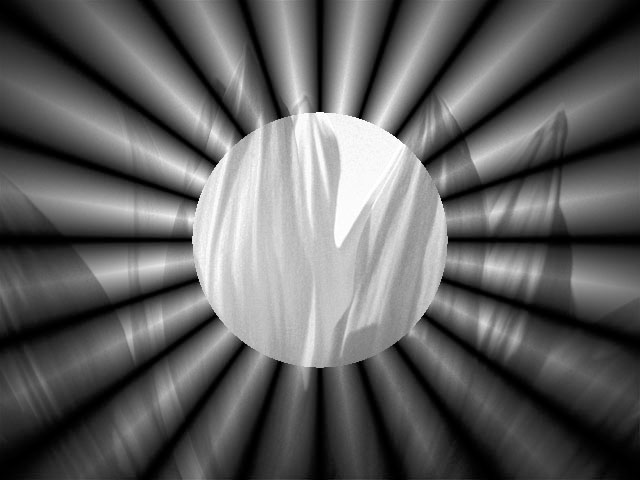 | 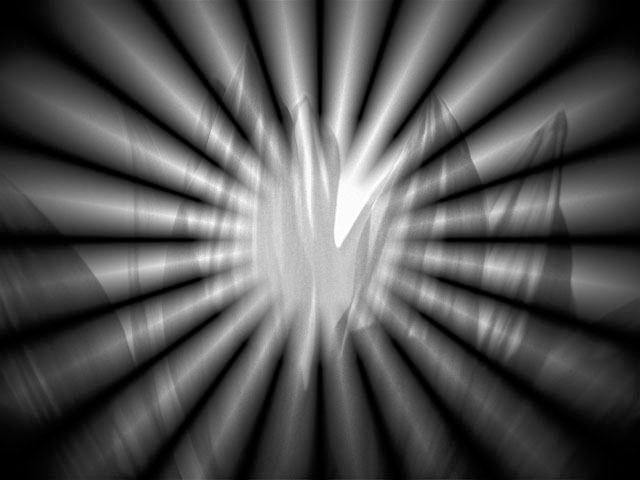 |
| Focus Inside Falloff=0 | Focus Inside Falloff=10 |
When Uniform Angular Focus is not selected, Focus Radius sets the radius of the circle in the center of the ray burst in which the rays are less focused. Higher values produce a larger unfocused region.
 | 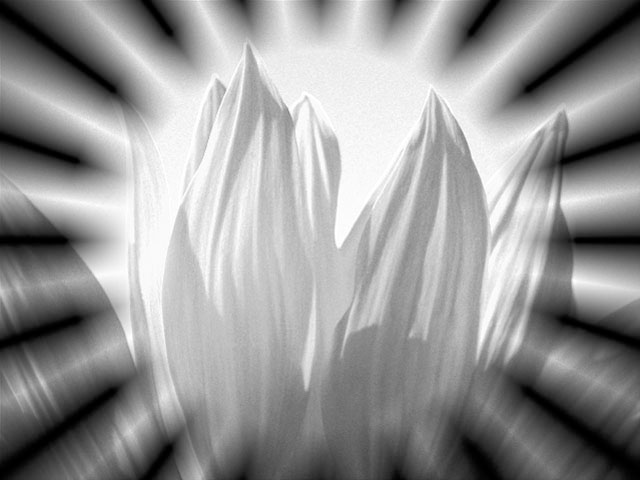 |
| Radius=20 | Radius=60 |
As the rays extend outward beyond the Radius, they begin to fall off as their transparency increases. Focus Outside Falloff adjusts the length of the rays beyond the Radius before they become transparent. Higher values produce longer rays. This parameter has no affect if Uniform Angular Focus is selected.
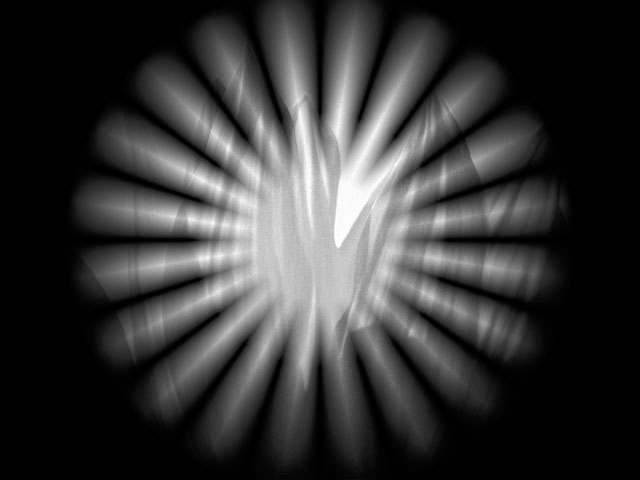 |  |
| Outside Falloff=20 | Outside Falloff=40 |
Aspect adjusts the shape of the ray burst. Positive values stretch the rays horizontally, and negative values stretch them vertically.
Rays Parameter Group
Count determines the number of rays in the effect.
Thickness sets the width of the rays. Higher values produce wider rays.
When the Scale Thickness to Count checkbox is selected, the ray Thickness value is scaled by the ray Count setting. This causes the rays to become thinner as Count increases.
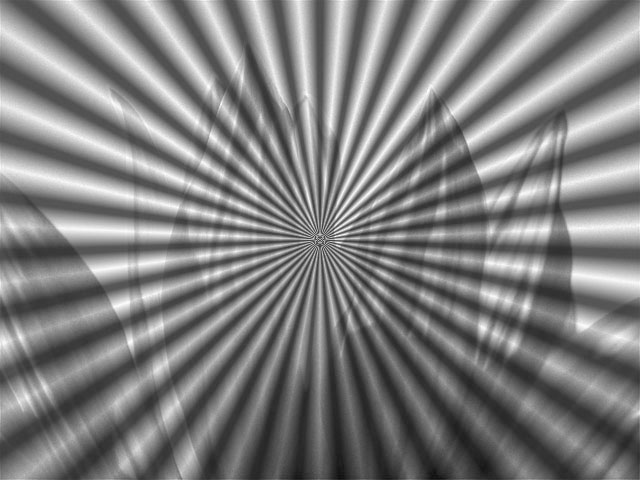 | 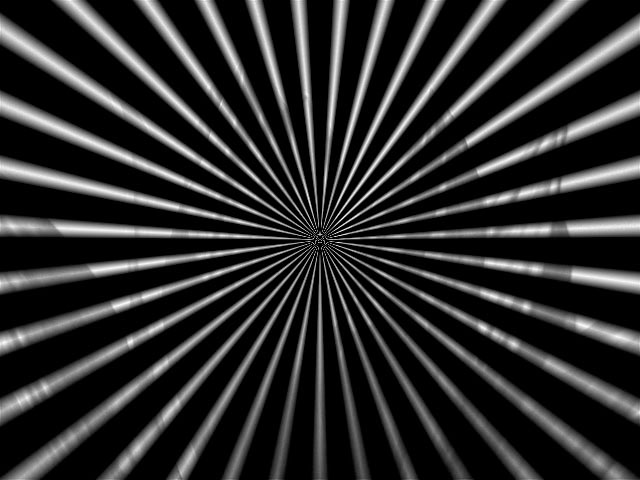 |
| Scale Thickness to Count=off | Scale Thickness to Count=on |
Rotation spins the rays around the point from which they emanate.
Angular Width determines the width of the angle in which the rays appear. At the default setting of 360, the rays emanate in a full circle. A setting of 90 produces rays in a semicircle, and so on.
Increasing Bunching distributes the rays within the Angular Width area less evenly, placing more rays closer to the specified Rotation angle.
When the Angular Splits On checkbox is selected, the controls in the Angular Splits parameter group split each ray into multiple rays, using a random number generator to control the pattern. When this checkbox is deselected, the Angular Splits parameters have no affect.
Angular Splits Parameter Group
The Angular Splits parameters can be used to split each ray into multiple rays.
Angular Splits adjusts the number of splits created from each ray.
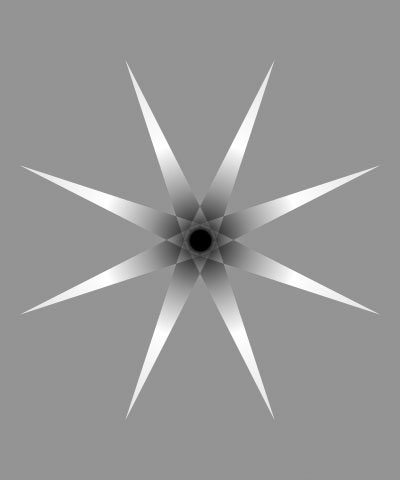 | 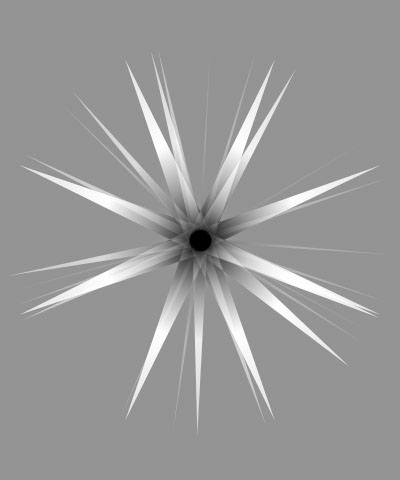 | 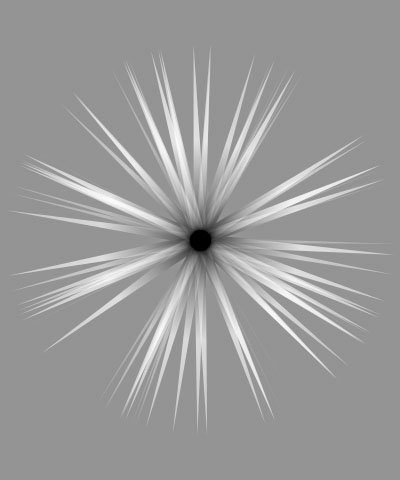 |
| Angular Splits=0 | Angular Splits=3 | Angular Splits=9 |
Split Width sets the angular distance between the split rays and the original rays.
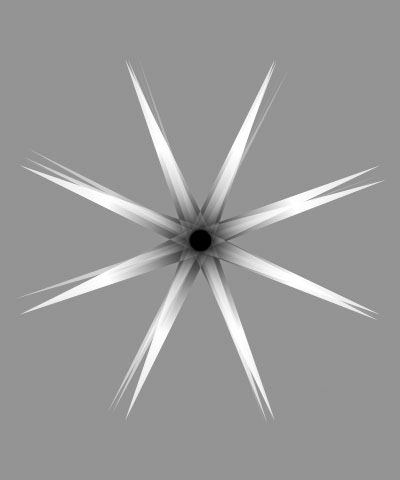 | 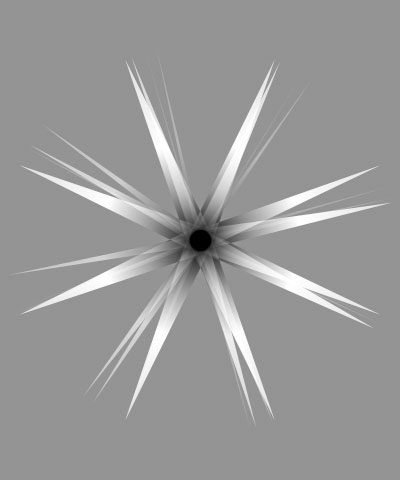 | 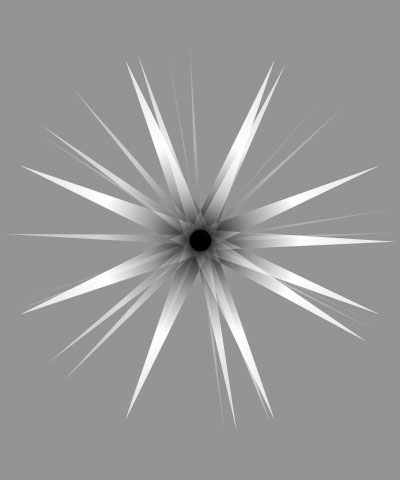 |
| Split Width=2 | Split Width=5 | Split Width=10 |
Split Fade Time controls how fast new rays reach their maximum intensity as the Angular Splits value is increased. Lower Split Fade Time values cause new rays to reach their maximum intensities more quickly.
The Split Narrows Rays menu determines how the Angular Splits value affects the thickness of the rays.
- Off leaves the thickness of the rays and angular splits unchanged regardless of the Angular Splits value.
- Low causes the rays and angular splits to become narrower as the Angular Splits value increases.
- High works similarly to Low, but the Angular Splits value has an even more pronounced affect on the widths of the rays and splits.
The Split Variance Type menu controls the type of number series used to position the angular splits.
- Noise uses a random number sequence. When Ray Variance Type is set to Noise, the Split Seed/Multiplier/Frequency value is used as the input value by the random number generator.
- Fractal uses a sequence derived from fractal math. When Fractal is chosen, low Split Seed/Multiplier/Frequency and Split Start/Phase values produce a regular series, and high values produce a more chaotic series.
- Constant offsets all of the angular splits’ positions uniformly by the chosen Variance Amount.
- The remaining Sine, Triangle and Spectrum choices correspond to waveforms. When a waveform option is chosen, Split Seed/Multiplier/Frequency sets the frequency of the wave, and Split Start/Phase sets the starting phase.
Select the Variance 1 and Variance 2 On checkboxes to turn on the variances below. Deselect these option to turn off the variances. If these checkboxes are not selected, the parameters in the Variance 1 and Variance 2 parameter groups have no affect.
Variance 1 and Variance 2 Parameter Groups
The two Variance parameter groups can vary almost any attribute of the ray effect. Each Variance group varies up to three attributes of the rays using a sequence of random or ordered numbers. Each Variance group uses the same controls, which are described below.
The Variance Type menu controls the type of number series used to vary the selected attributes of the effect.
- Noise uses a random number sequence. When Ray Variance Type is set to Noise, the Seed/Multiplier/Frequency value is used as the input value by the random number generator.
- Fractal uses a sequence derived from fractal math. When Fractal is chosen, low Seed/Multiplier/Frequency and Start/Phase values produce a regular series, and high values produce a more chaotic series.
- Constant varies the attributes uniformly by the specified Variance Amount.
- The remaining choices correspond to waveforms. When one of the waveform options is chosen, Seed/Multiplier/Frequency sets the frequency of the wave, and Start/Phase sets the starting phase.
Variance Destination 1, Variance Destination 2, and Variance Destination 3 allow you to choose up to three different parameters to affect by the variance.
Off turns off the Variance Destination, so it affects no parameter.
- Thickness varies the thickness of the rays. The Thickness parameter is set in the Rays parameter group.
- Angle varies the angular position of the rays, leaving them unevenly spaced.
- Focus Intensity varies the opacity of the Focus Matte making some rays fade away and others become more opaque for most of their thickness.
- Focus is a matte that sits over the ray and focuses it, causing some rays to appear narrow and more focused and others to appear wider and less focused.
Each Variance Destination has an Amount and a Skip control which appear when the destination is set to any choice other than Off. Variance Amount determines the amount of variation applied to the chosen destination. Variance Skip sets the number of elements in the sequence that are skipped before the numbers are used.
- Note: If Variance Type is set to Noise, you can use Skip to produce a completely different set of random numbers for each Variance Destination. If Variance Type is set to Fractal or one of the wave options, Skip allows you to manipulate the relationship of the patterns produced by each of the Variance Destinations.
Select the Radial Matte On checkbox to turn on the radial matte (see the next section). If this option is not selected, the Radial Matte parameters have no affect.
Radial Matte Parameter Group
The Radial Matte controls allow you to selectively filter the image using a radial matte.
You can achieve a transition from transparent to opaque by animating Offset Radius from a negative value to a positive value. The values needed for a full transition depend on the other filter settings. Control this parameter to create a transition regardless of the other settings in the filter.
Inside Radius and Outside Radius set the radius of the inner and outer edges of the filtered region, respectively.
Inside Blend and Outside Blend soften the inner and outer edge of the filtered region, respectively. Higher values produce a softer edge.
The Apply Mode menu determines how the alpha information created by the filter is composited with the source alpha to produce an output alpha channel. You can also use this menu to preview the matte.
- Replace Alpha replaces the source alpha with the matte created by the filter.
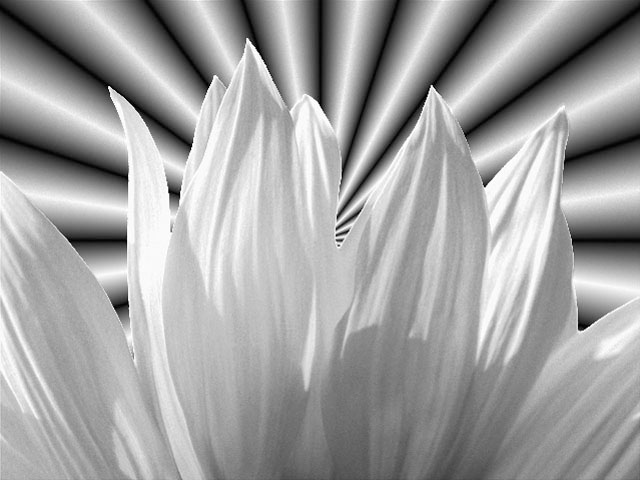
- Screen Alpha screens the alpha channel created by the filter with the source alpha channel. All areas that are opaque in at least one of alpha channels are opaque in the output.
 |
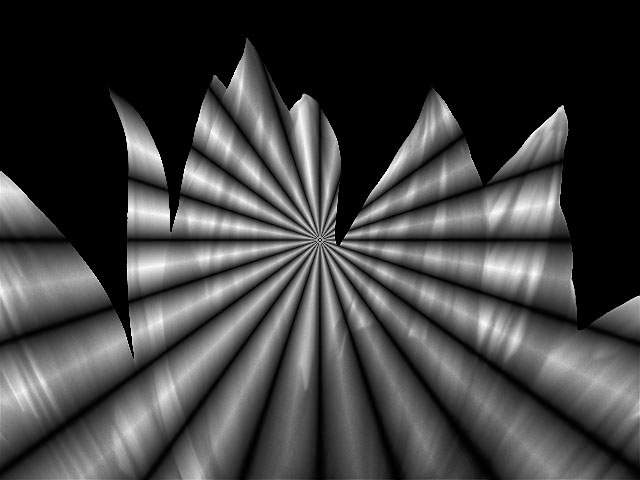
- Multiply Alpha multiplies the alpha channel created by the filter with the source alpha channel. Only areas that are opaque in both alpha channels are opaque in the output.
 |
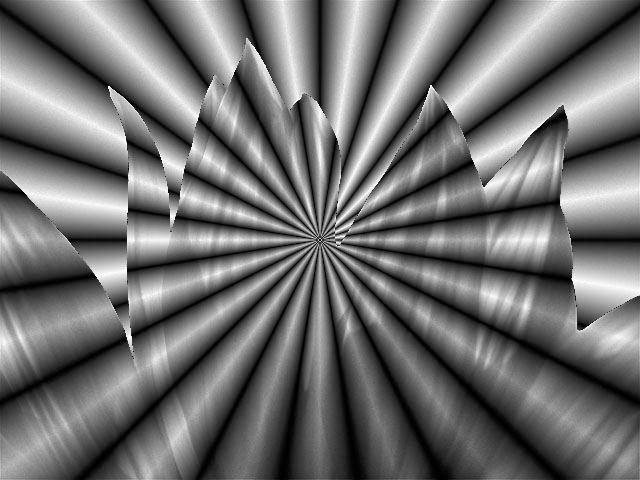
- Difference Alpha subtracts the alpha channel created by the filter from the source alpha.
 |
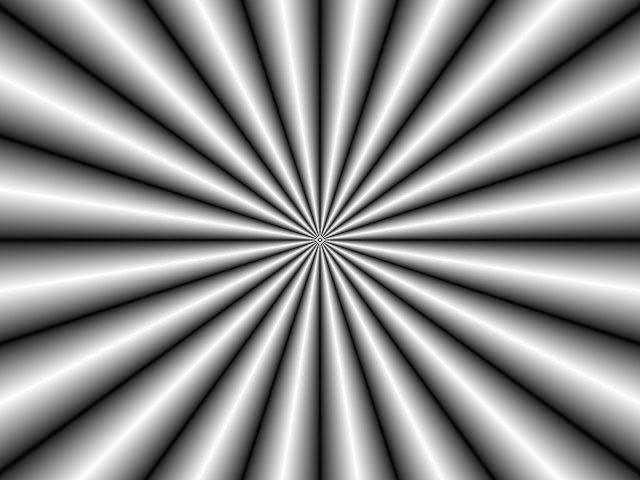
- View Matte displays a grayscale preview of the alpha channel created by the filter. Opaque regions are white, and transparent regions are black.
 |
- View Inverse Matte displays a grayscale preview of an inverted version of the matte created by the filter.
- View Source displays the unfiltered source image.
- Mask Source shows the source of the Matte with a ruby (50% red) mask applied to pixels that will be made transparent.
Gamma controls the value of the middle tones while leaving the white and black of the image unaltered. The Gamma parameter controls a gamma adjustment that is made to the derived alpha. Increasing gamma spreads the alpha so that the matte is more opaque.
Alpha Offset controls an offset that is added to the output alpha. You can create a transition by animating this from –255 to 255. At a value of -255, the entire image keys out. At a value of 255, the entire image is opaque.
Choke applies a choke to the image. Positive Choke values tighten the matte around the selected regions, while negative values pull the matte away from the edges of the selected regions.
Motion Tracker
The BCC Motion Tracker allows you to track the motion of an object, then use the motion path to drive other geometric properties of the effect without the need for keyframing.
For more information on the Motion Tracker, Click Here.


