Replaced by BCC+ Two Way Key
We recommend use of BCC+ Two Way Key instead of BCC Two Way Key. The newer BCC+ filter features a 32 bit float pipeline and full hardware rendering on all supported platforms. As with all BCC+ filters, BCC+ Two Way Key is GPU accellerated for fast, speedy results, and includes access to the FX Editor.
Overview
Two Way Key is useful for keying out a range of colors while retaining one color in the range. Two Way Key works by using a Key Color to determine which color is keyed out, then using a Keep Color to restore opacity to selected colors in the range. You can also adjust the range of colors to key out and key in using the Similarity controls.
Function
This image shows the original source image, which contains a range of blue pixels that need to key out.
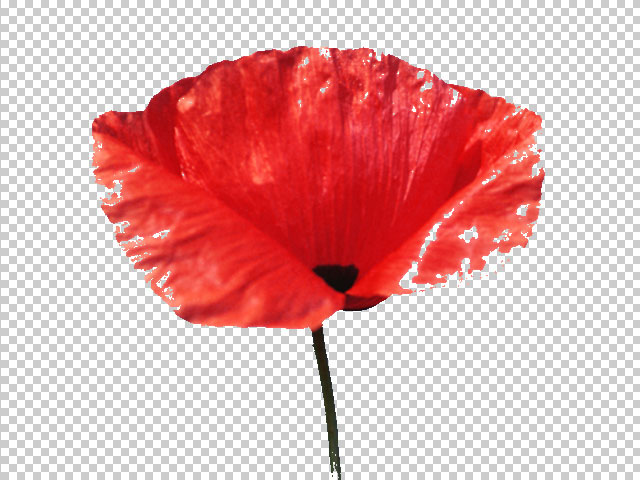
In this example, Two Way Key is applied and the Key Color is set to a medium blue. When Key Similarity is increased to key out the full range of blue pixels, some of the foreground pixels also key out, creating holes.
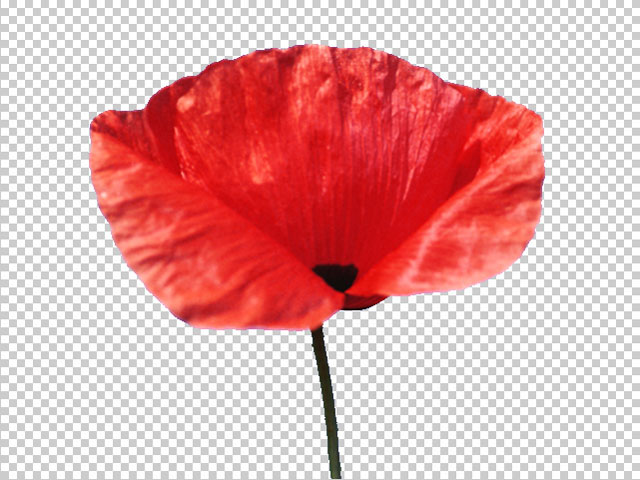
In this example, Keep Color is set to a light pink to match the light areas of the foreground image. When Keep Similarity is increased, opacity is restored to these regions.
Presets and Common Controls
BCC filters come with a library of factory installed presets plus the ability to create your own custom presets and preview them with the BCC FX Browser™.
BCC filters also include common controls that configure global effect preferences and other host-specific effect settings.
For more information about working with presets and other common controls, Click Here.
Compare Mode
The BCC Compare Mode provides a convenient mechanism to compare the effect result with the original source layer. It provides several variations on basic split-screen views with the filtered clip placed next to the unedited original.
For more information on the Compare Mode,Click Here.
Compare Mode popup: Controls what is displayed by the Compare Mode. The options are:
- Off shows the output of the filter.
- Side By Side the left side of the output shows half of the incoming image, and the right side shows the same half of the image as processed by the filter. When in Side-by-Side mode, the corresponding Slide and Right Offset sliders become available.Wipe*enables the user to interactively wipe the effect across the image. The left side of the wipe bar on the image output shows the unfiltered image, while the right side of the wipe bar shows the filtered result. When in Wipe mode, the corresponding Wipe slider becomes available.
- Wipe/Slide operates as a Wipe function when Wipe is selected in Compare Mode, and as a Slide function when Side-‐By-‐Side is selected in Compare Mode. When in Wipe mode, adjustments to this parameter moves the vertical wipe bar across the image; the region on the left of the wipe bar shows the original unfiltered image, while the region on the right shows the filtered result. When in Slide mode, adjustments to this parameter pans the image in the viewer window, maintaining the spatial relationship in the viewer between the before and after images.
- Right Offset provides a way to adjust the spatial relationship between the unfiltered original image and the filtered result in the viewer window. Adjustments to this parameter will offset the position of the filtered image in the viewer.
The Output menu determines how the output of the filter is rendered.
- Composite uses the new alpha channel, making portions of the image partially or completely transparent when composited over the new background.
- Composite – Inv Alpha inverts the new alpha channel.
- Show Matte displays the matte instead of the composite, allowing you to view the matte as you make adjustments.
- Show Invert Matte displays the inverted matte.
- Gel allows you to create artistic gel effects using an alpha channel generated from the image. A Gel effect applies a transparent solid color, similar to a theatrical gel, to the source image. The alpha channel created by the filter is used to composite the chosen Gel Color over the background.
- Gel – Inv Alpha inverts the new alpha channel and uses it to composite the chosen Gel Color over the background.
- Mask Transparent Pixels allows you to view the source image with a 50% red mask over the pixels that will be transparent.
Key Color and Similarity determine which portion of color space (the Key Color Region) is affected by the key. Key Color sets the color that is keyed out. Similarity controls a range of values similar to the Key Color that are keyed out. If Similarity is 0, the filter only keys out pixels that exactly match the key color. Increasing Similarity keys a wider range of colors.
- Note: If the default key Color pulls a matte which removes a lot of the source image, it can be difficult to use the eyedropper to select a different key Color. Temporarily hide the filter and pull the correct matte color from the unfiltered image.
Keep Color and Keep Similarity determine which portion of color space is not affected by the filter. Keep Color sets the color that is retained in the image. Pixels whose channel values match the Keep Color remain opaque even if the they are within the Key Color region. Keep Similarity controls the range of values similar to the Keep Color that remain opaque. If Keep Similarity is 0, the filter only keeps in pixels that exactly match the Keep Color. Increasing Keep Similarity keeps in a wider range of colors.
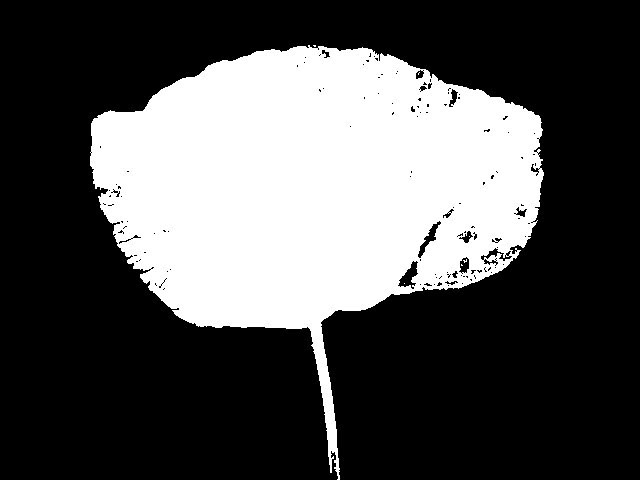
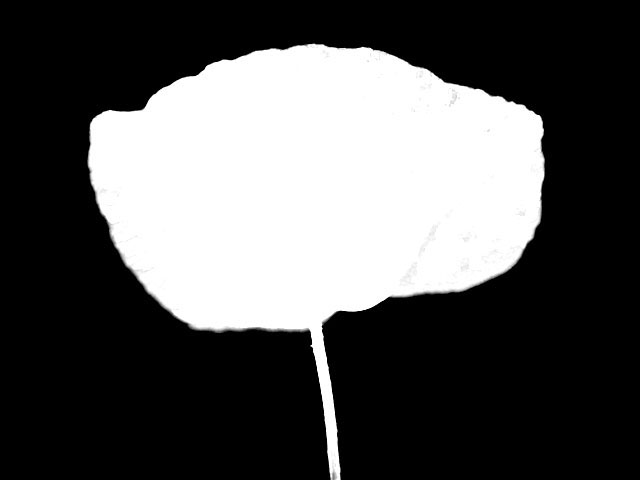
Softness softens the matte by increasing transparency in pixels that are close to the borders of the key color region. You can use Softness to soften the matte edges so the colors of the image change gradually from point to point, or to create artistic blended mattes in which the image gradually becomes transparent as you move into the Key Region.
 |
 |
| Softness=0 | Softness=40 |
Post Blur blurs the alpha channel after the matte is created. Use Post Blur to soften the edges in the matte for sources with high-contrast edges. Softness does not increase rendering time, but Post Blur increases it substantially.
 |
 |
| Post Blur=0 | Post Blur=40 |
Gamma controls the value of the middle tones while leaving the white and black of the image unaltered. The Gamma parameter controls a gamma adjustment that is made to the derived alpha. Increasing Gamma spreads the alpha so that the matte is more opaque.
Alpha Offset controls an offset that is added to the output alpha. You can create a transition by animating from –255 to 255. At a value of -255, the entire image keys out. At a value of 255, the entire image is opaque.
Choke applies a choke to the image. Positive Choke values tighten the matte around the selected regions, while negative values pull the matte away from the edges.
Region Parameter Group
The linear keys allow you to define a Region of Interest. The key creates a matte only for pixels that lie within this region.
The Region of Interest menu determines the shape of the region where the filter is applied. You can apply the filter to an area Inside Rectangle, Outside Rectangular, Inside Oval, Outside Oval, or choose All to filter all pixels in the image, regardless of their location.
Region Top-Left and Region Bot-Right control the size and location of the region of interest. If Region of Interest is set to Inside or Outside Rectangle, Region Top-Left and Region Bot- Right define the upper left and bottom right corners of the rectangle. If Region of Interest is set to Inside or Outside Oval, the Region Top-Left and Region Bot-Right points define a rectangle in which the oval is inscribed.
Outside Region controls the processing of points outside the region. Make Transparent clears the alpha channel for these points. Use Make Transparent if you have chosen a region that includes all of the desired foreground (opaque) pixels. The Use Existing Alpha setting leaves these points unprocessed, and uses only the alpha information in the original image.
Gel Color allows you to set the color of the gel which is used to create artistic gel effects using an alpha channel generated from the image. A Gel effect applies a transparent solid color, similar to a theatrical gel, to the source image. The alpha channel created by the filter is used to composite the chosen Gel Color over the background. Gel Color has no affect unless the Output menu is set to Gel or Gel-Inv Alpha.


