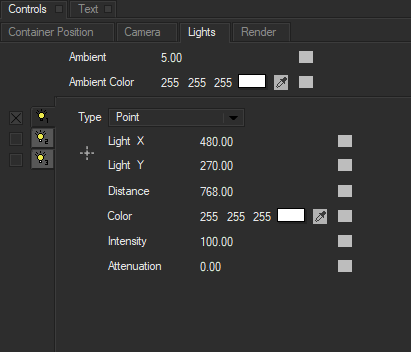
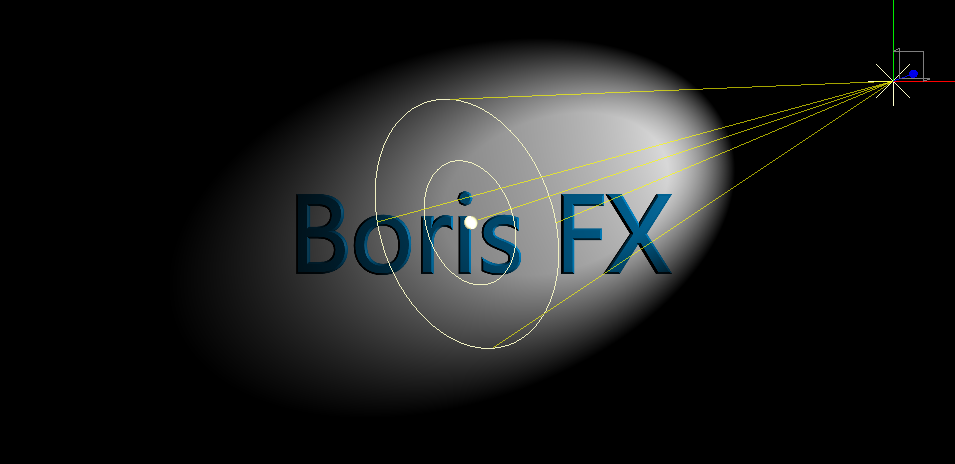
The Lights Tab provides parameters that affect ambient lighting and 3D Shadow casting in your scene. Users are able to apply up to three separate lights to the effect. These lights are modeled as non-directional point sources that can be positioned in 3D space. The tab becomes available only when the scene container has been selected in the timeline. Once selected you can adjust and animate the lights’ color and intensity, and control the amount of ambient light and shadow on the entire scene.
The Ambient Intensity parameter allow you to adjust the color mix between the global Ambient Light color set in the Lights Tab and the individual tracks’ Ambient Light color set in the default Material Shader track. Decreasing the value reduces the amount of Ambient Light color from the Lights tab applied to the effect; increasing the value adds more of the Ambient Light color from the Lights tab to the effect.
The Ambient Color parameter allows you to set the color of the overall ambient light. Click the color chip to access the system color picker, use the eyedropper to pick a color from the screen or enter RGB values into numerical fields. NOTE: the ambient color parameter sets the global color of the light in the scene. It does not change the color of the individual track materials.
Adding and Adjusting Lights
By clicking on one of the three numbered light tabs you can adjust the controls for that light. To turn on the light, select the checkbox next to the tab. Leave the checkbox deselected to turn off the light source. Viewing each light individually can be useful if you want to work with one light at a time.
Each light contains the following controls:
The Type menu determines the type of light source.
- Point combines both focused (specular) and diffuse light. You can use this light type to create the appearance of a shiny surface lit by a point light source.
- Spot simulates the look of a traditional theatrical spotlight. Spot creates a small spot of intense light whose falloff can vary.
- Shadow creates a spotlight that casts a shadow. In order to see a shadow you need at least two objects—one to cast the shadow and one to receive it.
NOTE: Shadow lights are only available in 3D Composite mode.
Common Parameters
The following parameters are common to all light types. The Spot and Shadow light types include additional parameters which are described in the following sections.
Light X and Light Y position the light source in space by moving the light parallel to the image plane along the X and Y axes. Adjusting the Light X and Light Y values can change the shape of the light. For example, as the light source moves off to the right, the light becomes more oval and less round in shape. Changing the Light X and Light Y is analogous to pivoting a theatrical spotlight to follow a performer on stage.
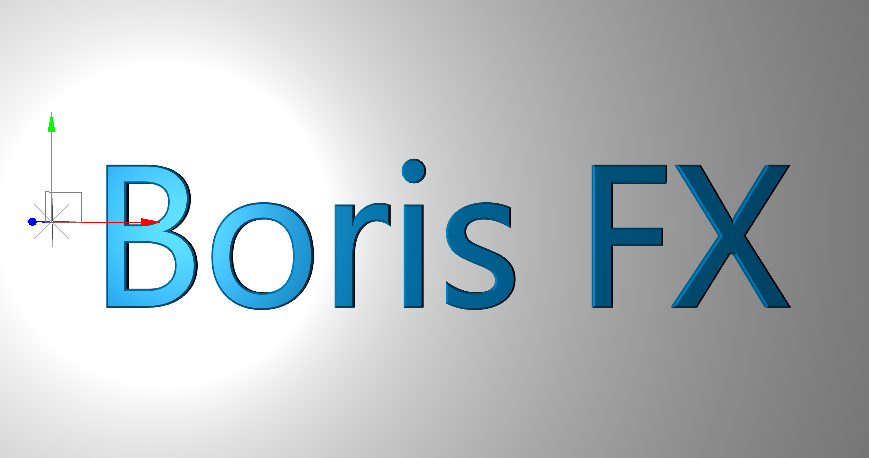 Light Source is located on the left by adjusting the Light X parameter
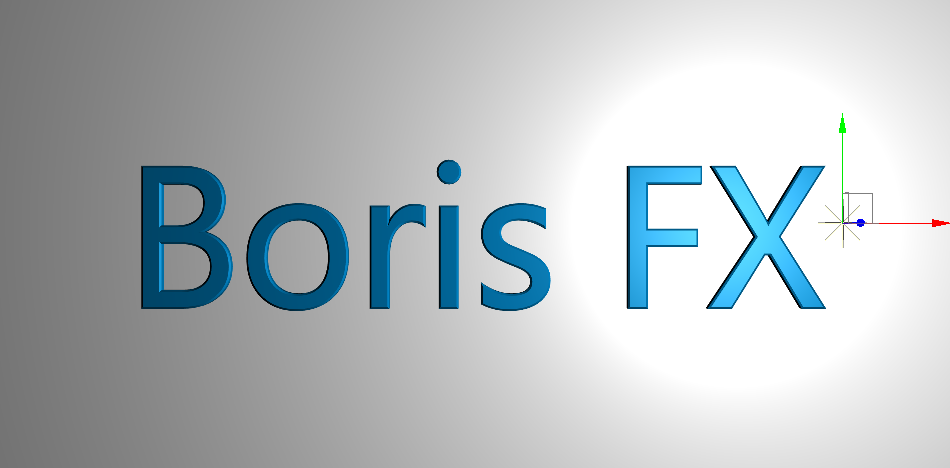 Light Source has been moved to the right side by adjusting the Light X Parameter.
Distance positions the light source relative to the image plane. Increasing positive Distance values bring the light source closer to the viewer. Negative Distance values place the light behind the object and move the light away from the viewer. If Distance is negative, the light can be seen only if the object is rotated or displaced so that all or part of it is behind the light source (that is, the light source always points in toward the object, never out at the viewer).
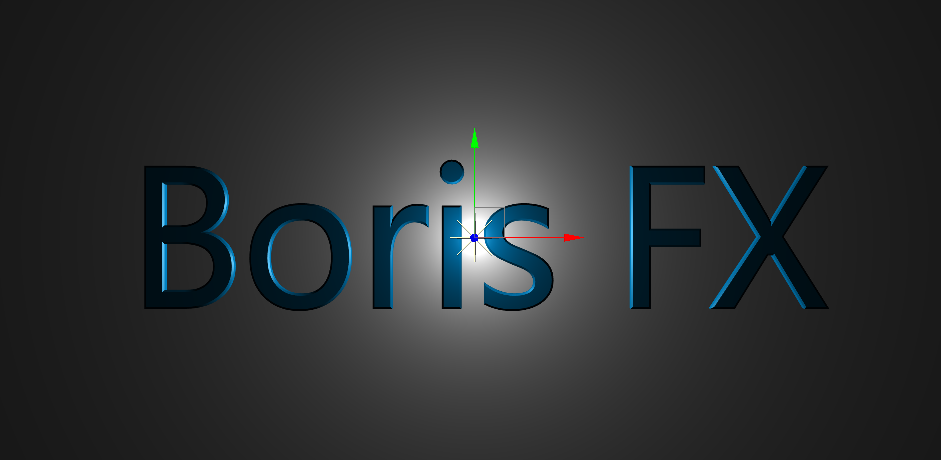 Adjusting the distance of the light can move the source above or behind the objects in your scene
PROTIP: The Light X, Light Y and Distance Parameters can also be adjusted by using the on screen interactor.
Color sets the color of the light itself. Click the color chip, use the eyedropper or enter RGB values into the numerical fields and press Enter.
Intensity controls the brightness of the light.
Attenuation lessens the intensity of the light rays as they extend from the source. This allows you to create a less directional distant diffuse light, similar to sunlight.
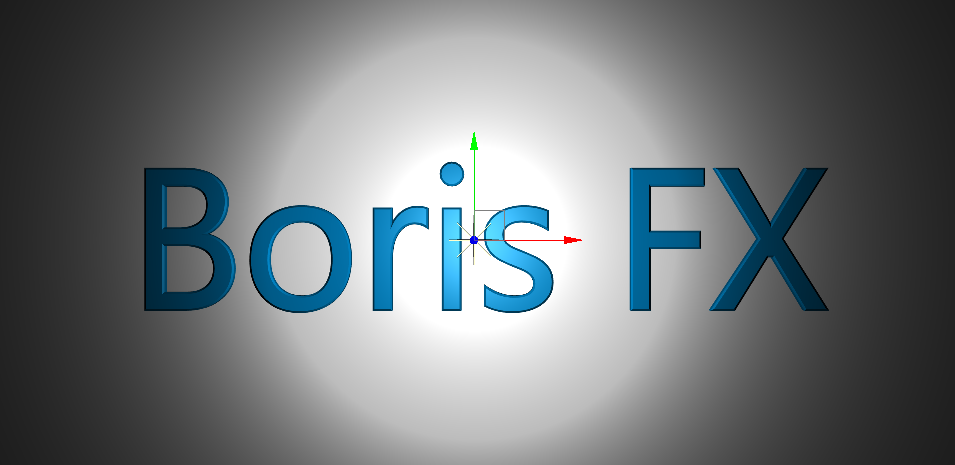 The Higher the Attenuation, the more defined the edge of the light will be
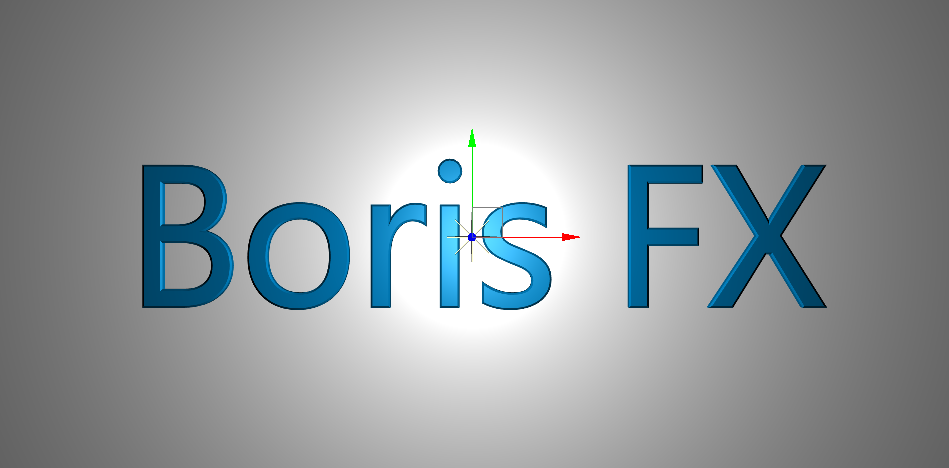 Lower Attenuation will create a more diffuse natural light
Spot Light Parameters
Spot X, Spot Y and Spot Z set the X, Y and Z coordinates for the point at which the spotlight is aimed. Unlike Light X and Light Y, adjusting the Spot parameters does not change the shape of the light.
Angle sets the angle of the light. This is analogous to focusing the light. Decreasing values create a smaller, more focused light.
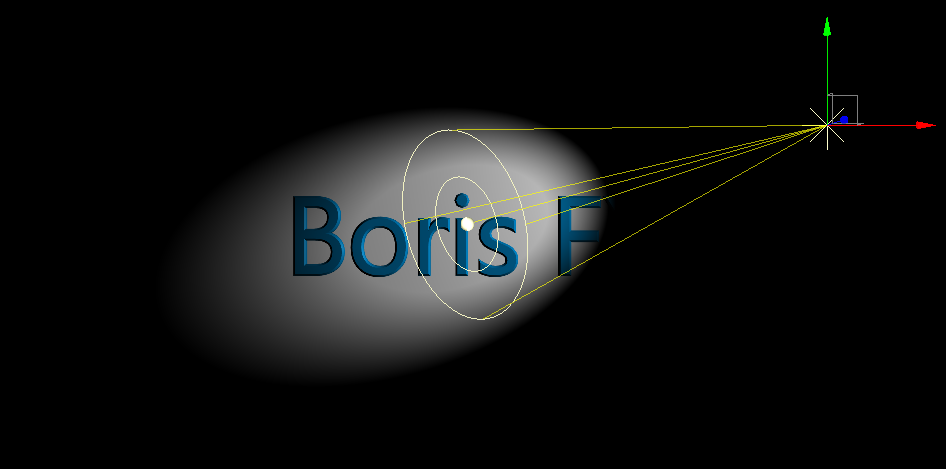 Lower values for the Angle Parameter will create a more narrowly focused spotlight.
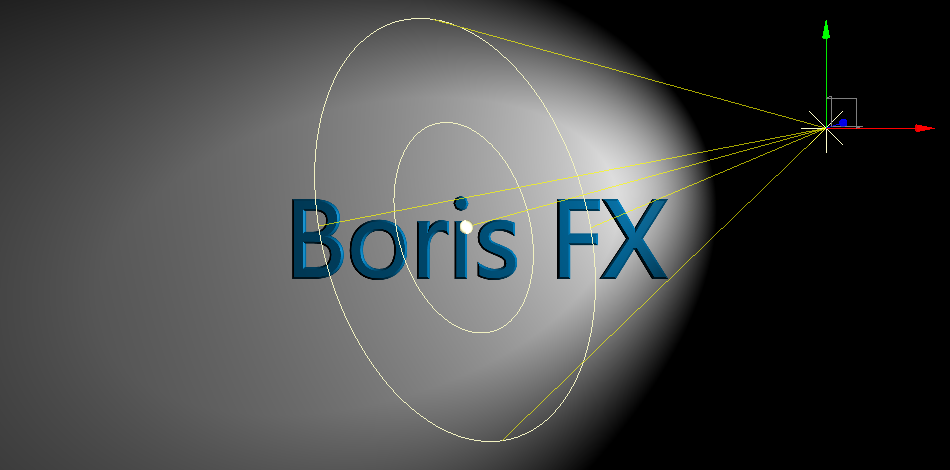 Higher values will create a wider angled spot light.
Edge Falloff controls the relative softness of the edges of the lit region. Leave Edge Falloff at its default setting of 50 if you prefer a soft edge on the spotlight effect, or increase this value to harden the edges of the lit region. Edge Falloff removes light from the edges of the lit region. To maintain the size of the region while softening its edges, you need to increase Angle accordingly.
Shadow Light Parameters
In order to see a shadow, you must first enable 3D Composite Mode in your project, and then set the lighting type to Shadow. It should be noted that flat objects such as splines and text do not cast shadows. They can receive shadows, but the object casting the shadow must be a 3D object.
Shadow Lights function identically to Spot Lights, with a few additional parameters:
Shadow Softness softens the edges of the shadows, emulating the appearance of shadows cast by a diffuse light source. A value of 0 creates shadows with hard edges. Increasing this value softens the shadow edges.
Map Resolution adjusts the resolution of the shadow itself. Higher values increase detail, while lower values will decrease the detail. Adjusting this can help to resolve banding issues.
Shadow Opacity sets the degree of opacity. A value of 100 makes the shadow completely opaque. Decreasing this value makes the shadow increasingly transparent. A value of 0 creates a completely transparent shadow.
Tips for Using Lighting Controls
All light sources can be positioned in 3D space to accent the front or back faces, bevels or extrusions of objects. Additionally multiple lights can help to create more complex, multi-colored lighting effects.
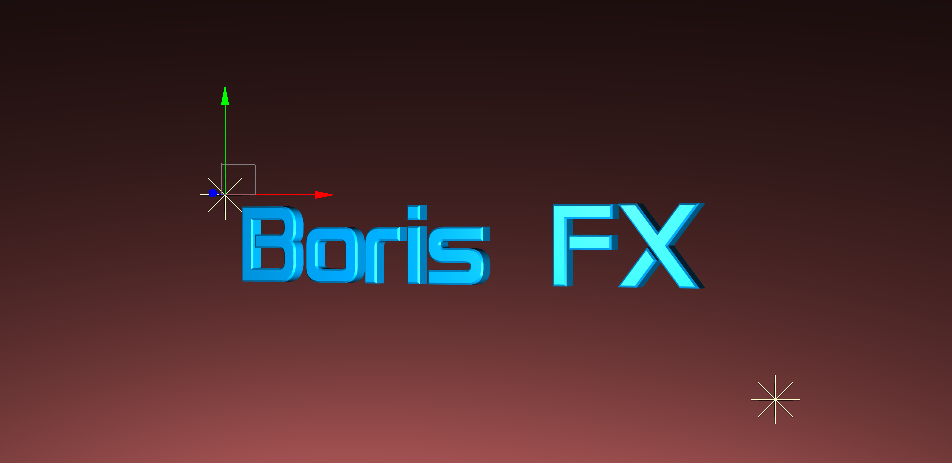 To highlight the face of the object, use a positive Distance value to place the light in front of the object.
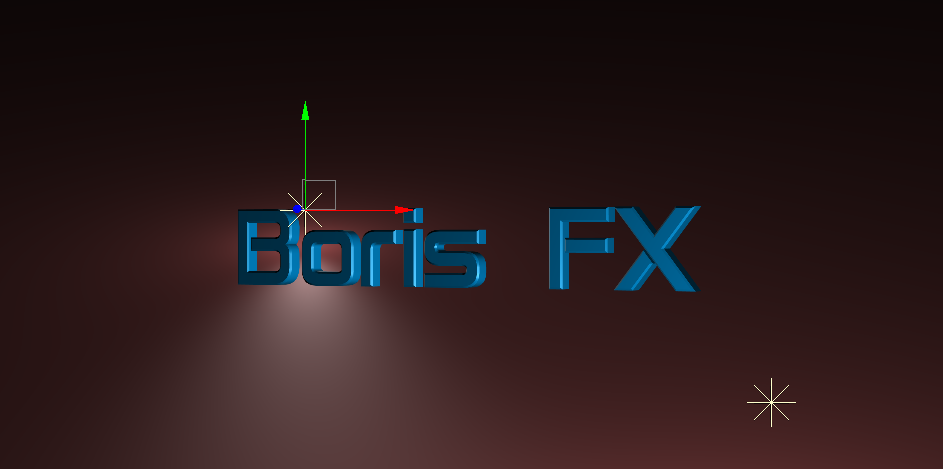 To backlight an object, use a negative Distance value to place the light in behind the object.
Return to the Main Title Studio Page.


